Have you ever been on a leisurely bike ride, only to hear a sudden hissing sound? Your heart sinks as you realize that you have a flat tire. While it can be frustrating to deal with a flat tire, repairing a tubeless tire can be a simple and easy process. In fact, it can be done in just a few steps, resulting in a tire that’s as good as new.
In this blog post, we’ll take you through the process of how to repair a tubeless tire, so you can get back to enjoying your ride. Whether you’re a seasoned cyclist or just starting out, mastering the art of tubeless tire repair is an essential skill to have. With our step-by-step guide, you’ll be able to fix a flat tire on your own in no time!
Table of Contents
Tools You’ll Need
If you’re looking to repair a tubeless tire, you’ll need some essential tools to get the job done right. First, you’ll need a puncture repair kit, which typically includes plugs and installation tools for sealing punctures in the tire. Next, you’ll need a tire lever, a small but sturdy tool that helps you remove the tire from the rim.
A pressure gauge is also necessary, as it allows you to test the tire’s pressure and ensure that it’s properly inflated. Finally, a pump will be necessary to fill the tire with air once you’ve finished repairing it. With these tools in hand, you’ll be well-equipped to tackle the job of repairing a tubeless tire quickly and efficiently.
Tire Plug Kits
When it comes to tire plug kits, having the right tools can make all the difference. The most essential tool you’ll need is a tire plugger or insertion tool which is used to insert the plug into the punctured tire. A T-handle reamer is another essential tool that’s used to clean and prepare the puncture hole for the plug.
Additionally, you’ll need a pair of pliers to help pull out the offending object that caused the puncture in the first place. A razor blade or scissors are also necessary to trim the excess plug material sticking out of the puncture hole once the plug has been inserted. Finally, it’s highly recommended to have a tire pressure gauge to ensure that the tire’s pressure is at the correct level before and after the plug has been inserted.
With all these tools at your disposal, and a high-quality tire plug kit, you’ll be able to confidently patch up any punctures that come your way on the road.

Tire Sealant
When it comes to tire sealant, you’ll need a few tools to ensure a successful repair. First and foremost, you’ll need the sealant itself, which typically comes in a canister or bottle. You’ll also want to have a tire gauge on hand to check the tire’s pressure before and after the repair.
A valve stem tool can also come in handy for removing and replacing the tire’s valve stem, as well as a reamer tool for prepping the puncture hole. Finally, a plug inserter tool can help you insert the sealant plug into the tire’s puncture hole. With these few tools, you’ll be equipped to confidently use tire sealant and fix any minor punctures your tires may encounter.
Remember to always read the manufacturer’s instructions before using any type of tire repair product and when performing any repair, safety must be your utmost priority.
Tire Pressure Gauge
If you’re going to check your tire pressure, you’ll need a tire pressure gauge. It’s a small but incredibly useful tool that can save you from a lot of problems on the road. Thankfully, tire pressure gauges are relatively cheap and easy to use.
You can buy them at any car parts store or online and can range from basic analog gauges to digital ones with additional features. When choosing a tire pressure gauge, make sure to check its accuracy and the pressure range it can measure. A digital tire pressure gauge offers a higher level of accuracy and can display the PSI on an LCD screen.
On the other hand, analog gauges are cheaper and don’t require batteries, but they can be harder to read. Whichever option you choose, make sure to keep it in good condition to ensure proper readings. A tire pressure gauge is a critical tool for maintaining the health and safety of your vehicle and its passengers.
So don’t forget to add it to your glove compartment or car emergency kit.
Assess the Damage
Repairing a tubeless tire is a straightforward process, but before you get started, the first step is to assess the damage. Begin by removing the tire and checking for any visible punctures or cuts on the sidewall or tread. Next, inspect the valve stem and ensure it’s still seated properly.
If the tire has been pushed off the rim, try to reset it with a tire lever or your hands. Once you’ve identified the damage, you can determine whether it’s possible to repair the tire or if you need to replace it altogether. Small punctures or cuts on the tread can often be repaired with a tire plug, while larger gashes or damage to the sidewall may require replacing the tire entirely.
By assessing the damage first, you can decide on the best course of action and save both time and money in the long run.
Identify the Puncture/Leak
When it comes to fixing a tire, the first step is to identify the puncture or leak. This is crucial because it allows you to assess the damage and determine your course of action. Sometimes the puncture may be obvious, like a nail stuck in the tire.
Other times it may be harder to find, such as a small hole or crack. To identify the puncture, start by examining the tire visually. Look for anything that appears to be penetrating the tire or any cuts or abrasions on the surface.
You can also feel for leaks by running your hand over the surface of the tire and listening for any hissing sounds. If you can’t locate the puncture visually or by feel, you may need to use some soapy water to identify the leak. Apply the soapy water to the surface of the tire and look for bubbles where the air is escaping.
Once you locate the puncture, you can assess the damage and decide whether to repair or replace the tire. By taking the time to identify the puncture or leak, you can ensure that you make the right decision and get back on the road safely.
Remove the Wheel and Inspect
When it comes to assessing damage on a car wheel, one of the first steps is to remove the wheel and inspect it closely. This allows you to get a better view of any problems, such as cracks or bends, that may exist. It’s important to be vigilant because any damage could seriously affect the safety and performance of your vehicle.
When removing the wheel, start by loosening the lug nuts and lifting the car with a hydraulic jack. Carefully take off the wheel and examine it from all angles. Check the tire too, as sometimes damage on the tire can cause issues with the wheel.
Look for any signs of wear and tear, such as uneven tread or punctures. If you notice anything out of the ordinary, it may be time to take your car to a professional mechanic who can offer repair or replacement recommendations. Remember, proper maintenance of your wheels and tires is key to ensure a safe and smooth ride.
Plug the Hole
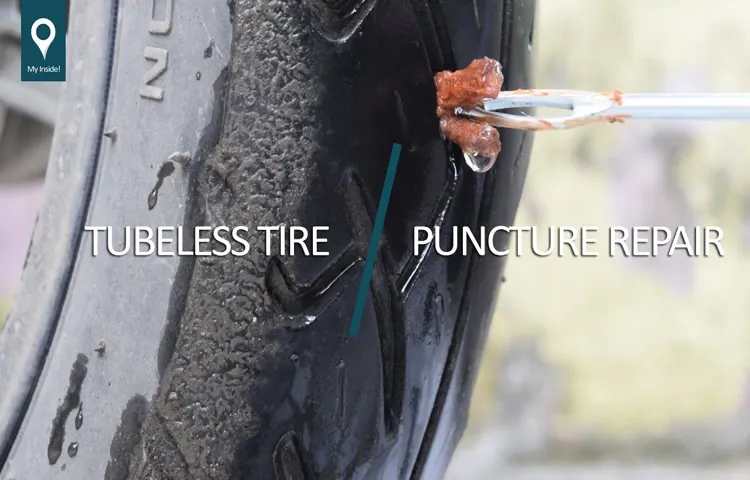
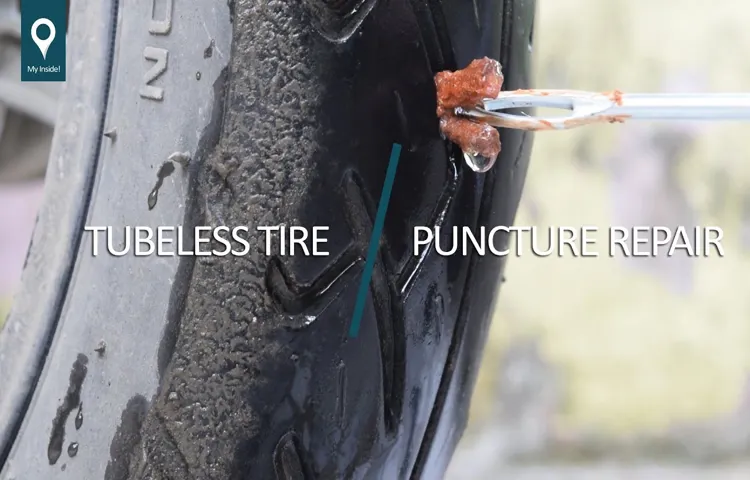
Got a flat tire on your mountain bike? Don’t worry, fixing a tubeless tire is not as daunting as it may seem. The first step is to locate the puncture or hole. This can be accomplished by listening for the hissing sound or by inspecting the tire for any debris or objects that might have caused the damage.
Once you have found the hole, it’s time to plug it. To do this, you’ll need a tire plug kit. These kits are available at most bike shops and online retailers.
The process involves threading a rubber plug through the puncture and then trimming off the excess. This will seal the hole and allow you to reinflate the tire. It’s important to note that a tire plug is a temporary fix and should be replaced with a new tire as soon as possible.
With a little practice, you’ll be able to repair a tubeless tire quickly and get back on the trail in no time!
Insert the Plug
When it comes to home repairs, plugging a hole can be a simple yet essential task. Whether it’s a leaky pipe or a crack in the wall, the first step is to insert the plug. But it’s important to choose the right plug for the job.
For instance, a pipe leak might require a rubber sleeve or tape, while a hole in drywall might need a spackling compound or a mesh patch. It’s also important to prepare the surface before inserting the plug. Clear any debris, dust, or loose material around the hole, and ensure it’s dry and clean.
Then, simply insert the plug and secure it in place using adhesive or screws, depending on the material. With the right plug and the right technique, anyone can quickly and easily plug a hole and prevent further damage.
Trim the Excess Plug
When it comes to plugging a hole in your walls or ceiling, sometimes the excess plug can be an eyesore. Fortunately, there’s a simple solution – trim the excess plug! Using a utility knife or a pair of scissors, carefully trim away any excess plug that’s sticking out beyond the surface of your wall or ceiling. Be sure to take your time and go slowly, as you don’t want to accidentally damage your walls or create an uneven surface.
Once you’ve finished trimming away the excess plug, you’ll be left with a smooth, flush surface that looks clean and professional. And with this small finishing touch, your DIY project will look even better than you imagined!
Reinflate the Tire
Repairing a tubeless tire can be daunting, but don’t worry, it’s not as complicated as it seems. The first step is to locate the leak, which can be done by submerging the tire in water and looking for bubbles. Once found, remove any debris with a sharp tool and clean the area.
Then, apply a patch or sealant to the puncture site and wait for it to dry. Finally, reinflate the tire to the recommended pressure. A crucial step to keep in mind is to not overinflate the tire as this can cause further damage.
By following these steps, you can repair your tubeless tire and be back on the road in no time. Don’t forget to regularly check your tire pressure and watch out for any signs of damage.
Use a Compressor or Pump
If you find yourself with a flat tire, don’t panic! You can easily reinflate it using a compressor or pump. A compressor is a more powerful option, but an air pump is a great alternative for emergency situations. Begin by removing the valve cap on the tire and attach the compressor or pump nozzle to the valve stem.
Make sure the nozzle is secure, and turn on the compressor or pump. You’ll hear the air flowing into the tire, so monitor the pressure closely. Check the recommended pressure for your particular tire, and adjust the compressor or pump accordingly.
Once you’ve reached the recommended tire pressure, turn off the compressor or pump and remove the nozzle. Put the valve cap back on and check the tire pressure again using a tire gauge. If you’ve successfully reinflated the tire, you’re good to go! Remember to keep an eye on the tire pressure in the future to prevent flat tires and ensure your safety on the road.
Check for Leaks
If you’re wondering how to repair a tubeless tire, the first step is to check for leaks. The most common cause of a flat tire is a puncture, so it’s important to visually inspect your tire for any foreign objects that may have punctured it. If you don’t see anything, you’ll need to inflate your tire and then listen for any hissing sounds which are signs of a leak.
Once you locate the source of the leak, you can use a puncture repair kit to patch the hole and get back on the road. However, it’s important to note that some punctures may be too large or have occurred in an area that cannot be repaired, in which case you may need to replace the tire. Regularly checking your tires for leaks can help you catch any problems early and prevent a dangerous blowout while driving.
Apply Soapy Water
When it comes to checking if there are any leaks in your plumbing system, one method that plumbers often use is applying soapy water. When water escapes from a pipe, it creates bubbles when it comes into contact with soap, which makes it easier to detect a leak. To apply soapy water, you can mix a bit of dishwashing liquid with water and pour it over the area you suspect may be leaking.
Alternatively, you can also use a sprayer or sponge to spread the solution. Once you’ve applied the solution, check areas where bubbles form to identify any leaks. It’s essential to check all fittings, joints, valves, and pipes thoroughly to ensure that there are no leaks present.
By finding leaks quickly, you can prevent further damage, save money on your water bill, and minimize environmental impact. So the next time you suspect a plumbing leak, grab some soapy water and get to detecting.
Re-Check Tire Pressure
One important aspect of maintaining proper tire pressure is to regularly check for leaks. Leaks in your tires can cause them to lose pressure over time and can lead to poor performance, decreased fuel efficiency, and a safety hazard. One easy way to check for leaks is to conduct a visual inspection of your tires, looking for any cuts, punctures, or foreign objects like nails or glass embedded in the rubber.
A tire pressure gauge can also help to identify any potential issues by measuring the air pressure within the tire. If you notice any signs of a leak, it’s important to address the issue immediately, either by repairing the puncture or replacing the tire altogether. By being vigilant about checking for leaks and addressing them promptly, you can help ensure that your tires maintain the proper pressure and perform at their best, keeping you safe on the road.
Final Thoughts
In conclusion, repairing a tubeless tire is not as difficult as it may seem. With the proper tools and techniques, you can quickly fix your tire and get back on the road. Start by locating the puncture and removing any debris.
Then, insert a tire plug or use a patch kit to seal the hole. In some cases, you may need to use a sealant to reinforce the repair. It’s essential to regularly check your tire pressure and take preventive measures such as avoiding sharp objects and maintaining proper tread depth.
By following these steps and keeping an eye out for potential issues, you can extend the life of your tubeless tire and enjoy a smooth and safe ride.
Conclusion
In conclusion, repairing a tubeless tire may seem daunting, but with the right tools and knowledge, it can be a breeze. Remember to always check your tire for punctures and carry a puncture repair kit with you. If you do get a flat, locate the source of the puncture, use the reamer tool to clean the hole, insert the plug tool with the plug, and inflate the tire.
With a little practice, you’ll be back on the road in no time, leaving all your flat-tire woes in the dust!”
FAQs
What causes tubeless tires to get punctured?
Tubeless tires can get punctured by sharp objects such as nails, glass, stones, or other debris on the road.
How to identify a punctured tubeless tire?
To identify a punctured tubeless tire, check for a visible or audible hissing sound, sudden drop in tire pressure, or a bulge on the tire surface.
Can tubeless tires be repaired?
Yes, tubeless tires can be repaired, but it depends on the size and location of the puncture. Small punctures on the tread area can easily be repaired using a tire repair kit.
Can tubeless tires be repaired permanently?
No, tubeless tires cannot be repaired permanently. A temporary repair is done using a tire plug or sealant, but the tire’s structural integrity is compromised, and the repair must be inspected by a professional mechanic.
How to repair a tubeless tire at home?
To repair a tubeless tire at home, you will need a tire repair kit that includes a rasp, needle, and tire plugs. You can follow the instructions provided in the kit or watch a tutorial online to learn the step-by-step process.
Is it safe to drive on a repaired tubeless tire?
Yes, it is safe to drive on a repaired tubeless tire, but only if the repair was done using proper techniques. Always check the repair before driving and do not exceed the recommended maximum speed and distance.
When should a tubeless tire be replaced instead of repaired?
A tubeless tire should be replaced if it has a puncture in the sidewall, is older than six years, has worn out beyond the tread wear indicator, or has been driven on a flat tire for an extended period.


