Changing a tire rim can be a daunting task, especially if you have never done it before. But fear not, with a little guidance and patience, you can have your shiny new rim on your tire in no time! Before diving into the process of putting a rim on a tire, it’s important to understand what a tire rim actually is. The rim is the outer edge of the wheel that holds the tire in place.
It’s an essential part of your vehicle as it’s responsible for keeping the tire inflated and providing stability while driving. If you’re looking to upgrade your rims or simply replace a damaged one, the first step is to know the size and type of rim you’ll need. This information can be found in your vehicle owner’s manual or by consulting a professional.
Once you have your new rim, the next step is to remove the old rim from the tire. This can be done with a tire iron and a bit of elbow grease. Once the old rim is removed, it’s time to fit the new rim onto the tire.
This process is usually done by hand, but a special machine can also be used. The final step is to inflate the tire to the recommended pressure and install it back onto the vehicle. It’s also important to check for any leaks or issues before hitting the road.
With a little patience and careful attention to detail, anyone can learn how to put a rim on a tire. And with a sleek new set of rims, your vehicle will look and perform better than ever before.
What You’ll Need
If you want to know how to put a rim on a tire, there are a few things you’ll need to get started. First and foremost, you’ll need the tire and rim that you want to install. Make sure both of them are clean and free of debris before you begin.
You’ll also need a tire iron or pry bar to help you remove the old tire from the rim, as well as a tire mounting machine or a set of tire irons to help you get the new tire onto the rim. A tire balancer will also be essential to ensure that your tire is properly balanced once it’s mounted onto your vehicle. Finally, a torque wrench will be necessary to make sure that your lug nuts are tightened to the correct torque specification.
With these tools in hand, you’ll be ready to tackle the job of installing a new tire onto your rim like a pro!
New Rim
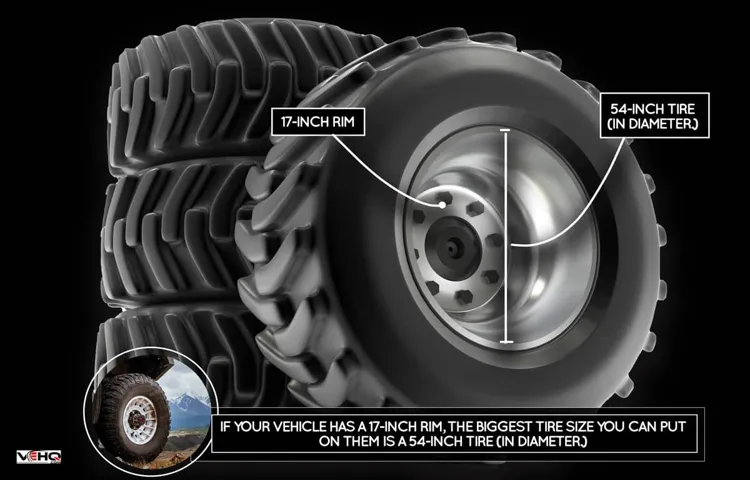
If you’re considering upgrading the rim on your vehicle, there are a few essential items you’ll need to get the job done right. First and foremost, you’ll need to make sure you have the correct size rim for your vehicle. Check the manufacturer’s specifications or consult with a mechanic to ensure you’re getting the appropriate size.
You’ll also need a lug wrench or tire iron to remove the old rim and install the new one. Additionally, having a torque wrench is crucial to ensure you tighten the lug nuts to the manufacturer’s recommended torque settings. Finally, be sure to have a jack or lift to elevate the vehicle off the ground as you remove and replace the rim.
With these items on hand, you’ll be well-equipped to tackle installing your new rim and hit the road with confidence and style.

Tire
If you’re planning to change your tire, there are a few things you’ll need to have on hand before you get started. The most important thing, of course, is a replacement tire that is the correct size and type for your vehicle. You’ll also need a jack to lift your car up off the ground so you can remove and install the tire.
A lug wrench is essential for loosening and tightening the lug nuts that hold the wheel in place. And don’t forget about safety! A pair of work gloves will protect your hands from any sharp edges or hot surfaces. It’s also a good idea to have a flashlight handy in case you need to work in dimly lit conditions.
With these tools at the ready, you’ll be well-equipped to tackle your tire replacement with confidence and ease.
Valve stem
When it comes to maintaining the air pressure in your tires, one of the most critical components is the valve stem. It’s a small, but essential piece that connects the tire to the valve and allows air to flow in and out. To ensure your valve stem is doing its job correctly, you’ll need a few things.
Firstly, you’ll need a tire gauge to measure the air pressure and determine if it’s time to add more air. Secondly, you’ll need a valve stem tool to remove and replace the valve stem if needed. Lastly, if you notice any leaks, you’ll need a valve stem sealant to stop the air from escaping.
By having these items on hand, you can keep your valve stem in top condition and maintain the correct air pressure in your tires, which will help prolong their lifespan and keep you safe on the road. So, make sure you have these essential tools and materials in your toolkit before you hit the road.
Tire iron
If you’re planning on changing a tire on your car, you’ll definitely need a tire iron. This tool is essential for removing and tightening the lug nuts that hold your wheel in place. The good news is that a tire iron is relatively inexpensive, and you can pick one up at any auto parts store.
However, not all tire irons are created equal. You’ll want to select one that is comfortable to hold and has a good grip to prevent slipping. It’s also important to make sure that the size of the tire iron matches the size of your lug nuts.
Using the wrong size tire iron can damage both the nuts and the tool itself. With the right tire iron on hand, changing a tire can be a quick and easy process. So, don’t forget to add one to your car’s emergency kit today!
Jack
Jack is a great DIY project for anyone looking to improve their home decor. To get started, you’ll need a few items. Firstly, you’ll need a jack base.
This could be anything from a wooden square to a large, round stone. You’ll also need a jack post. This will be the central support for your Jack, so it needs to be strong and sturdy.
For the top of your Jack, you’ll need a metal plate, which will provide a stable surface for your lamp or other decorative item. You’ll also need a drill, screws, and a saw, as well as any paint or staining supplies you might want to use to finish your Jack. With these items on hand, you’ll be all set to create a unique and eye-catching centerpiece for your home in no time.
So, are you ready to get started on your Jack project?
Compressor
If you want to use a compressor, there are a few things you’ll need to get started. First and foremost, you’ll need the compressor itself. There are a variety of compressors available, from small portable units to larger stationary models.
Consider what type of work you’ll be doing and how often you’ll be using the compressor to determine which type is right for you. In addition to the compressor, you’ll also need an air hose to connect the compressor to your tools or equipment. Make sure you choose a hose that is the right length and diameter for your needs.
Finally, you’ll need any other accessories or attachments that you may need to use with your specific tools or projects. This may include things like air fittings, spray guns, or inflation needles. By gathering all the right tools and equipment, you can ensure that you’re prepared to take on any project that comes your way.
Step-by-Step Instructions
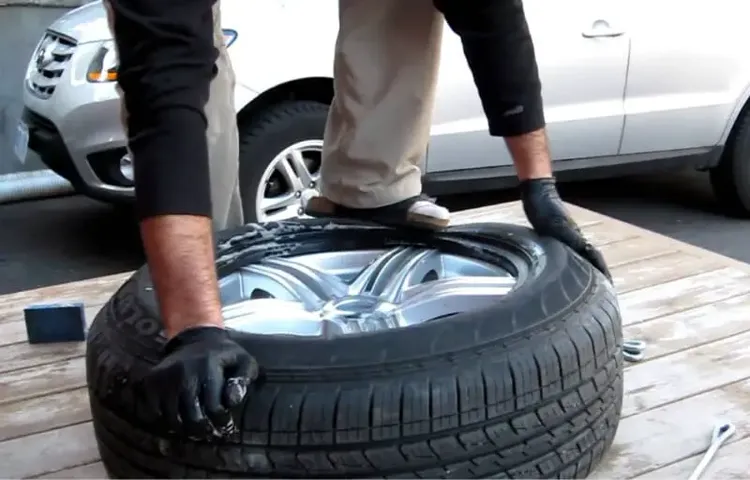
Putting a rim on a tire might seem like a daunting task, but with the right tools and knowledge, it can be done fairly easily. First, make sure the tire you are using is the correct size for the rim. Then, start by lubricating the inside of the tire with tire lubricant to make it easier to mount onto the rim.
Next, take the rim and slide it into the tire, making sure the valve stem is lined up with the hole in the rim. Once the rim is inside the tire, use a tire lever to work the lip of the tire over the rim. Keep working the tire lever around the circumference of the rim until the entire tire is in place.
Finally, inflate the tire to the recommended pressure, and use a tire gauge to check that it is at the correct PSI. With these simple steps, you will have successfully put a rim on a tire, and your vehicle will be ready to hit the road.
Step 1: Remove the old wheel
When it comes to fixing a flat tire, the first step you need to take is removing the old wheel. But how exactly do you do that? Fear not, as we’ve got you covered. First, you’ll need to make sure that your car is parked on a flat, stable surface, well away from any traffic.
Next, use a lug wrench to loosen the lug nuts on the wheel you want to remove. Be sure to use firm and steady pressure, but don’t completely remove the nuts just yet. Then, place a jack under the car near the tire you want to change, making sure to consult your owner’s manual to determine the right spot.
Slowly raise the jack until the tire is off the ground, and then remove the lug nuts completely. Carefully pull the wheel off the car. And there you have it! You’ve successfully removed your old tire.
Don’t forget to store the lug nuts in a safe spot so you don’t lose them!
Step 2: Clean the rim mounting surface
When it comes to changing a tire, it’s essential to clean the rim mounting surface properly. The first thing you want to do is remove any dirt, debris, or rust from the surface using a wire brush. This will allow the new tire to sit properly and avoid any vibrations or wobbling while driving down the road.
Once you’ve cleaned the surface, it’s also a good idea to inspect the bolts and nuts that hold the rim in place. Make sure they are tight and in good condition, as loose or damaged hardware can cause serious issues. Taking the time to clean and inspect the rim mounting surface ensures a safe and successful tire change.
So, don’t rush this step and give the surface a thorough cleaning before moving on to the next steps. Your safety and the safety of those on the road depend on it.
Step 3: Install the new valve stem
To prevent air from leaking out of your tire, it’s essential to install a new valve stem after removing the old one. In this step-by-step guide, we’ll walk you through the process of installing a new valve stem. Start by inserting the new valve stem into the hole in the rim from the outside.
Once you’ve done that, carefully feed the stem through the rim until it comes out the other end. Be sure to slide the valve stem over the rim’s valve hole and add the locking nut onto the stem – this will secure it in place. To tighten the valve stem using pliers, be sure to hold the locking nut in place.
Finally, inflate the tire to the recommended pressure and carefully check for any leaks. And that’s it – installing a new valve stem may seem intimidating at first, but it’s quite a simple process once you get the hang of it. Remember to always keep your tires inflated to the recommended pressure to ensure your safety on the road.
Step 4: Put the tire on the rim
Once you have properly prepped the tire and rim, it’s time to put the tire on the rim. Start by lining up the valve stem of the tire with the valve hole in the rim. Then, using your hands or tire levers, carefully work the bead of the tire onto the rim.
Be sure to go slow and apply equal pressure around the circumference of the tire to avoid pinching the inner tube. Once the tire is successfully mounted and evenly seated on the rim, make sure the bead is locked into place by pressing it down with your thumbs. Before you inflate the tire, check that the tire is mounted in the correct orientation and that the directional tread is facing the right way.
With everything in order, it’s time to inflate the tire!
Step 5: Install the new rim
Now that you’ve removed the damaged rim, it’s time to install the new one. Before you start, ensure that you have all the necessary tools and hardware. Begin by aligning the new rim with the wheel studs.
Insert the lug bolts and start tightening them by hand. Ensure that they’re tightened evenly to avoid warping or damaging the new rim. Using a torque wrench, tighten the bolts to the manufacturer’s recommended specification.
Be careful not to over-torque the bolts as it can cause the rim to crack or break. Once all the bolts are tightened, double-check their tightness and recheck after a few miles of driving. Following these simple steps will ensure a safe and successful installation of your new rim.
Happy driving!
Step 6: Inflate the tire
After completing the previous steps, it’s time to inflate the tire to the appropriate pressure. You can usually find the recommended PSI (pounds per square inch) for your specific tire in the owner’s manual, on the tire sidewall, or on a sticker located in the driver’s side doorjamb. Make sure to use a tire pressure gauge to ensure you are inflating the tire to the correct PSI.
Overinflated tires can cause a rough ride and reduce traction, while underinflated tires can lead to poor fuel efficiency and low handling. It’s important to check your tire pressure regularly and make any necessary adjustments. Once your tire is fully inflated, double-check the valve stem and replace the valve cap before hitting the road.
Final Thoughts
Putting a rim on a tire may seem intimidating at first, but it’s actually a straightforward process. First, make sure you have the correct size and type of rim for your tire. Then, remove the old rim and tire from the wheel.
Clean the wheel and inspect it for any damage. Next, place the new tire onto the rim, making sure it’s seated properly. Use tire mounting lubricant to help the process.
Finally, use a tire machine to mount the tire and rim onto the wheel. Tighten the lug nuts in a star pattern and check the tire pressure to make sure it’s set to the manufacturer’s specifications. With these steps, knowing how to put a rim on a tire is a simple task that can be done with a moderate level of automotive skill.
Safety Tips
Final Thoughts on Safety Tips When it comes to safety, it’s crucial to be cautious and aware of your surroundings at all times. Whether you’re walking through a dark alley at night or using a public transport system, there are several ways to ensure you’re safe. Always trust your instincts and avoid situations that seem dangerous.
It’s also essential to have someone you can contact in case of an emergency. Keep your phone charged and with you at all times, and make sure to share your location with someone who can check in on you. Additionally, always carry personal protection tools such as pepper spray or a whistle in case of an attack.
Remember, being prepared for the worst-case scenario can make all the difference in ensuring your safety.
Maintain your tires and rims
Maintaining your tires and rims is paramount not just for safety reasons but for enhancing your vehicle’s performance and aesthetics. Failure to take care of your tires and rims can lead to uneven wear, which can affect your car’s handling and fuel economy. Similarly, dirty or damaged rims can ruin the overall look of your car, minimizing its resale value.
To keep your tires and rims in the best shape possible, make sure to check tire pressure regularly and keep them inflated to the manufacturer’s recommended level. Also, rotate your tires after every 5,000 to 8,000 miles to ensure even wear. For the rims, regularly wash them with mild soap and water, and avoid using abrasive cleaners or harsh chemicals that can cause damage.
In conclusion, maintaining your tires and rims is a key aspect of car care that should not be overlooked. So, take good care of them, and your car will thank you by providing a smooth and safe driving experience for many miles to come.
Conclusion
In conclusion, putting a rim on a tire is a bit like a game of Tetris – you need to align all the pieces perfectly to ensure a smooth ride. But unlike the video game, practice doesn’t make perfect – it’s preparation and attention to detail that will get you rolling smoothly. So, grab your tools, take your time, and get ready to show off your tire-changing skills.
Because with this guide, you’ll be putting rims on tires like a pro!”
FAQs
What tools do I need to put a rim on a tire?
You will need a lug wrench, a jack, and a torque wrench to properly install a rim on a tire.
Can I install a rim on a tire without a professional mechanic?
Yes, you can install a rim on a tire without a professional mechanic. However, it is recommended to have some knowledge or experience in tire installation for a safe and proper fitment.
Should I use a pry bar to remove the old rim from the tire?
No, using a pry bar to remove a rim from a tire can damage the tire and the rim. Use a proper tool such as a tire iron or a wooden block to assist in removing the rim.
Can I reuse the old tire pressure sensor on my new rim?
It is recommended to install a new tire pressure sensor when changing rims. However, if the old sensor is in good working condition, it can be reused.
How tight should I torque the lug nuts on my new rim?
Refer to the manufacturer’s specification for the recommended torque settings. Over-tightening can cause damage to the rim and under-tightening can cause the wheel to come loose.
Can I put a different size rim on my vehicle’s tire?
That depends on your vehicle’s specifications and the size of the new rim. Consult with a professional mechanic or refer to the vehicle’s owner manual for recommended sizes.
How can I tell if my new rim and tire are a proper match?
Check the tire’s sidewall for the recommended rim size and make sure it matches the new rim. Also, consult with a professional mechanic or refer to the vehicle’s owner manual for recommended sizes and fitment.


