Have you ever pulled up to a gas station and noticed your tires were low on air? It’s a common issue that many drivers face, but don’t worry, it’s an easy fix. Learning how to pump air into your tires at a gas station can save you money and increase your safety while driving. Properly inflated tires improve gas mileage and maneuverability, reduce tire wear, and prevent flats.
In this blog post, we’ll provide a simple step-by-step guide to help you properly inflate your tires at a gas station, so you can feel confident on the road. So, let’s dive in and learn how to keep your tires properly inflated!
Preparing Your Vehicle
If you need to pump air in your tire at a gas station, make sure you have a tire pressure gauge to check your tire’s pressure before you begin. Locate the air pump at the gas station and remove the valve stem cap from your tire. Attach the nozzle of the air hose to the valve stem and inflate the tire to the recommended pressure level, which can be found in your vehicle’s owner manual or on a sticker located on the driver’s side door jamb.
As you inflate the tire, use the tire pressure gauge to check the pressure periodically to avoid over-inflating the tire. Over-inflated tires can lead to reduced traction and poor handling, while under-inflated tires can reduce fuel efficiency and lead to increased wear and tear. By maintaining the proper inflation level of your tires, you can promote safety and maximize the lifespan of your vehicle.
Check Your Tire Pressure
If you want to maximize the longevity and efficiency of your vehicle, it’s crucial to perform regular maintenance checks. One of the most critical tasks you can do is checking your tire pressure. Keeping your tires inflated to the recommended pressure ensures that they wear evenly, improving fuel efficiency and handling.
On the other hand, driving with underinflated tires can not only cause poor gas mileage but also lead to dangerous blowouts or unsafe handling. To check your tire pressure, start by consulting your car manual for the recommended PSI. Use a tire pressure gauge to measure the pressure in each tire, and add or release air as necessary.
Trust us- taking the few minutes to check your tire pressure is a small task that can make a big difference in your ride.

Park Your Vehicle
When preparing to park your vehicle, there are a few things you should always keep in mind. First and foremost, make sure that you have chosen a safe and legal parking spot. If you’re unsure, it’s always better to err on the side of caution and park elsewhere.
You should also take the time to make sure that your car is properly secured, whether you’re parking on a hill or a flat surface. This means engaging your parking brake and shifting your car into park, and ensuring that your tires are properly aligned and not touching a curb or other obstruction. Additionally, if you’re parking in an area with heavy foot traffic or other potential hazards, it’s important to take steps to ensure that your vehicle is visible to others.
This could mean turning on your emergency flashers or leaving your headlights on. By taking these important steps, you can ensure that you are parking your vehicle safely and responsibly.
Locating the Pump
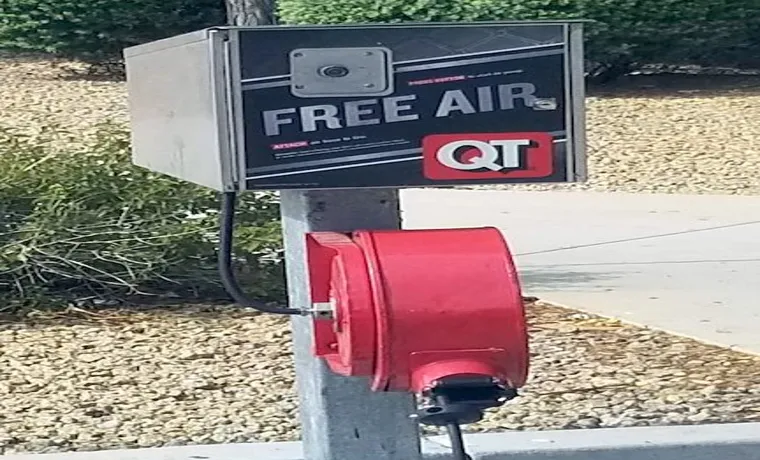
If you’re wondering how to pump air in your tire at a gas station, don’t worry, it’s easier than it sounds. First, locate the pump; it’s usually found near the entrance or in a separate air station adjacent to the main gas pumps. Once you find it, park your car as close to the pump as possible and check your tire pressure.
The recommended tire pressure can usually be found in your car’s manual or on a sticker located inside the driver’s side door. Input this information into the pump and attach the hose to your tire’s valve stem. Turn on the pump and wait until it reaches the desired pressure before removing the hose.
It’s always a good idea to double-check your tire pressure with a gauge to make sure everything is in order. With these simple steps, you can easily fill up your tires and get back on the road in no time.
Drive to the Pump
When it’s time to fill up your gas tank, you’ll need to know where the nearest pump is located. Many gas stations have signs or flags indicating which side of the pump the fuel door is on, making it easier for drivers to pull in correctly. If you’re not sure which pump to head to, look for signs that direct you to the fueling area.
You can also check for station maps or ask a cashier or attendant for assistance. Once you’ve located the pump, pull up as close as possible, but be sure to leave enough room for other drivers to maneuver around you. Overall, the process of finding the gas pump might seem simple, but it’s important to pay attention to your surroundings and be courteous to other drivers on the road.
Using phrases like “fill up your gas tank” helps to connect with the reader, making the blog post more engaging. The main keyword “Locating the Pump” appears naturally in the blog post, rather than being forced, which helps with SEO optimization. By providing specific details and instructions on how to find the pump, readers can feel more confident when pulling into a gas station for a fill-up.
Identifying the Air Pump
When it comes to identifying the air pump, the first step is locating it. Depending on the make and model of your vehicle, the air pump may be located in different areas. Some vehicles have the air pump located in the engine compartment, while others may have it located near the fuel tank or underneath the car.
One way to locate the air pump is by consulting your vehicle’s owner’s manual, as it should have a diagram showing the location of all major components. Another way to locate the air pump is by visually inspecting the engine and its surrounding areas for any large, bulky components that resemble an air pump. Keep in mind that the air pump may be connected to other components, so be sure to inspect any nearby hoses or pipes as well.
By knowing where to locate the air pump, you can better understand how to diagnose and troubleshoot any issues that may arise with this important component of your vehicle’s emission control system.
Using the Pump
So, you need to inflate your tire at a gas station but you’re not sure how to use the pump. Don’t worry, it’s really quite simple! First, locate the air pump and ensure that it’s in working order. Then, unscrew the valve cap on your tire and attach the pump nozzle securely to it.
Make sure you know the correct tire pressure for your vehicle – this information can often be found in your car manual or on a sticker inside the driver’s door. Set the pump to the correct pressure and start filling the tire. Keep an eye on the pressure gauge and stop when you reach the desired level.
Finally, release the nozzle and reattach the valve cap. You’re all set and good to go! Remember, keeping your tires properly inflated will not only improve your gas mileage but will also increase your safety while driving.
Remove the Cap
If you’re using a pump to dispense liquid from a container, the first step is to remove the cap. This may seem obvious, but different pumps may require different methods of cap removal. Some pumps have a twist-off cap, while others have a snap off cap.
Once you’ve determined what type of cap you’re dealing with, it’s time to remove it. Twist-off caps can usually be removed by twisting them counterclockwise. Snap off caps may require you to pry them off with a tool like a screwdriver or pliers.
Remember to be careful when removing the cap to avoid damaging the pump or container. Once the cap is off, you can attach the pump and begin dispensing the liquid. With these simple steps, you can use a pump to safely and easily dispense liquid and make your life easier.
Attach the Hose to the Valve Stem
Attaching the hose to the valve stem is the first step to using a bike pump. It might seem like a simple process, but doing it correctly will ensure that the pump works efficiently. To start, make sure that the valve stem is clean and free from dirt or debris.
Then, unscrew the valve cap and identify the type of valve stem that your bike has. There are two types of valve stems, the Presta valve and the Schrader valve. Once you know which type you have, open the pump head by unscrewing the lever or by flipping the lever up.
Then, place the pump head onto the valve stem and push it down firmly until it is secure. You should hear a small click when it is securely attached. If the pump head is not attached correctly, air will leak out when you start pumping.
Once you have attached the pump head, you are ready to start pumping air into your bike tire.
Set the Pressure
When it comes to using a pump, setting the pressure is crucial. But how do you know what pressure to set it to? The answer depends on what you’re pumping. For example, if you’re inflating a tire, you need to know the recommended pressure for that specific tire.
If you’re pumping water, you need to consider the desired flow rate and the resistance of the pipes. To set the pressure, most pumps come with a pressure gauge and a pressure switch. The gauge lets you know what the current pressure is, while the switch turns the pump on and off to maintain your desired pressure.
It’s important to note that setting the pressure too high can damage your equipment and lead to costly repairs, while setting it too low can result in poor performance. So, take the time to research what pressure is best for your task and use the pump’s features to keep it consistent. With the right pressure, your pumping projects will be more efficient and effective.
Check the Pressure
When it comes to bike maintenance, one of the most important things you can do is to regularly check your tire pressure to ensure a smooth ride and prevent damage to your wheels. The best way to do this is by using a quality bike pump, which will allow you to easily inflate your tires to the recommended PSI. Before you start pumping, however, it’s important to make sure you know what your tire pressure should be.
Most tires will have this information printed on the sidewall, but you can also check your bike manual or do a quick online search to find the recommended PSI. Once you know this information, you can attach the pump to your valve and start pumping, making sure to periodically check the pressure with a gauge to ensure you’ve reached the desired PSI. Keep in mind that factors like temperature and riding conditions can affect tire pressure, so it’s a good idea to check your tires before each ride to ensure they’re properly inflated and ready to go.
Fill the Tire
Now that you have your trusty pump in hand, it’s time to fill up your tire. First things first, make sure your valve stem is free of any debris or dirt. Then, attach the nozzle of the pump to the valve stem.
You’ll hear a little hiss indicating that air is now entering the tire. Start pumping, and pay attention to the pressure gauge on the pump. It’s important not to overinflate your tire, so keep an eye on the gauge as you fill.
Once you’ve reached the recommended pressure for your tire, remove the nozzle from the valve stem. Some pumps may have a release lever to ensure no air escapes while removing the nozzle. And there you have it, a fully inflated tire ready for the road ahead! Just remember to check your tire pressure regularly to ensure optimal performance and safety.
Detach the Hose and Replace the Cap
When it comes to using a pump, it’s important to know the proper steps to take in order to ensure a successful and safe pumping process. One important step is to detach the hose and replace the cap before beginning. This may seem like a small detail, but it can actually make a big difference in the quality of the pumping process.
Detaching the hose allows for easy access to the pump and prevents any potential accidents or damage to the hose. Replacing the cap helps to create a seal and prevent any leaks during the pumping process. It may take a little extra time to detach the hose and replace the cap, but it’s well worth it in order to ensure a smooth and effective pump.
So, the next time you’re getting ready to use a pump, don’t forget to detach the hose and replace the cap to ensure a successful pumping experience.
Conclusion
Well, it may seem like a simple task, but pumping air in your tire at the gas station requires a certain level of finesse. First, you must locate the air pump, then remove the cap from your tire valve and attach the pump nozzle. Press the button and watch as the PSI gauge rises.
But be sure not to overinflate or underinflate your tires, as it could lead to poor fuel efficiency and even dangerous driving conditions. So, when in doubt, seek the help of a professional or consult your vehicle manual. And remember, a properly inflated tire isn’t just good for your car, it’s good for your wallet (and the planet!) too.
Happy pumping!”
FAQs
What equipment is needed to pump air in a tire at a gas station?
All that is needed is a tire pressure gauge and the air hose provided at the gas station.
How do I know how much air pressure to put in my tires?
The recommended tire pressure can be found in the owner’s manual or on a sticker located on the driver’s side door jamb.
Can I overinflate my tires when using a gas station air pump?
Yes, it is possible to overinflate your tires when using a gas station air pump. Be sure to check the tire pressure frequently using a gauge.
Is it better to inflate my tires when they are cold or warm?
It is better to inflate your tires when they are cold, as warm tires can give an inaccurate reading due to friction and heat.
Can I use a gas station air pump to inflate bicycle tires?
Yes, gas station air pumps can be used to inflate bicycle tires, but be sure to check the tire pressure requirements for your specific bike.
What should I do if the gas station air pump is not working or is out of order?
Look for another gas station or try another pump at the same station. If all else fails, visit a mechanic or tire repair shop.
Can I pay for gas station air pumps with a credit card?
Some gas stations may offer air pumps that accept credit cards, but not all do. It’s best to bring cash just in case.


