Have you ever had a flat tire, only to discover that the cause was a popped bead? It can be frustrating and intimidating to deal with, especially if you haven’t encountered this issue before. But don’t worry, popping a bead on a tire is a common problem that can be fixed with the right tools and techniques. In this blog post, we’ll explore everything you need to know about popping a bead and how you can successfully fix it yourself.
So, whether you’re a seasoned mechanic or a newbie to tires, read on to discover our top tips for popping a bead on a tire.
Introduction
Have you ever experienced the frustration of a tire popping off the bead? It’s a common problem that many drivers face and can be a real hassle when you’re on the road. Fortunately, popping the bead back onto the tire isn’t as difficult as it sounds. First, you’ll need to remove the wheel from the car and deflate the tire completely.
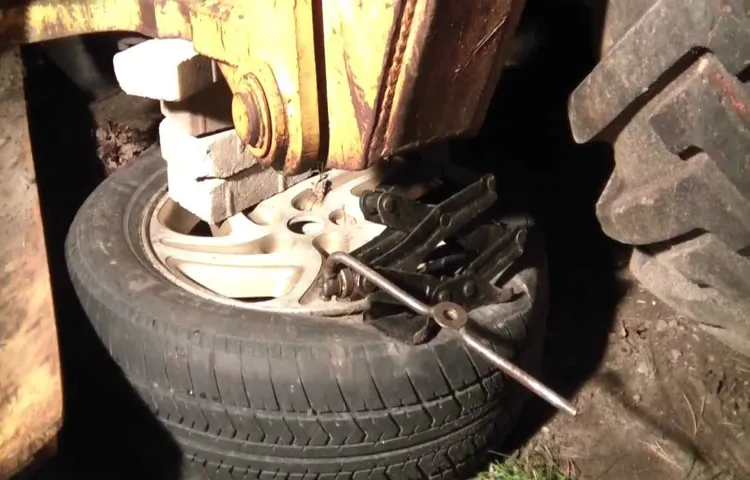
Then, use a bead breaker tool to separate the tire from the rim. Once the bead is broken, lubricate the rim and tire with soapy water or tire mounting lubricant to help slide the tire back onto the rim. Use a tire iron to carefully work the tire around the rim until it’s fully seated.
Finally, inflate the tire to the recommended pressure and check for any leaks. By following these simple steps, you can easily pop a bead back onto your tire and get back on the road in no time.
What is a Bead on a Tire?
A bead on a tire refers to the part of the tire that sits on the rim, holding it in place. The bead is made up of steel wires that give it strength and allow it to maintain its shape, and it is covered by a rubber coating that creates an airtight seal with the rim. The bead is an essential part of a tire and must be designed to fit the specific rim it will be used on.
When choosing tires for your vehicle, it is important to ensure that the bead size and type are compatible with your rims. Otherwise, you may experience issues with tire pressure, handling, and even safety. So, if you’re in the market for a new set of tires, make sure you understand the importance of the bead and select tires that are a perfect match for your rims.

Why Do You Need to Pop Bead on a Tire?
If you’ve ever had to change a tire, you may have heard the term “pop bead” before. But what exactly does it mean, and why is it necessary? Essentially, popping the bead on a tire refers to breaking the seal between the tire and the rim. This is typically done when removing a tire from a rim, or when re-seating a tire that has come loose.
It may seem like a small detail, but ensuring that the bead is properly seated is crucial for maintaining proper tire pressure and preventing blowouts. That’s why it’s important to make sure that the bead is popped and re-seated correctly when working on a tire.
Materials Needed
If you’re wondering how to pop bead on tire, you’re definitely not alone. It’s a common question among car owners and enthusiasts alike. First things first, you’ll need a few materials.
These include a tire irons, a valve stem tool, and a compressed air source. The tire irons will be used to remove the tire from the rim, so it’s important to have at least two of them on hand. The valve stem tool is necessary in order to remove the valve stem core, which is required during the popping process.
A compressed air source, such as an air compressor, is needed to inflate the tire once the bead has been popped. With these materials in hand, you’re now ready to move on to the actual process of popping the bead.
Tire Bead Pusher
If you’re a cyclist, you know how frustrating it can be to try to install a new tire onto a rim. The tire bead can be difficult to get over the edge of the rim, and if you’re not careful, you can end up damaging either the tire or the rim. That’s where a tire bead pusher comes in handy.
To make one, you’ll need a few simple materials. First, you’ll need a piece of 1 x 2 inch wood that is about a foot long. You’ll also need two pieces of metal coat hanger wire, each about six inches long.
Bend one end of each piece of wire into a hook shape, and then screw them into the wood about an inch apart. You now have a simple yet effective tool to help push the tire bead over the edge of the rim. Just place the wood against the rim, hook the wire onto the tire bead, and push down.
With a little effort, the tire should pop onto the rim without any damage. This tire bead pusher can save you time and hassle when changing tires!
Tire Lubricant
If you’re wondering how to make your tire lubricant last longer, then there are a few materials that you’ll need. Firstly, you’ll require a high-quality lubricant that is specifically designed for tires. Look for one that is water-resistant and can withstand high temperatures.
Next, you’ll need a clean cloth or rag to apply the lubricant onto the tire. This is important, as any debris or dirt on the tire can affect the lubricant’s effectiveness. Additionally, it’s recommended to have a tire cleaner on hand to ensure the tire is completely clean before applying the lubricant.
Finally, consider investing in a tire shine spray to give your tires that extra sparkle. By using these materials, you can extend the life and performance of your tires, reducing the need for frequent replacements.
Protective Gloves
When it comes to protecting your hands, wearing the right gloves is essential. But not all gloves are created equal. That’s why it’s important to choose the right materials for the job.
Some of the most common materials used for protective gloves include latex, nitrile, vinyl, and neoprene. Latex gloves are a popular choice as they provide a high level of sensitivity and are suitable for a wide range of tasks. Nitrile gloves, on the other hand, are ideal for those with latex allergies, as they offer similar protection but without the risk of an allergic reaction.
Vinyl gloves are another option, but they are less durable than other materials and are best used for short-term tasks. Neoprene gloves are a good choice for those who need protection against chemicals or harsh substances, as they offer excellent resistance to oil, grease, and other chemicals. Ultimately, the material you choose will depend on the task at hand and the level of protection you require.
Air Compressor
When it comes to using an air compressor, you’ll need a few materials to get started. First and foremost, the air compressor itself! You’ll want to choose one that fits your needs based on the power and size you require. Additionally, you’ll need an air hose to connect the compressor to your tools or other equipment.
Be sure to choose a hose with the appropriate length and diameter to avoid any air leakages. You may also want to invest in some additional accessories such as air filters to keep your equipment clean and extend its lifespan, as well as pressure gauges to monitor your air compressor’s performance. Don’t forget to wear proper ear and eye protection while using the air compressor, and keep a fire extinguisher nearby just in case.
By having all the necessary materials on hand, you’ll be able to ensure safe and efficient use of your air compressor.
Step-by-Step Guide
Popping a bead on a tire can be a daunting task, but with the right steps, it can be done safely and easily. First, make sure to deflate the tire completely before attempting to pop the bead. Next, position the tire in a way that allows you to apply pressure to the sidewall, using a mounting spoon or pry bar to assist.
Apply force carefully and evenly, working around the circumference of the tire until the bead pops off the rim. Once the bead is off, it’s important to inspect the tire and rim for damage before re-inflating. By following these steps, you can successfully pop a bead on a tire yourself and avoid an expensive trip to the mechanic.
1. Loosen the Lug Nuts
Loosening the lug nuts is an essential step to properly changing a tire. Before you jack up your car and remove the tire, you must first loosen the lug nuts. To start, locate your lug wrench and use it to loosen each lug nut, but don’t take them off just yet.
It’s crucial to loosen them while the car is still on the ground, as it will prevent the tire from spinning when you apply force. Give each lug nut a quarter turn counterclockwise, just enough to break its resistance. Be sure to use enough force, but not too much, as this could damage the lug nuts.
Once all the lug nuts are loosened, you can now proceed to jack up the car. Remember, loosening the lug nuts is the first step to changing a tire, and it’s important to do it correctly to avoid potential mishaps on the road.
2. Jack Up the Car
Jack Up the Car – A Step-by-Step Guide Whenever you plan to do any work on your car underneath or change your car tires, it’s always essential to jack up your car to ensure safety. But incorrect handling of the jacking process can result in serious injuries or even death. To prevent such accidents, it’s crucial to follow the correct procedure of jacking up your car.
So, how do we do this? Firstly, you need to make sure that the ground surface is stable and not prone to sinking during the jacking up process. Once confirmed, locate the jacking points instructed in your car’s manual. These are usually located at the corners of the car, just beneath the doors.
Next, properly position your jack under the jacking point while ensuring the jack is placed on a stable area of the car’s frame. Then, raise the jack carefully until the car’s tire is completely off the ground. Once you ensure the car is stable and secure, place jack stands under the car’s frame.
Lastly, firmly set the jack stands at the appropriate height and lower the car on them, making sure that the weight of the car is resting fully on the stands. With these simple steps, you have successfully jacked up your car, ensuring your safety while working on it. Remember, it’s always better to prioritize your safety rather than rush the process and put your life in danger.
3. Remove the Tire from the Car
To remove a tire from your car, there are several steps you need to follow. First, locate your car’s jack and use it to lift the car off the ground. Next, use a lug wrench to loosen the lug nuts on the tire you want to remove.
Make sure not to completely remove them just yet. Once loosened, place a jack stand under the car to support it. Fully remove the lug nuts and gently pull the tire off the car.
If it’s stuck, give it a nudge or a gentle kick to loosen it. Before putting on a new tire, inspect the wheel well and hub for any damage or debris. Then, line up the new tire’s lug nut holes with the studs and tighten the lug nuts with the wrench in a star pattern.
Ensure the tire is properly inflated before lowering the car off the jack stand. Removing a tire may seem daunting at first, but with these steps, it can be done efficiently and safely.
4. Lubricate the Bead Area
When it comes to mounting tires on rims, lubricating the bead area is a crucial step that is often overlooked. The bead area refers to the part of the tire that comes into contact with the rim, and applying a lubricant can make the process much smoother. The lubrication reduces friction between the tire bead and the rim, allowing for easier mounting and preventing any damage that could occur.
The best lubricant to use for this job is a soap solution made of water and mild soap, as it is gentle on both the tire and the rim. Simply apply the solution to the bead area with a brush or spray bottle, and then proceed with mounting the tire. By taking the extra step to lubricate the bead area, you can ensure a smoother mounting process and protect your equipment from unnecessary wear and tear.
So, the next time you mount a tire, don’t forget to lubricate the bead area for a hassle-free experience.
5. Use the Bead Pusher to Pop the Bead
When it comes to changing your car’s tires, popping the bead can be one of the most challenging parts. That’s where the bead pusher tool comes in handy. Here is a step-by-step guide on how to use it.
Firstly, take off the tire from the vehicle, removing any hubcaps or lug nuts, and lay the tire flat on the ground. Then, place the bead pusher tool against the tire, ensuring it’s in the right position. Next, tap the bead pusher tool gently with a rubber mallet to push the bead into the grooves.
Once the bead is in the right position, you can add a lubricant to the tire’s interior sidewall to make the tire mounting easier. Finally, use the bead pusher tool to pop the bead completely, ensuring that it firmly fits into the rim. Remember, popping the bead can be tricky, so it’s essential to use the right tool and to do it with care.
With the help of the bead pusher, you can quickly and efficiently upgrade or change your car’s tires.
6. Check for Damage and Reinstall the Tire
Once you have carefully removed the tire from its rim, it’s essential to check for any significant damages. Look for cuts, punctures, and any signs of wear and tear, such as cracking, deformities, or flat spots. These damages might have been the reason for your flat tire.
It’s crucial to fix or replace your tire before putting it back on your vehicle to avoid any potential accidents. Reinstall the tire by first fitting one side of the tire back into the rim, then gradually pushing the other side into place. Once you have ensured that the tire is securely fitted onto the rim, inflate it with the recommended pressure.
Finally, double-check that all nuts and bolts are tightened, and the tire is correctly balanced. By correctly reinstalling your tire, you’ll ensure your safety while driving and enjoy a smooth ride.
Conclusion
In conclusion, popping a bead on a tire is the kind of satisfying process that makes you feel like a true tire whisperer. It requires a bit of muscle, a bit of technique, and maybe a few choice words, but mastering it will ensure you can efficiently change tires on the go and leave you feeling like a total badass. So go forth and pop some beads like a pro!”
Safety Precautions
Safety precautions are essential when performing any task or activity, and following a step-by-step guide is a crucial part of ensuring the safety of everyone involved. Before starting any task, it is important to assess the risks involved and take steps to mitigate them. This may involve wearing appropriate protective gear, such as helmets, gloves, and safety glasses.
Additionally, all tools and equipment should be inspected before use to ensure they are in good working condition and are properly maintained. When using tools, it is important to follow the manufacturer’s instructions, and never force a tool beyond its intended use. When working with chemicals, it is important to be aware of their properties and handle them with care, following all recommended safety procedures.
Finally, it is critical to always work in a well-lit and well-ventilated area and to avoid distractions while performing any task. By following these safety precautions and referring to a step-by-step guide, anyone can perform tasks safely and efficiently.
Take Care of Your Tires
Tire maintenance is an essential aspect of car ownership, and it is vital to ensure that your tires are properly cared for to prevent unexpected blowouts or poor performance. One effective step-by-step guide to keeping your tires in excellent condition includes checking the tire pressure regularly, ensuring that your tires are properly inflated, inspecting the tire tread for any signs of wear and tear, and rotating your tires regularly to promote even wear. Additionally, it is recommended to keep your tires cleaned, as any debris or dirt can cause damage to the rubber and affect their lifespan.
By following these simple steps and taking care of your tires, you can ensure that your safety on the road is never compromised, and your car maintains optimal performance. So, when was the last time you checked the air pressure in your tires?
FAQs
What are the benefits of using bead poppers for tire maintenance?
Bead poppers are an effective tool for breaking the bead seal on tires, making it easier to remove and replace tires for maintenance. This saves time and effort, and can also prevent damage to the tires during removal.
Can bead poppers be used on all types of tires?
Bead poppers can be used on most types of tubeless tires, including those with alloy wheels or low-profile tires. However, they may not be suitable for tires with a high aspect ratio or those with a stiff sidewall.
How do you use a bead popper to remove a tire?
To use a bead popper, first loosen all the lug nuts on the wheel. Then position the bead popper tool over the bead of the tire and apply downward pressure until the bead pops off the rim. Repeat on the other side to completely remove the tire from the wheel.
Are bead poppers safe to use on tires?
Bead poppers are generally safe to use on tires when used correctly. However, it is important to follow the manufacturer’s instructions and use appropriate safety gear, such as gloves and eye protection.
Can bead poppers be used for tire repairs?
Bead poppers are primarily used for removing and replacing tires, rather than for repairing them. However, they can make it easier to access the tire for repairs if necessary.
How do you maintain a bead popper tool?
To maintain a bead popper tool, keep it clean and free of debris. Lubricate any moving parts with a suitable lubricant, and store it in a dry, cool place.
Can bead poppers be used for all tire sizes?
Bead poppers can be used for most tire sizes, but may not be suitable for very small or very large tires. Always check the specifications of the tool to ensure it is suitable for the tire size you are working with.


