Are you a DIY enthusiast who enjoys working on your car? If so, you might have encountered problems removing or replacing tires due to the tire beads being stubbornly stuck to the rim. Breaking tire beads is a crucial aspect of tire maintenance, and it can be challenging, especially if you are new to the whole process. In this guide, we will walk you through the process of breaking tire beads simply and effectively.
Imagine trying to take off a stubborn jar lid that won’t budge. Now, multiply that by ten, and you have an idea of the challenge that breaking tire beads presents. The beads are rubber edges located on the inner part of the tire that hold it tightly onto the rim.
They play a crucial role in maintaining the integrity and safety of the tire, but they can also prove to be a headache when they refuse to come loose. Whether you want to change a tire or fix a puncture, breaking the tire beads will be the first step that you need to take. It involves applying pressure in the right areas to force the beads out of the rim, allowing you to proceed with your repairs or replacements.
But, it requires patience, attention to detail, and the right tools to get the job done right. In this guide, we will show you how to break tire beads using a variety of methods and tools. From using tire-changing machines, to employing homemade solutions or simple hand tools, we will provide a comprehensive overview of each approach’s pros and cons.
Ultimately, this guide will give you the confidence to tackle any tire-related repair with ease.
Table of Contents
Introduction
If you’re looking to change a tire or repair a puncture, you’ll need to know how to break the bead before you can remove the tire from the wheel. The tire bead is essentially the seal between the tire and the rim, and it can be challenging to break it without damaging the tire or the wheel. One way to break the bead is by using a bead breaker tool, which is designed to apply force and separate the tire from the rim.
You can also use a pry bar or a hammer and chisel, but these require more finesse and can be riskier. Whichever method you choose, be sure to position yourself and your tools carefully, wear protective gear, and take your time to avoid accidents. With a little patience and practice, you can become adept at breaking the tire bead and tackling tire repairs like a pro.
Understanding Tire Beads
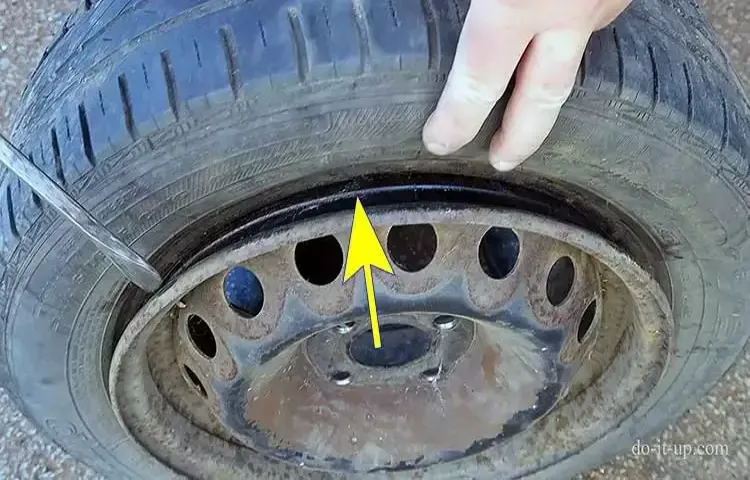
When it comes to understanding tire beads, there may be some confusion as to what exactly they are and how they work. In simplest terms, tire beads refer to the metal wires located on either side of the tire that help to hold it securely onto the rim. These beads are essential to the overall functionality and safety of the tire, as they ensure a tight and stable fit between the tire and rim.
Without properly functioning tire beads, a tire may not be able to maintain its shape and may even come off the rim while driving. Therefore, it is important for drivers to understand the role that tire beads play in maintaining the integrity of their tires and take any necessary measures to ensure that these beads are functioning properly.

Why Break a Tire Bead?
Tire bead breaking might not be a widely known practice to many people, but it is a necessary one for anyone working with tires. A tire bead is the edge of the tire that fits snugly onto the wheel rim. Breaking the bead involves separating this edge from the rim to access the tire’s inner workings or to replace it altogether.
There are various reasons why you might need to break a tire bead, including fixing a flat tire, mounting and dismounting tires, and changing the tire’s inner tube. By breaking the bead, mechanics and tire specialists can easily access the tire’s interior, making repairs quicker and more efficient. If you need to replace the tire, breaking the bead makes it easier to remove the old tire and fit a new one.
Overall, breaking a tire bead is a crucial aspect of tire maintenance, repair, and replacement.
Tools and Materials
Breaking a tire bead can be a difficult task, but with the right tools and materials, it can be done without too much hassle. The first thing you’ll need is a tire machine, which is designed specifically for this kind of work. Once you have the machine, you’ll also need a tire bar and a bead breaker.
These tools are designed to help you break the bead away from the rim, making it easier to remove the tire from the wheel. In addition to the tools, you’ll also need some lubricant to help loosen up the bead and make it easier to work with. You can use a wide variety of lubricants, including soapy water, WD-40, or even tire shine.
Before you start using the tools, it’s important to deflate the tire completely first. Once you’ve done that, you can begin the process of breaking the bead. Remember to take your time and be careful, as this job can be dangerous if not done correctly.
With the right tools and materials, however, you should be able to break the bead and remove the tire with ease.
What You’ll Need
If you’re preparing for a DIY project, having the proper tools and materials is crucial for success. Depending on the nature of your project, you might require a variety of tools, including hammers, screwdrivers, saws, drills, pliers, and wrenches. Each of these tools comes in different types and sizes, so make sure you choose the ones that are suited for your specific task.
It’s also essential to stock up on materials, such as wood, paint, nails, screws, glue, and sandpaper, among others. These materials can be found at your local hardware store or online retailers. When purchasing tools and materials, make sure you consider the quality and price point.
It’s better to invest in higher quality tools and materials that will last longer and help you achieve better results. By having the right tools and materials, you’ll be well-prepared and set up for success when tackling your next DIY project.
Safety Precautions
When it comes to DIY projects, it’s important to prioritize safety precautions, and that includes having the right tools and materials. Before starting any project, ensure that you have all the necessary tools and materials, and that they’re in good working condition. This not only ensures the quality of your work, but also keeps you safe from accidents.
For instance, if you’re using power tools, make sure they have safety guards and that you know how to use them properly. Additionally, wearing appropriate safety gear like safety glasses, gloves, and masks can protect you from any hazardous materials or chemicals that you may come in contact with. Remember, taking the time to prepare for your project and prioritize safety will allow you to enjoy the process and feel confident in your abilities.
The Process of Breaking a Tire Bead
Breaking a tire bead is an important skill to have in your arsenal, especially when changing tires on a vehicle. The process can seem intimidating, but it’s actually quite simple if you follow a few key steps. First, deflate the tire completely by removing the valve stem.
Next, use a bead breaker tool to break the seal between the tire bead and the wheel. This can be a specialized tool or a simple piece of equipment like a two-by-four or metal pipe. Once you’ve broken the seal, use a tire iron to pry the bead away from the wheel.
You may need to repeat this process on both sides of the tire to completely break the bead. With the bead broken, you’re ready to remove the tire from the wheel and begin the process of changing or repairing your tire. With these steps in mind, breaking a tire bead can become a quick and easy task that you can easily tackle on your own.
Step 1: Loosening the Rim
Breaking the bead on a tire can be a tough task without the right tools and knowledge on how to do it. But worry not! With a few simple steps, you can break the tire bead easily and quickly. The first step in the process of breaking a tire bead is to loosen the rim.
To do this, use a tire iron to remove the valve stem core and deflate the tire completely. Next, use a bead breaker tool to break the seal between the tire bead and the rim. Place the tool on the outside of the tire sidewall, and use the foot pedal to press down on the tire bead until it pops off the rim.
Once the tire bead is loose, use another tire iron to work it around the rim until it comes off completely. By following these simple steps, you’ll be able to break the tire bead with ease, allowing you to repair or replace the tire quickly and efficiently.
Step 2: Inserting the Bead Breaker
When it comes to breaking a tire bead, the second step is to insert the bead breaker. This may seem like an easy task, but it’s important to do it correctly to avoid damaging the tire or the tool. First, make sure the rim is positioned properly, either on the ground or in a tire changing machine.
Then, lift the bead breaker and place its blade between the tire and the rim, making sure to position it at the base of the bead. Once the blade is in place, use the handle to push down on the breaker until it locks into place. This will create a gap between the tire and the rim, allowing you to remove the tire.
Remember to be gentle when using the bead breaker to avoid harming both the tool and the tire. By following these steps, you’ll be able to insert the bead breaker with ease and move onto the next step in the tire changing process.
Step 3: Breaking the Bead
Breaking the bead on a tire is no easy task, but with the right tools and technique, it can be done quickly and efficiently. The bead is the part of the tire that fits securely onto the rim, and it is essential to break it in order to remove the tire. There are a few ways to do this, but one of the most common methods is to use a bead breaker tool.
This tool is shaped like a clamp and is designed to apply pressure to the tire sidewall, forcing the bead to break away from the rim. Another method is to use a hydraulic press, which can be more powerful and easier to use. Regardless of which method you choose, it is important to take your time and work carefully to avoid damaging the tire or rim.
Once the bead is broken, the tire can be easily removed and replaced with a new one. So, if you need to break the bead on your tire, make sure you have the right tools and technique, and take your time to do it safely and correctly.
Step 4: Removing the Tire from the Rim
Breaking a tire bead can be a daunting task for those who are not familiar with the process, but it is necessary when removing a tire from a rim. The first step is to deflate the tire completely. Next, locate the mounting dots on the tire and the valve stem, which will help you keep track of the tire’s original position on the rim.
Then, use a tire iron to pry the bead away from the rim, working your way around the tire in a clockwise or counterclockwise direction until the bead is completely loose. Once the bead is free, you can use your hands to push the tire off the rim, being careful not to damage the tire itself. Breaking a tire bead requires some patience and elbow grease, but with some practice, anyone can do it successfully.
Conclusion
In conclusion, breaking a tire bead can be a daunting task, but with the right tools and techniques, it can be done in a snap. Remember, persistence and determination are key. If at first you don’t succeed, try, try again.
And if all else fails, just call in the professionals – they’ve got the gear and know-how to get the job done right. Now go forth and conquer those stubborn tire beads, one hit at a time!”
Safety Reminders
When it comes to changing a tire, knowing how to properly break the bead is crucial to safely completing the task. The bead is the part of the tire that sits on the rim, and breaking it requires force and precision. Before attempting to break the bead, it’s important to consult your vehicle’s manual and use a proper tire-changing stand or tool.
Additionally, eye and hand protection should always be worn to protect from flying debris or injury. To break the bead, first, remove the valve stem core to release any air trapped in the tire. Then, use a bead breaker tool to push against the sidewall until the bead pops loose from the rim.
Remember to always work slowly and methodically, being mindful of the pressure and positioning of the tire. By following these safety reminders, you can ensure a successful tire change without risking harm to yourself or your vehicle.
Other Tips and Tricks
Breaking a tire bead can seem daunting, but with the right tools and technique, you can do it yourself without damaging your tire or rim. The first step is to remove the air from the tire and place it on a tire changing stand or secure it with blocks. Then, using a tire iron or bead breaker tool, loosen the tire bead where it meets the rim by applying pressure on both sides of the tire.
Once the bead is loose, work your way around the tire until both beads are off the rim. Remember to take extra care when using tools as they can easily damage the tire. By following these steps, you’ll be able to break a tire bead safely and efficiently.
Happy Bead Breaking!
Breaking a tire bead can be a challenging process, but with the right tools and techniques, it can be done easily. First, you’ll need to remove the wheel from the vehicle and release the air pressure from the tire. Then, use a bead breaker tool to apply pressure to the sidewall of the tire and break the bead away from the rim.
This can be done using a specialized bead breaker tool or a regular tire iron. Once the tire is loose, use tire spoons to remove it from the rim, being careful not to damage the tire or rim in the process. It’s important to take your time and use caution during this process, as improper technique can cause serious injury or damage to your equipment.
With a little patience and practice, however, happy bead breaking can be achieved!
FAQs
What tools do I need to break a tire bead?
To break a tire bead, you’ll need a tire bead breaker tool, tire irons, a tire mounting lubricant, a rubber mallet, and a tire pressure gauge.
Can I break a tire bead without using a tire bead breaker tool?
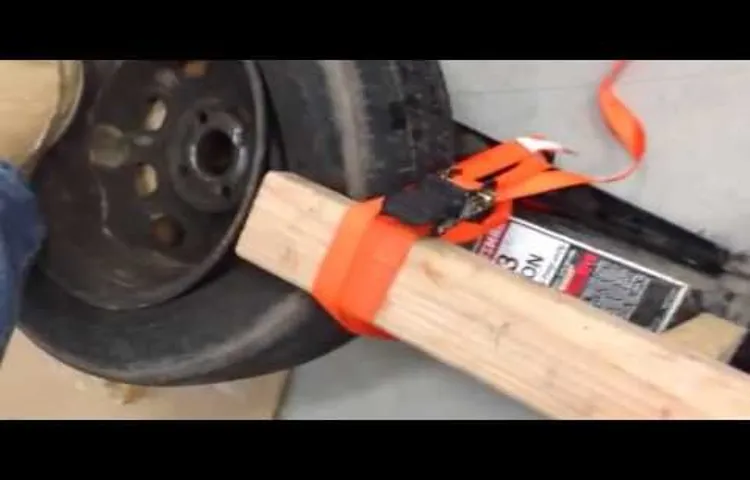
Yes, you can break a tire bead without using a tire bead breaker tool, but it can be more difficult and time-consuming. Instead, you can use a floor jack, a hammer, and a piece of wood to break the bead.
How much force do I need to apply to break a tire bead?
The amount of force required to break a tire bead can vary depending on the type of tire, the rim size, and the amount of pressure in the tire. Generally, you’ll need to use a significant amount of force to break the bead.
What is the safest way to break a tire bead?
The safest way to break a tire bead is to use a tire bead breaker tool designed for that purpose. These tools are specifically designed to break beads safely and efficiently without damaging the tire or the rim.
How do I use a tire bead breaker tool?
To use a tire bead breaker tool, you’ll need to position the tool against the side of the tire and push down to break the bead. Then, you can use tire irons to remove the tire from the rim.
Can I reuse a tire after breaking the bead?
Yes, you can reuse a tire after breaking the bead, but it’s important to inspect the tire carefully for any damage or wear before remounting it on the rim.
Is it safe to break a tire bead myself, or should I take it to a professional?
Breaking the tire bead can be a challenging task, and it requires a lot of force and precision. If you’re not comfortable doing it yourself or don’t have the necessary tools, it’s best to take your tire to a professional to have it changed.


