Mounting a dirt bike tire can be an intimidating task, especially if you’re new to the world of dirt biking. But don’t let it discourage you from getting your hands dirty and learning how to do it yourself. Knowing how to mount a dirt bike tire is a crucial skill that can save you time and money in the long run.
Replacing a tire at home can also be a fun and fulfilling task, one that can give you a better understanding of your dirt bike and its components. But, where do you begin? What tools do you need? This blog post will guide you through the process, step-by-step, and get you back to riding in no time. So, let’s dive in and tackle this task together!
Table of Contents
Gather the Required Tools
To mount a dirt bike tire, you will need a few important tools. First, you will need a designated dirt bike tire stand or lift to work on. This will help keep the tire elevated and provide a stable base to work on.
Next, you will need a set of tire spoons or irons to remove the old tire and install the new one. A valve stem removal and installation tool will also be needed to remove and replace the valve stem. An air compressor is also crucial for inflating the tire once it is mounted.
It’s important to make sure all of these tools are of high quality and in good condition to ensure a successful tire mounting process. With these tools on hand, you’ll be well-prepared to mount your dirt bike tire with ease and efficiency.
Tire Irons, Valve Stem Tool, Lubricant
When it comes to changing a tire, gathering the required tools is the first step. A tire iron or a lug wrench is an essential tool used to remove the lug nuts that hold the tire in place. It’s important to make sure you have the correct size tire iron that fits the lug nut size of your vehicle.
Another crucial tool is a valve stem tool to remove and replace the valve cap and valve core. Lubricant is also necessary to help loosen the lug nuts and make the whole process easier. It’s best to use a water-displacing spray lubricant for this job.
Having all of these tools on hand before attempting to change a tire can save you time and frustration. Remember, safety is always a top priority, so make sure you have a spare tire that’s in good condition and use jack stands to support the vehicle while changing the tire.

Remove the Old Tire
When it comes to mounting a dirt bike tire, the first step is to remove the old tire. Before starting the process, ensure that your bike is stable and secure. Use a stand, a center stand, or a paddock stand to avoid causing damage to the bike.
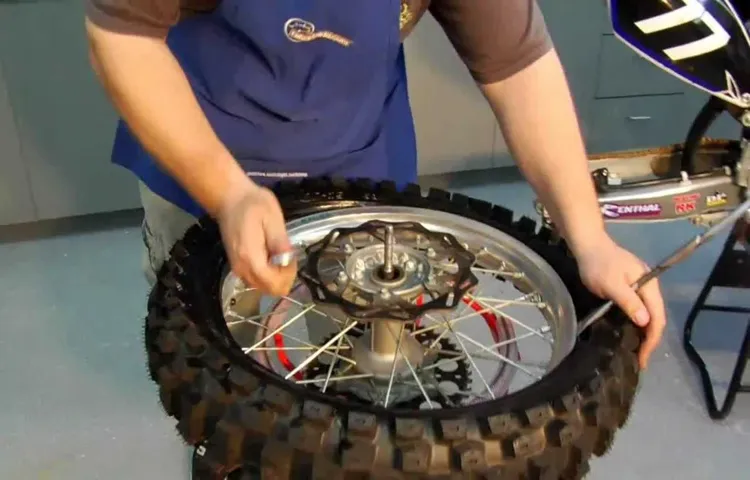
Next, loosen the bolts on the wheel and remove it from the bike. Once you have removed the wheel, carefully deflate the tire completely by removing the valve stem. You might need a tire spoon or a small pry bar to remove the tire from the wheel.
Be careful while removing the tire as they are tightly fit and could burst out suddenly. Now, clean the wheel thoroughly with a degreaser, and you are all set to mount your new tire. Overall, removing the old tire is a critical step in mounting a new tire, and it’s essential to do it with care to avoid damaging your bike or yourself.
Deflate Tire, Loosen Bead, Remove Tire Using Tire Irons
When it’s time to replace your old tire, it’s important to remove it properly to avoid any damage to your wheel or vehicle. First, deflate the tire completely by removing the valve cap and pressing down on the valve stem. Use a tire gauge to ensure the tire is fully deflated.
Then, lubricate the tire irons to help prevent damage to the tire and rim as you work. Starting at the bead opposite the valve stem, insert the tire iron between the tire and rim and pry the bead up and over the rim. Work your way around the tire, using two tire irons if necessary, until the tire is completely off.
Be sure to inspect the inner surface of the tire for any signs of damage or wear, and check the valve stem and rim for any signs of corrosion or leaks. Removing an old tire can be challenging, but taking the time to do it properly will help ensure your safety and the longevity of your new tire.
Inspect the Rim and Tire
Mounting a dirt bike tire can be a bit of a tricky process, but with the right steps, it can be done easily. First and foremost, inspecting the rim and tire is crucial to ensure that the fit is correct. Check the condition of the rim and make sure there are no cracks or damage that could affect the tire’s performance.
Also, look for any debris that may have gotten lodged in the rim or tire from the last ride. Next, make sure the size of the tire matches the size of the rim. This is important for proper alignment and stability while riding.
Finally, check the tire pressure and adjust it if necessary. If the tire is too low on pressure, it could cause the motorcycle to handle poorly. By taking the time to inspect the rim and tire before mounting, you can ensure a smooth and safe ride.
Check for Damage and Wear
As a responsible car owner, it’s essential to regularly inspect your rim and tire for any damage or wear. This is especially true if you frequently drive on rough roads or encounter potholes. Start by checking the rim for any cracks, dents, or bends that could compromise its structural integrity.
If you detect any signs of damage, it’s crucial to address them immediately before they worsen and cause a dangerous blowout. Next, inspect the tire for any cuts, punctures, or bulges. These could indicate that the tire is worn out and needs replacing.
Additionally, note any uneven wear patterns, which could signal an alignment or suspension issue. By taking the time to inspect your rim and tire regularly, you can prevent inconvenience and ensure your safety on the road.
Mount the New Tire
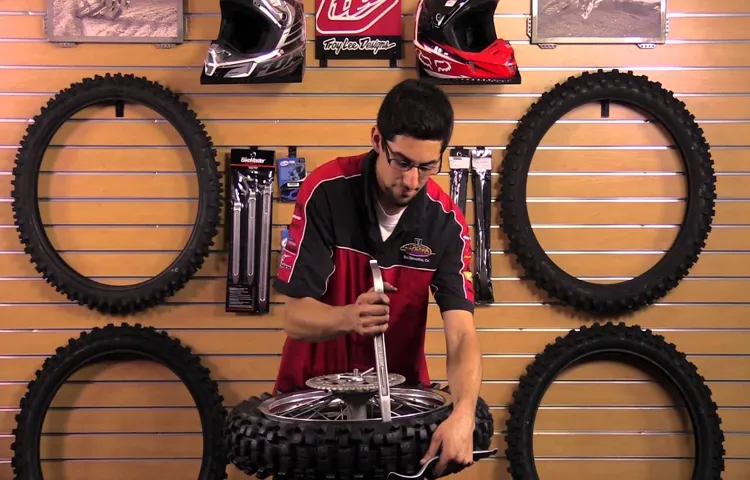
Mounting a dirt bike tire can seem like a daunting task, but with the right tools and approach, it can be done. To begin, place the new tire over the rim, ensuring that the arrow on the tire is pointed in the direction of rotation. Next, use specialized tire levers to carefully work the tire onto the rim, starting at the opposite side of the valve stem.
Once the tire is mostly mounted, add air to the tire and use soapy water to lubricate the remaining section of the tire. This will make it easier to slide the tire onto the rim. You’ll want to be careful not to pinch the tube between the tire and the rim during this process, as that can cause a flat.
Once the tire is fully mounted, double check that it’s seated evenly all the way around the rim. With the tire mounted, you’re ready to hit the dirt and enjoy your ride!
Lubricate Beads, Place Tire onto Rim, Use Tire Irons to Mount
Mounting a new tire onto a rim can be a challenging task, but with the right technique and tools, it can be done smoothly. Before starting, make sure to lubricate the beads of the tire and rim to reduce friction during the installation process. Once the beads and rim are lubricated, take the new tire and place it onto the rim.
With the tire in place, use tire irons to hook onto the edge of the tire’s bead and push it onto the rim. Use multiple tire irons to work around the tire’s circumference, making sure that the bead is evenly mounted onto the rim. Be sure to use caution and keep your fingers and hands away from the tire irons during this process to avoid injury.
Once the tire is fully mounted, double-check the alignment and pressure, then tighten the valve stem cap to secure the tire in place. With these steps followed, the process of mounting a new tire onto a rim can be completed safely and efficiently.
Inflate the New Tire
When it comes to mounting a dirt bike tire, one crucial step is inflating the new tire. Before you get started, make sure you have the correct air pressure set by referencing your owner’s manual. Using a portable air compressor or tire inflator, carefully attach the nozzle to the valve stem and begin inflating the tire.
As you inflate the tire, ensure that it is centered and balanced on the rim. Keep an eye on the pressure gauge to ensure that you do not overinflate the tire, as this can lead to blowouts and other complications. Once the tire is at the recommended pressure, be sure to recheck the pressure after a few rides, as the tire may require further adjustment.
With a properly inflated tire, you’ll be ready to take on the toughest terrain with ease.
Add Air and Check Pressure
Inflate the New Tire: Add Air and Check Pressure Once you’ve changed your tire on the side of the road or in your garage, the next step is to inflate the new tire. Start by checking the recommended pressure listed on the sidewall of your tire or in the owner’s manual of your vehicle. Using a tire pressure gauge, check the current pressure of the tire to ensure it matches the recommended amount.
If it’s low, you’ll need to add air until it’s properly inflated. It’s important to note that you should never overinflate your tire, as this can lead to blowouts and reduced stability while driving. Overinflated tires can also cause excessive wear in the center of the tread.
On the other hand, underinflated tires can lead to reduced fuel economy, uneven wear, and increased risk of blowouts. To add air, you’ll need either a portable air compressor or a manual hand pump. Attach the air hose to the tire’s valve stem and inflate the tire until it reaches the recommended pressure.
Once you’ve added air, check the pressure again with your gauge to ensure that it’s accurate. If you’ve overinflated the tire, use the gauge to release some air until it reaches the correct pressure. In conclusion, inflating your new tire can be a simple and straightforward process, but it’s important to check the pressure regularly to avoid potential hazards on the road.
Always keep a tire pressure gauge and a portable air compressor handy in your vehicle, just in case you need to inflate your tire quickly while on the go. Remember to follow the recommended pressure guidelines listed on your tire and in your owner’s manual to ensure proper performance and longevity.
Test the New Tire
If you’re a dirt bike enthusiast, you know that changing tires is a necessary part of regular maintenance. Mounting a new tire can be intimidating for some, but with the right tools and technique, it can be a straightforward process. Start by removing the old tire from your bike by breaking the bead with a tire iron.
Then, use the same tool to pry the tire away from the rim. Once the old tire is removed, it’s time to mount the new one. Begin by lubricating the bead of the tire with soapy water or tire mounting lube, which will help it slide onto the rim.
Hold the tire in place and use the same tire iron to push the bead over the rim. Finally, inflate the tire to the manufacturer’s recommended pressure and test it out. Remember, if you’re not confident in mounting your dirt bike tire yourself, it’s always best to leave it to the professionals.
Check for Leaks, Take a Short Test Ride
Before taking your bike out for a spin, it’s crucial to check for any leaks and take a short test ride to ensure the new tire is a perfect fit. Start by inspecting the tire for any visible defects or damage that may compromise its performance. Check the tire pressure and make sure it matches the manufacturer’s recommendation.
Next, look for any leaks by spraying water or soapy solution around the tire. Observe any bubbles that form, indicating a leak. Once you’ve determined that the tire is free from leaks and damage, take a short test ride to get a feel for the new tire.
Ride in a straight line, then gradually increase your speed and take a few turns to test the tire’s grip and stability. Don’t forget to also test the brakes on the new tire. These simple steps will ensure that you can ride safely and confidently with your new tire.
Conclusion
And that, my dear friend, is how you mount a dirt bike tire! It may seem like a daunting task, but with the right tools and a bit of practice, you’ll be flying through it in no time. So go ahead, grab your tire, your spoon, and your tire irons, and get to work. Who knows, you may even impress your riding buddies with your newfound tire-mounting skills.
Just remember to always wear protective gear and approach the task with confidence. Happy riding!”
FAQs
What tools do I need to mount a dirt bike tire?
You will need a tire changer, rim protectors, bead breaker, tire spoons, and tire lubricant.
How do I remove the old tire from my dirt bike rim?
Use a bead breaker to loosen the tire from the rim, then use tire spoons to carefully remove the tire from the rim.
Is it necessary to balance my dirt bike tire after mounting it?
Yes, it is important to balance your tire to ensure proper handling and stability while riding.
What should I do if I don’t have access to a tire changer?
You can try using manual methods such as using tire irons to break the bead and mount the new tire.
How often should I replace my dirt bike tire?
It is recommended to replace your tire after every 40 hours of riding or if you notice any signs of wear such as cracking or loss of tread.
What are some tips for properly mounting a dirt bike tire?
Make sure to use rim protectors to prevent damage to the rim, lubricate the tire beads, and double-check the tire pressure after mounting.
Can I reuse an old inner tube when replacing my dirt bike tire?
It is not recommended to reuse an old inner tube as it may have experienced wear and tear and could potentially cause a flat tire while riding.


