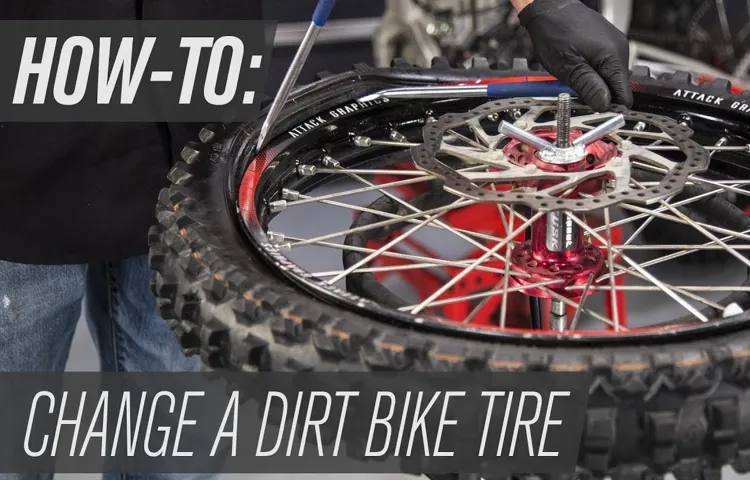
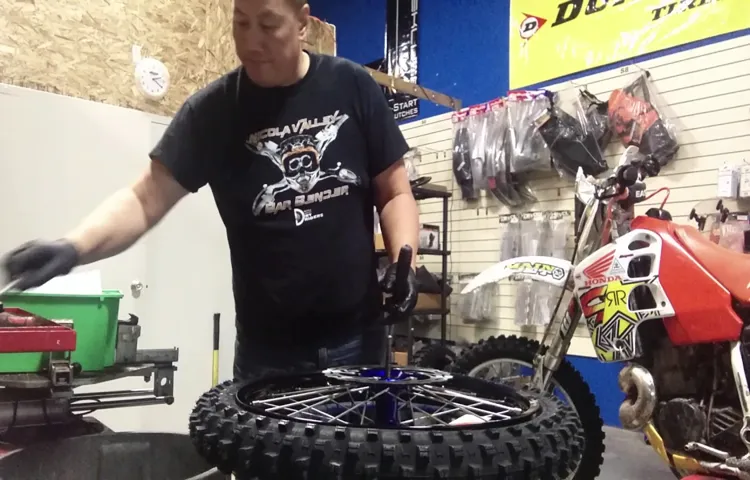
If you’re an avid motocross or off-road rider, you know that changing your dirt bike tire is a skill that you need to master. Not only can expertly changing your tires save you money, but it can save you time. However, for those who are new to the world of dirt bike maintenance, putting a tire on can seem like a daunting task.
But fear not, because with a little bit of practice and the right tools, anyone can become a tire-changing pro. In this blog post, we’ll walk you through the step-by-step process on how to put a dirt bike tire on. From removing the old tire to installing the new one, we’ll cover everything you need to know.
We’ll also provide tips and tricks to make the process smoother and less intimidating. But before we dive in, it’s important to note that changing a tire can be dangerous if not done correctly. Always wear protective gear and take caution when handling the bike and tire.
If you’re unsure about any step, it’s best to consult a professional mechanic. Now, let’s get started on becoming a master tire-changer.
Table of Contents
Gather Supplies
If you’re looking to put a new tire on your dirt bike, the first thing you need to do is gather all the necessary supplies. You’ll need a new tire, a tire iron, a rubber mallet, and some lubricant. Make sure you get the right size tire for your bike and that it has the appropriate tread for the type of riding you’ll be doing.
Once you have all of your supplies ready, you can start removing the old tire from your bike. Start by loosening the bead of the tire with the tire iron, then work your way around the tire until it comes off. Once the old tire is off, it’s time to put the new tire on.
Apply some lubricant to the rim to help the tire slide on more easily. Use the tire iron to work the tire onto the rim, and use the rubber mallet to gently tap it into place. Once the tire is on, make sure the bead is securely seated on the rim and give it a test ride to make sure everything feels good.
With a little practice, you’ll be able to change your dirt bike tire in no time!
Tire Irons, Lubricant, Air Compressor
Gathering the right supplies is crucial when it comes to maintaining your vehicle’s tires. Tire irons, lubricant, and an air compressor should be at the top of your list. Tire irons are essential for removing and replacing tires, while lubricant helps to prevent friction between the tire and the rim during this process.
An air compressor is necessary for inflating tires to the correct pressure, which can help improve gas mileage and make your car run more smoothly. It’s important to make sure you have the right tools on hand before attempting any tire maintenance on your own. With the right supplies and some basic knowledge, you’ll be able to keep your tires in great shape for miles to come.

Prepare the Bike for Tire Change
Putting on a dirt bike tire may seem like a daunting task at first, but with the right preparation, it can be a smooth process. To start, ensure that you have all the necessary tools, such as a tire lever, rim protectors, and a valve stem tool. Before removing the old tire, clean the rim and inspect it for any damage or cracks.
Next, deflate the tire and use the tire lever to remove the bead from the rim. Take note of the direction of the tire’s rotation and position it accordingly when installing the new tire. Start by installing the bead onto the rim and use rim protectors to prevent scratching.
Then, use the tire lever to work the rest of the bead onto the rim. Finally, use a valve stem tool to install the valve stem, inflate the tire, and check for proper pressure. With these steps, you’ll be able to confidently install a new dirt bike tire and be ready for your next adventure.
Stand the Bike Up, Remove Axle, Loosen Wheel Bolts
Before changing a bike tire, it’s crucial to prepare the bike. The first step is to stand the bike up, either on a stand or by balancing it with the kickstand. Then, remove the axle by loosening the bolts that hold it in place.
Be sure to have the necessary tools on hand, such as a wrench, to make this process easier. Once the axle is removed, loosen the wheel bolts. This will make it easier to remove the tire from the bike.
Keep in mind that not all bikes have the same type of axle or wheel bolts, so it’s crucial to consult the bike manual if you’re unsure of the process. Ensuring that the bike is prepared properly will make the tire change process smoother and safer. You don’t want to start changing the tire only to realize that the bike isn’t stable or that you don’t have the correct tools on hand.
Preparing ahead of time can save you time, frustration, and potentially hazardous situations down the road.
Remove Old Tire
If you’re wondering how to put a dirt bike tire on, the first step is to remove the old tire. This may seem obvious, but it’s an important first step that can’t be overlooked. To do this, you’ll need a few tools, including a tire iron and a bead breaker.
First, loosen the axle nut and remove the chain. Then, use the tire iron to remove the valve core and deflate the tire. Next, use the bead breaker to break the bead on both sides of the tire.
Once the tire is loose, use the tire iron to remove it from the rim. Be careful not to damage the rim or the tire during this process. With the old tire removed, you can now move on to installing the new tire – but that’s a topic for another post! Remember to wear protective gear and work in a clean, well-lit area when working on your dirt bike.
Deflate Tire, Break the Beads, Remove Tire
If you need to remove an old tire from your vehicle, there are a few steps you’ll need to follow. First, start by deflating the tire completely. This will make it easier to handle and manipulate.
Next, you’ll need to break the tire beads – the rubber that sits against the rim. There are a few tools you can use to do this, such as a specialized pry bar or bead breaker tool. Once the beads have been broken, you should be able to remove the tire from the rim.
This can be done using tire irons or other specialized tools. It’s important to be careful while doing this, as the tire can be heavy and difficult to handle. With a bit of patience and care, however, you should be able to successfully remove the old tire.
And once you’ve done so, you can get started on putting on a new one – which will hopefully give you smoother driving experience and better overall performance on the road. Keyword: Remove old tire.
Install New Tire
Installing a new tire on your dirt bike can seem daunting at first, but with the right tools and proper technique, it can be a straightforward process. First, remove the old tire by loosening the bolts with a wrench and prying the tire off with a tire iron. Next, inspect the rim and clean it thoroughly before placing the new tire onto it.
Use the tire iron to work the tire onto the rim gradually, starting at one edge and working your way around to the other. Once the tire is fully seated on the rim, inflate it to the recommended pressure and double-check that it’s aligned properly. Finally, tighten the bolts on the rim to secure the tire in place, and you’re good to go.
Remember to take your time and be careful as you work, and always follow the manufacturer’s instructions for your specific tire model. With a little patience and practice, putting a new tire on your dirt bike can become a routine task that you can do confidently on your own.
Install Valve Stem, Place Tire on Rim, Use Tire Irons to Position Beads
Installing a new tire on a rim can be intimidating, but with the right tools and a little elbow grease, you can do it yourself. First, make sure you have the correct tire size and type for your vehicle. Once you’ve removed the old tire, install the valve stem on the rim.
Next, place the tire on the rim and use tire irons to position the beads. This can be a little tricky, but with practice, you’ll get the hang of it. It’s important to make sure the beads are properly seated before inflating the tire.
Once the tire is inflated, double-check the alignment and make any necessary adjustments before hitting the road. In order to successfully install your new tire, you’ll need to use tire irons. These tools allow you to position the beads of the tire on the rim, but it can take some practice to get the hang of it.
Think of it like a puzzle – you’ll need to work out the best way to get the beads in place. Don’t rush it, or you could damage the tire or the rim. Remember to always double-check your work before inflating the tire, as a poorly seated bead could cause a blowout while you’re driving.
With a little patience and attention to detail, you’ll have your new tire installed and ready to go in no time.
Seal Tire and Inflate
Putting a dirt bike tire on can be a bit of a challenge for those who have never done it before. One method is to first lubricate the inside of the tire with tire mounting lubricant. Next, place one side of the tire onto the rim and use tire levers to work the other side of the tire onto the rim.
Once the tire is on the rim, it’s time to seal the tire by filling it with air, making sure to keep the valve stem at the 12 o’clock position. To inflate the tire, use a compressor or a hand pump with a pressure gauge to ensure the tire is filled to the recommended psi. Lastly, check the seal again and make sure the tire is properly seated on the rim.
With practice and patience, putting a dirt bike tire on can become a quick and easy task. So, don’t be intimidated, grab some tire levers and get to work!
Apply Lubrication, Reinstall Axle, Tighten Bolts, Inflate Tire
If you have a flat tire on your bicycle, you need to take certain steps to fix it. First, you need to locate the hole or puncture in the tire. Once you find it, ensure that you clean the damaged area thoroughly.
Then, apply a lubricant to the edges of the hole. This will help the sealant bond to the tire and make it easier to insert. The next step is to insert the sealant into the hole and work it in by squeezing and pressing on the tire.
After the sealant is in place, inflate the tire to the recommended pressure level. Now that the sealant has had time to set, it’s time to reinstall the axle and tighten the bolts. It’s essential to ensure that you tighten everything securely, so the wheel can rotate properly.
Once you have done this, it’s time to inflate the tire to ensure that the wheel rotates correctly and doesn’t wobble or shake. If you’re not sure how much air pressure is required, check the tire sidewall for details. Finally, give the tire a spin to ensure everything is working correctly.
If everything is working well, then you’re ready to hit the road again and enjoy your ride. Remember to apply the lubrication, reinstall the axle, tighten bolts, and inflate the tire properly. So, next time you have a flat tire, follow these steps to fix it on your own!
Test Ride and Inspection
Putting a new dirt bike tire on is not as difficult as it may seem, but it does require some preparation. First, you need to have the proper tools to remove the old tire. You will need a tire iron, rim protectors, and maybe even a valve core removal tool.
Once you have the tools, you need to remove the old tire and inspect the tire and rim for any damage. If the rim is damaged, it may need to be repaired or replaced. The next step is to install the new tire, which is relatively easy if you use the proper technique.
Start by lubricating the rim and tire bead, then work the tire onto the rim using the tire irons. Make sure the tire is properly seated on the rim and that the bead is completely inside the flange of the rim. Finally, inflate the tire to the recommended pressure.
Remember that a brand new tire will need some breaking in, so take it easy on the first few rides. By following these steps, you will have a new tire on your dirt bike in no time.
Check Tire Pressure, Ensure Proper Placement
When it comes to test riding and inspecting your bike, there are a few important things to keep in mind. Firstly, check your tire pressure and ensure they are properly placed. This will not only improve your bike’s performance but also increase safety by reducing the risk of accidents.
Riding with underinflated or misaligned tires can lead to poor traction, unstable handling, and increased wear and tear on your tires. To check your tire pressure, you can use a simple gauge or consult your bike’s manual. Once you have confirmed the pressure is within the recommended range, check that the tires are properly aligned.
This means making sure that the tires are sitting straight on the rim and that they spin freely without any wobble or bumping. Taking these simple steps will help ensure that your ride is smooth, comfortable, and safe on your bike.
Conclusion
And there you have it, folks! Putting a dirt bike tire on is all about technique, finesse, and a dash of bravery. It’s like a dance, a dance between you, the tire, and your trusty tools. So the next time your off-road adventures leave you with a flat tire, fear not! With this guide, you’ll be able to don your mechanic hat and get your bike up and running in no time.
Remember: confidence is key, and a successful tire change will leave you feeling like the king or queen of the dirt trails. Happy riding!”
FAQs
What tools do I need to put a dirt bike tire on?
You will need a tire iron, a valve stem tool, and an air compressor.
Can I change a dirt bike tire without a tire changer?
Yes, it is possible to change a dirt bike tire without a tire changer, although it may be more difficult.
How do I remove the old tire from my dirt bike?
Use a tire iron to break the bead on the old tire, then remove it from the rim.
How do I install a new tire on my dirt bike?
Lubricate the bead of the new tire, then use a tire iron to lever it onto the rim.
How much air pressure should I put in my dirt bike tire?
Consult your owner’s manual or tire manufacturer’s instructions for recommended tire pressure.
Can I ride my dirt bike with a punctured tire?
It is not recommended to ride with a punctured tire, as it could cause further damage or loss of control.
How often should I change my dirt bike tires?
The lifespan of dirt bike tires varies depending on usage, but it is recommended to replace them at least once a year.


