Getting a flat tire is one of the last things you want to deal with, especially if you’re on the road and in a hurry. While some punctures can be easily resolved with just a patch or plug, damage to the tire’s sidewall can be a bit more complicated to handle. Fortunately, patching a sidewall isn’t impossible, and it’s something you can do right in your garage with the proper tools and techniques.
In this blog post, we will guide you through the steps of patching a sidewall of a tire, providing you with useful tips and tricks to ensure a successful repair. So, grab your tools, and let’s get to work!
Table of Contents
Gather Materials
If you need to patch the sidewall of your tire, the first step is to gather all the necessary materials. You will need a tire patch kit, which typically includes rubber patches, abrasive pads, a tube of rubber cement, and a metal rasp for roughening up the surface of the tire. You’ll also need a valve core tool if your tire has a valve stem that needs to be removed.
Additionally, you’ll need a jack to lift the vehicle and a lug wrench to remove the tire. Once you have all these items, you can begin the process of patching the tire sidewall. Keep in mind that patching a sidewall is not always recommended, and it’s always best to consult a professional if you’re unsure of the best course of action.
But if you feel confident in your abilities and have all the necessary materials, you can give it a shot and potentially save yourself the cost of a new tire.
Materials needed include: tire patch kit, rasp tool, rubber cement, and a tire gauge.
Before you start fixing a flat tire, it is important to gather all the materials you will need. A tire patch kit, rasp tool, rubber cement, and tire gauge should be your top priority. The tire patch kit will contain everything you need to fix a punctured or damaged tire, while the rasp tool helps prepare the surface of the tire for the patch.
The rubber cement is used to secure the patch in place and ensure it stays put. Don’t forget to use a tire gauge to check the pressure of the tire before and after the repair is complete. It’s important to have every material on hand before you start, so that you don’t waste time running around to find missing pieces.
Once you have everything you need, you will be ready to fix your flat tire and get back on the road again.

Locate the Puncture
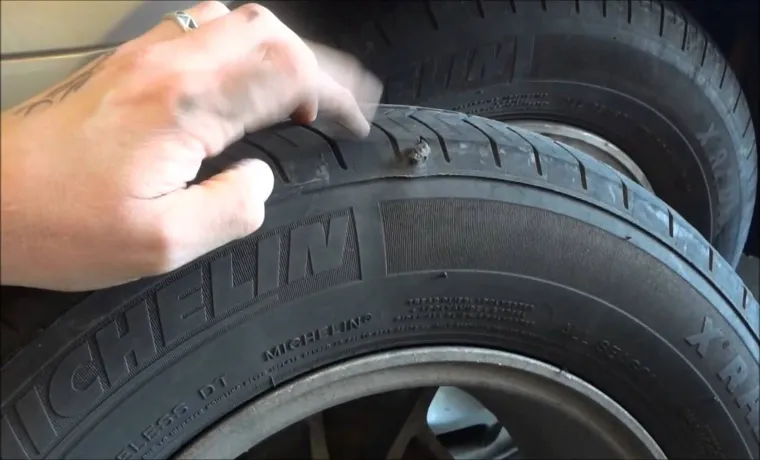
If you have a small puncture in the sidewall of your tire, you may be able to fix it with a patch. The first step to repairing the tire is to locate the puncture. This can be tricky, as sidewall punctures can be hard to spot.
One way to find the puncture is to inflate the tire and spray it with soapy water. The puncture will create bubbles in the soap, allowing you to pinpoint its exact location. Another method is to feel around the tire for any abnormalities, such as protruding objects or cuts.
Once you have located the puncture, you can begin the repair process. It’s important to note that patching a sidewall puncture is a temporary solution and should be done with caution. It’s always best to replace the tire if possible to ensure your safety on the road.
But if you’re in a bind and need a quick fix, patching the sidewall can get you back on the road until you can replace the tire.
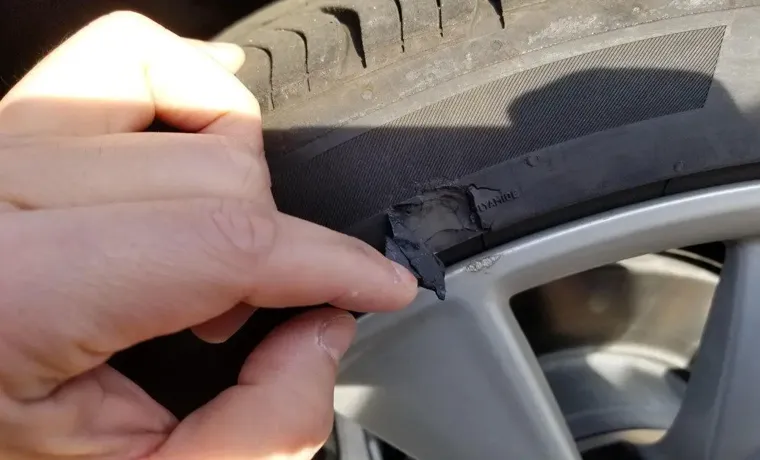
Check the tire for any tears or holes on the sidewall. Mark the location with chalk or a permanent marker.
When you notice a flat tire on your vehicle, the first step is to identify the puncture’s location before attempting any repair work. Inspect the tire carefully and check for any tears, cuts, or holes on the sidewall. These damages can cause the tire to lose air pressure or even explode while driving.
Once you have located the puncture, make sure to mark its position with a chalk or a permanent marker. This simple technique will ensure that you can quickly locate the damaged area once you have removed the tire for repair or replacement. It is essential to check the tire regularly for any visible signs of damage or wear and tear.
You should also inspect the tire’s tread depth, as this can have an impact on the vehicle’s handling and safety. By keeping an eye on your tires’ condition, you can spot issues early on and prevent any potential problems while driving. Remember, safety is paramount on the road, and a flat tire can be a severe hazard if not handled correctly.
So take the time to inspect your tires carefully and seek professional assistance if necessary.
Prepare the Tire
When it comes to patching a damaged sidewall on your tire, the first step is to properly prepare the area. Begin by using a coarse grit sandpaper to rough up the surface of the damaged area. This will help the patch adhere to the tire better.
Next, clean the area with a tire cleaner or rubbing alcohol to remove any dirt or debris that could prevent the patch from sticking properly. Once the area is clean, it’s important to let it dry completely before applying the patch. This may take a few minutes, so be patient.
Once the area is dry, apply the patch according to the manufacturer’s instructions. It’s important to make sure the patch is properly centered over the damaged area before pressing it firmly in place. With proper preparation and installation, your patched tire should be good as new and ready to hit the road again.
With these simple steps, you can confidently patch the sidewall of your tire and avoid having to replace it altogether.
Remove any debris or objects from the puncture area. Use the rasp tool provided in the tire patch kit to roughen the area around the puncture.
When it comes to preparing a tire for a patch, the first step is to remove any debris or objects from the puncture area. This is important because any foreign materials left in the tire can cause even more damage over time. Once the puncture area is free from debris, it’s time to use the rasp tool provided in the tire patch kit to roughen the area around the puncture.
This is important because it helps the patch adhere to the tire and creates a rough surface for the adhesive to stick to. So don’t skip this step, even if the puncture looks small. A little prep work can go a long way in ensuring a successful patch job and a safer ride in the long run.
Apply Rubber Cement
If you’re wondering how to patch the sidewall of your tire, one option is to apply rubber cement. First, clean the area around the puncture with a rag and some rubbing alcohol to remove any dirt or debris. Then, apply the rubber cement to the punctured area using a brush or spatula, spreading it evenly over the surface.
It’s important to let the cement dry completely before attempting to inflate the tire or drive on it. Once it’s dry, you can apply a patch to cover the hole and reinforce the strength of the sidewall. Keep in mind that not all punctures can be repaired with a patch, so it’s always a good idea to have a professional inspect your tire if you’re unsure about the extent of the damage.
But for smaller punctures, applying rubber cement can be an effective DIY solution to get you back on the road safely.
Apply a generous amount of rubber cement to the puncture area, extending past the edges of the patch.
When it comes to fixing a punctured tire, one of the most important steps is applying a generous amount of rubber cement to the puncture area. But what exactly is rubber cement, and why is it so essential for patching up a tire? Rubber cement is a special type of adhesive that contains elastic polymers, making it ideal for bonding rubber surfaces together. This means that when you apply rubber cement to the puncture area, not only does it hold the patch in place, but it also helps to create a seamless bond between the patch and the surrounding tire.
It’s important to apply enough rubber cement to ensure that the entire patch is covered, as well as extending past the edges of the patch to give it a secure hold. By properly applying rubber cement, you can get back on the road with confidence, knowing that your tire is as good as new.
Apply Patch
If you find yourself in a situation where you need to patch the sidewall of your tire, don’t panic! It’s actually a fairly simple process that can save you the cost of a new tire. First, locate the puncture on the sidewall and mark it with chalk or a marker. Next, use sandpaper to rough up the area around the puncture to create a good surface for the patch to adhere to.
Then, apply rubber cement to the area and let it dry for a few minutes until it becomes tacky. Finally, apply the patch over the puncture area and firmly press it into place. Once you’ve successfully patched the sidewall, it’s important to monitor it for any signs of damage or wear.
Remember, driving on a damaged tire can be dangerous and potentially cause a blowout. By following these simple steps to patch your sidewall, you can extend the life of your tire and save yourself some money in the process.
Peel the backing off the patch and apply it onto the puncture area. Press firmly and smooth out any air pockets.
When it comes to repairing a punctured tire, using a patch is one of the most effective and efficient solutions available. But how do you apply a patch onto the puncture area? Firstly, make sure you have the right patch kit for your tire. Then, prepare the area by cleaning it with a small brush or cloth.
Once it’s dry, peel the backing off the patch and apply it onto the puncture area. It’s important to ensure the patch is placed correctly and isn’t covering any other holes or damages. Press firmly and smooth out any air pockets using your fingers or the flat end of a tool.
Keep in mind that the adhesive on the patch needs time to bond to the tire, so it’s best to wait at least 10 minutes before inflating the tire. Following these steps will help you apply the patch correctly and effectively. With a little practice, you’ll be able to fix punctures like a pro.
Check Tire Pressure
Have you ever had a flat tire with a sidewall puncture? It can be a frustrating situation, but knowing how to patch the sidewall of your tire can save you time and money. First, make sure to check the tire pressure before attempting any repair. Low pressure can cause further damage to the sidewall and make it harder to patch effectively.
Next, remove any debris or foreign objects from the puncture site, being careful not to widen the hole. After that, clean the area thoroughly and apply a rubber patch to cover the hole. Make sure to use a patch designed for sidewall punctures, as regular tire repair kits may not be suitable.
Remember to use caution and follow all safety guidelines, as sidewall repairs can be more challenging than other types of tire repairs. In conclusion, knowing how to patch a sidewall puncture can save you time, money, and potentially dangerous situations.
Use a tire gauge to check the pressure of the tire. Adjust as needed.
Checking the tire pressure is an essential part of regular car maintenance. A tire gauge is the perfect tool for this job. Simply unscrew the valve stem cap, place the gauge on the valve stem, and press down firmly.
The gauge will give you a reading of the tire pressure in PSI. The recommended pressure can usually be found in the owner’s manual, on a sticker on the door jamb, or on the tire itself. If the pressure is too low, use an air compressor to add air until the pressure reaches the recommended level.
If the pressure is too high, use a tire pressure gauge or the release valve on the compressor to release some of the air. Proper tire pressure ensures better gas mileage, longer tire life, and increased safety on the road. Don’t underestimate the importance of checking your tire pressure regularly.
It’s a small task that can make a big difference in the performance of your car.
Conclusion
Well folks, there you have it – the ultimate guide on how to patch the sidewall of a tire. As we’ve learned, it’s not rocket science, but it does require some careful attention to detail and a steady hand. And who knows, with your newfound tire-repair skills, you just might be the hero of your next roadside emergency.
So don’t let a pesky sidewall puncture deflate your spirits – grab some supplies, get that patch on there, and get back on the road to adventure!”
FAQs
What causes sidewall damage in tires?
Sidewall damage in tires can be caused by hitting curbs, potholes, driving on rough roads, and overloading the vehicle, among other factors.
Can a sidewall puncture be repaired?
No, sidewall punctures cannot be repaired. It is important to replace the tire if there is damage to the sidewall.
How do I know if my tire sidewall is damaged?
Look for visible signs of damage, such as cuts, bulges, or cracks on the sidewall. Also, check for air leaks and abnormal tire wear.
Can I drive on a tire with sidewall damage?
It is not recommended to drive on a tire with sidewall damage, as it can lead to tire failure and loss of vehicle control.
How do I patch the sidewall of a tire?
It is not recommended to patch the sidewall of a tire, as it can compromise the structural integrity. It is important to replace the tire if there is damage to the sidewall.
How often should I check my tire sidewalls for damage?
It is recommended to inspect your tire sidewalls for damage at least once a month or before long trips.
What are the consequences of driving on a tire with sidewall damage?
Driving on a tire with sidewall damage can result in a blowout, loss of vehicle control, and potentially fatal accidents. It is important to replace the tire if there is damage to the sidewall.


