Seating a tire can be a daunting task for both seasoned mechanics and novice DIY-ers. However, with the right tools and techniques, it can be a smooth and straightforward process. Whether you’re changing a flat tire or fitting a new set of wheels onto your car, learning how to seat a tire correctly is crucial for safety and performance.
In this complete guide, we’ll walk you through the steps needed to successfully seat a tire, from inspecting the rim to inflating the tire to the correct pressure. So buckle up and let’s get started!
Table of Contents
What Does it Mean to Seat a Tire?
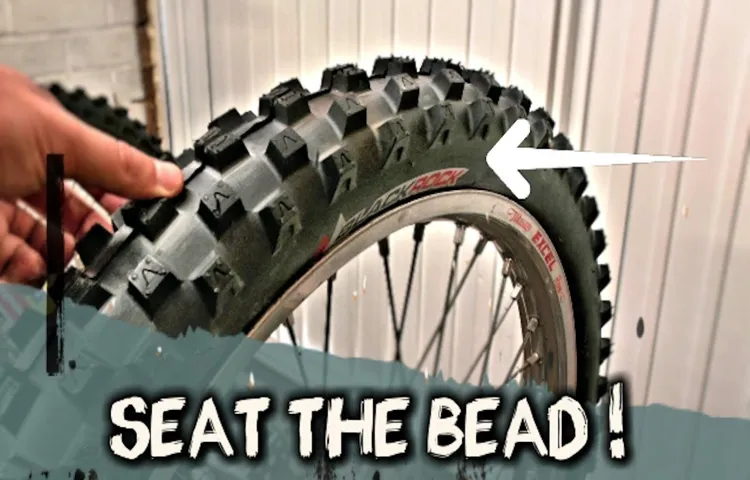
Seating a tire refers to the process of ensuring that the tire is properly secured onto the rim, preventing it from being dislodged from position while driving. This process is pivotal since an improperly seated tire can lead to unsafe driving conditions and can even cause a dangerous blowout. To seat a tire properly, the tire must be fully inflated and installed onto the rim.
Then, the tire needs to be pressed securely against the rim, usually through methods like an air compressor or rubber mallet. Once the tire is firmly in place, it is essential to check that it is holding air correctly and doesn’t exhibit any air leaks. Ensuring that a tire is fully seated on the rim is critical for safe and efficient driving, particularly when driving at high speeds.
By understanding and implementing the proper techniques for seating a tire, drivers can keep themselves and their passengers safe on the road. So, make sure to take it seriously and follow the instructions, especially if you change a tire on your own.
Explanation of Tire Seating
Tire seating is the process of making sure the tire bead is properly positioned on the rim of the wheel. This is critical for both safety reasons and overall performance. It involves inflating the tire to the recommended pressure, which pushes the bead outwards and onto the rim flange.
A good tire seating is important because it ensures an airtight seal between the tire and the wheel, preventing leaks and reducing the risk of a blowout. In addition, a well-seated tire distributes the vehicle’s weight evenly, resulting in a smoother drive and better handling. It’s essential to have a professional conduct this procedure to avoid any issues that can arise from improperly seated tires.
In short, when it comes to tire seating, taking the time to ensure it’s done correctly can make all the difference between a smooth and safe drive or a potentially dangerous one.

Tools You Will Need
Seating a tire properly requires a few essential tools to make the job easier and safer. You’ll need a tire changer, which can help you remove the tire from the rim, as well as a bead breaker to loosen the tire from the rim. Additionally, tire mounting lubricant can help prevent damage to the tire and the rim during the seating process.
Some other helpful tools include valve stem replacement kits, tire pressure gauges, and rubber mallets for gently tapping the sidewall of the tire to help it settle onto the rim. Don’t forget to wear protective gloves and eyewear when working with tires to avoid injury from sharp edges or flying debris. By having the right tools on hand and taking proper safety precautions, you can confidently seat your tire and get back on the road in no time.
List of Required Tools for Tire Seating
If you plan on seating tires, you need to have the right tools. One of the essential tools is a tire changer. A tire changer can make quick work of removing and installing tires with ease.
Another vital tool to have is a tire balancing machine. A tire balancing machine helps to balance tires, which ensures that they run smoothly and evenly on the road. A rubber mallet is also important in seating tires.
It can help to adjust the tire’s position and ensure that the tire is in the right place. Additionally, a bead blaster can help to seat the tire quickly. It works by releasing air to help the tire expand.
Lastly, a tire pressure gauge is crucial to ensure that the tire is inflated to the correct pressure. Without proper inflation, a tire can fail or wear unevenly. Overall, having the right tools can make the process of seating tires more manageable, faster, and safer.
It’s important to invest in high-quality tools to ensure that you get the best results possible.
Preparation Steps
If you’ve ever struggled with seating a tire on your car, you know how important preparation can be. Before you begin trying to seat the tire, make sure that you have the correct tire size for your car. You should also check the tire pressure and make sure it’s within the recommended range.
If the tire pressure is too low, it can be difficult to seat the tire properly. Additionally, you’ll need to check the wheel for damage or corrosion, as these issues can also make it difficult to seat the tire. Once you’ve verified that everything is in good condition, you’re ready to begin the seating process.
Checking Tire and Rim Compatibility
When it comes to checking tire and rim compatibility, preparation is crucial. The first step is to determine the correct tire size for your vehicle. This can typically be found in your car’s owner’s manual or on the inside of the driver’s door.
Once you have this information, you can begin to look for a rim that is compatible with your tire size. It’s important to note that not all rims will work with all tires, so it’s essential to ensure that you’re selecting a rim that is compatible with your specific tire size. Additionally, it’s important to consider the type of driving you’ll be doing and select a rim that is appropriate for your needs.
For example, if you plan on doing a lot of off-roading, you’ll want to look for a rim that is designed for rugged terrain. By taking these steps, you can ensure that your tire and rim are compatible and that you’re driving safely and with confidence on the road.
Matching Tire and Rim Sizes
Matching tire and rim sizes is a crucial part of ensuring your vehicle runs smoothly and safely. Before beginning this process, there are several preparation steps you should take to make sure everything matches up perfectly. The first step is to determine the appropriate tire size for your specific car model.
This can usually be found in the owner’s manual or on a placard located on the driver’s side doorjamb. Once you have this information, you need to select a rim size and type that corresponds with the tire size. It’s important to make sure the rim you select has the correct bolt pattern, offset, and width for your particular vehicle.
Any mismatch between the tire and rim sizes can lead to handling and performance problems, as well as potentially dangerous driving conditions. By taking the time to properly prepare and match your tire and rim sizes, you can ensure a smoother ride and better overall safety on the road.
Inspecting Rim and Tire Condition
Inspecting the condition of your rims and tires is an essential step in maintaining the performance and safety of your car. Before you begin, make sure to park your car in a well-lit area and set the emergency brake. Give the rims and tires a close inspection, looking for any signs of wear and tear, such as cracks, bulges, or cuts.
Make sure the rims are free of dents and bends that may cause the tire to wear unevenly. Check the tire pressure and make sure it matches the manufacturer’s recommended pressure. Remember, the condition of your rims and tires can affect your car’s handling, fuel efficiency, and overall safety.
By taking the time to inspect them regularly, you can avoid costly repairs and keep your car running smoothly. So, take a few minutes to give your rims and tires a thorough once-over and keep your car in top shape!
Seating the Tire on the Rim
Seating a tire on the rim may seem like a simple and straightforward task, but there are a few tricks to getting it right. First, make sure the tire bead is lubricated with a soapy solution or tire mounting lubricant. This will make it easier for the tire to slide onto the rim without damaging the bead.
Next, position the tire on the rim with the valve stem at the 12 o’clock position. Use a tire spoon or a bead seating tool to push the tire onto the rim. You may need to use gentle tapping to get the tire fully seated.
Once the tire is seated, inflate it to the recommended pressure and check the bead to ensure it is properly seated all the way around the rim. Remember, improper seating of a tire can lead to unsafe driving conditions, so take the time to do it right.
Step-by-Step Instructions for Seating a Tire
Seating a tire can be a challenging task, but with the right tools and steps, it can be done quickly and effectively. The first step in seating a tire is to inspect the rim and tire to ensure they are in good condition. Then, lubricate the bead area of the tire and rim with a tire lubricant to aid in the seating process.
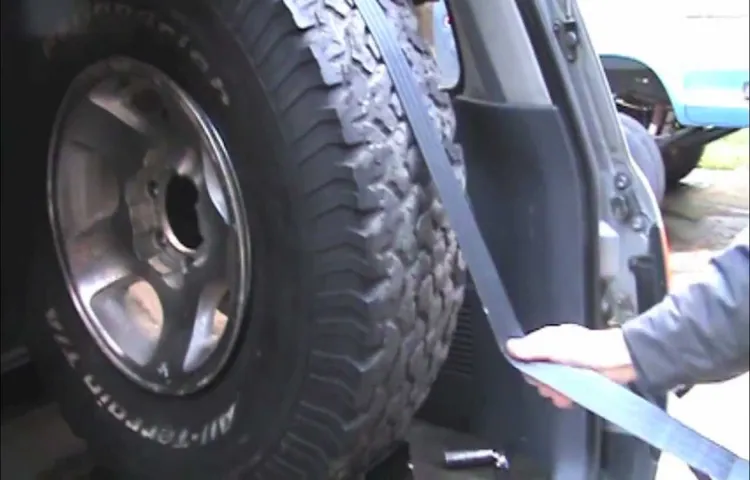
Next, use a tire inflator with a gauge to inflate the tire to the manufacturer’s recommended pressure. If the tire fails to seat, use a bead blaster to forcefully force air into the tire, positioning the tire on the rim. Once the tire is seated, check the pressure again, and adjust as necessary.
Finally, use a tire pressure monitoring system to ensure the tire is properly inflated and test the tire for leaks. Keywords: tire seating, tire lubricant, bead blaster, tire inflator, tire pressure monitoring system.
Tips for Ensure Proper Seating
Seating the tire on the rim can be a tricky task, and doing it incorrectly can lead to a host of problems down the road. To better ensure a proper seating, start by cleaning both the tire and the rim thoroughly. Then, apply lubrication to both surfaces to make them easier to manipulate.
When mounting the tire, make sure it is lined up squarely with the rim and use even pressure to push it on. Once you’ve got the tire on, inflate it to the recommended pressure and check to make sure it’s seated properly. If the tire is not seated correctly, try spinning the tire and bouncing it a bit to get it to settle into place.
Remember, a properly seated tire is key to getting the best performance and longevity out of your tires. So, take the time to make sure it’s done right!
Inflation and Final Steps
When it comes to seating a tire, there are a few crucial steps to follow to ensure a secure fit and prevent any potential issues down the road. The first step is to make sure the tire is properly aligned with the rim and valve stem. Once the tire is in place, it’s important to apply a small amount of lubricant to the bead of the tire to help it slide onto the rim more easily.
Here’s where inflation comes in: start by filling the tire with just enough air to create some pressure, then use a tire gauge to check the pressure and adjust as needed. Overinflating the tire can cause it to pop off the rim, while underinflation can cause the tire to become unseated while driving. Finally, give the tire a thorough visual inspection to ensure it’s properly seated and balanced.
Following these steps will help ensure a safe and secure fit for your tire.
Inflating the Tire to Recommended Pressure
When it comes to inflating your tire to the recommended pressure, there are a few final steps you’ll want to take to ensure a safe and smooth ride. First, you’ll need to check your tire pressure with a reliable gauge to ensure it’s at the recommended level listed on the driver’s side door jamb. Once you know the current pressure, you can start inflating the tire using an air compressor or a manual pump until it reaches the desired level.
Be sure to check the pressure frequently as you inflate the tire, since over-inflating the tire can be just as dangerous as under-inflating it. Finally, make sure to replace the valve stem cap securely to prevent any additional air from escaping and check the pressure again once the tire has cooled off. By taking these final steps, you can prevent potential blowouts, improve fuel efficiency, and ensure a safer, smoother ride.
Final Inspection for Proper Seating
After inflating your new seating arrangement, it’s time for the final inspection to ensure that it’s properly seated. First, check for any obvious signs of misalignment or gaps between the inflatables. Next, apply pressure to different points of the seat to ensure that it feels solid and stable.
Give it a few good shakes to see if there is any movement or wobbling. Once you’ve confirmed that the seat is stable, sit in it to feel if it’s comfortable and feels secure. If it’s a chair or a recliner, check to see if it adjusts properly.
The goal is to make sure that the seat is both safe and comfortable to use. Finally, if everything seems to be in order, go ahead and enjoy your new seating arrangement!
Conclusion
In conclusion, seating a tire is all about using the right tools, following the proper techniques, and having a little bit of patience. It’s like a delicate dance between man and machine, where the goal is to get that tire perfectly snug on the rim. So if you want to get rolling on the road with confidence, remember to take your time, don’t force anything, and always make sure to give your tire a little love tap at the end.
With these simple steps, you’ll be cruising in style in no time!”
FAQs
What tools do I need to change a tire?
To change a tire, you will need a lug wrench, a jack, and a spare tire.
How do I know when it’s time to replace my tires?
Pay attention to the wear indicators on your tire. If the tread is worn down to 2/32 of an inch, it’s time to replace them.
Can I replace just one tire instead of all four?
It’s recommended to replace all four tires at the same time, but if it’s not possible, replace tires in pairs on the same axle for balanced handling.
Can I repair a flat tire or does it need to be replaced?
It depends on the location and extent of the damage. A puncture in the tread can oftentimes be repaired. A tear or sidewall damage will require a replacement.
How much air pressure should I put in my tires?
Check the vehicle’s owner manual or tire information placard for the recommended pressure. Overinflated or underinflated tires can affect handling, fuel efficiency and tire wear.
What should I do if my tire blows out while driving?
Keep a firm grip on the steering wheel, gradually slow down by taking foot off the gas, and pull off the road to the side when it’s safe to do so.
How often should I rotate my tires?
It’s recommended to rotate your tires every 6,000 to 8,000 miles to ensure even tread wear and prolong tire life.


