If you’re looking to change the tires on your vehicle at home, you’ll need to know how to break the bead. This process involves separating the tire bead from the rim, which can be tricky if you don’t have the proper tools or knowledge. However, with the right techniques, you can easily break the tire beads at home without any complications.
Breaking tire beads is essential if you want to change the tires yourself. Without breaking the bead, it’s impossible to remove the old tire and install a new one. The process can be intimidating for those who aren’t familiar with it, but it’s actually quite simple.
All you need is a few basic tools and some knowledge of how to use them. One common method of breaking tire beads is using a bead breaker tool. This tool is specifically designed to break the bead by applying pressure to the tire sidewall.
It’s a useful tool to have in your garage if you plan on changing your tires frequently. However, if you don’t have access to a bead breaker tool, there are other methods you can use. In this guide, we’ll cover various techniques for breaking tire beads at home.
We’ll discuss the tools you’ll need and provide step-by-step instructions for each method. By the end of this guide, you’ll be well-equipped to change your tires at home and save money on expensive tire changes at the mechanic. So, let’s get started and learn how to break tire beads like a pro!
Table of Contents
Introduction
Breaking a tire bead may sound daunting, but with the right tools and techniques, you can do it right at home. Firstly, loosen the lug nuts on the wheel and prop the car on a jack stand. Then, use a tire iron to pry off the hubcap or wheel cover and remove the valve core to deflate the tire.
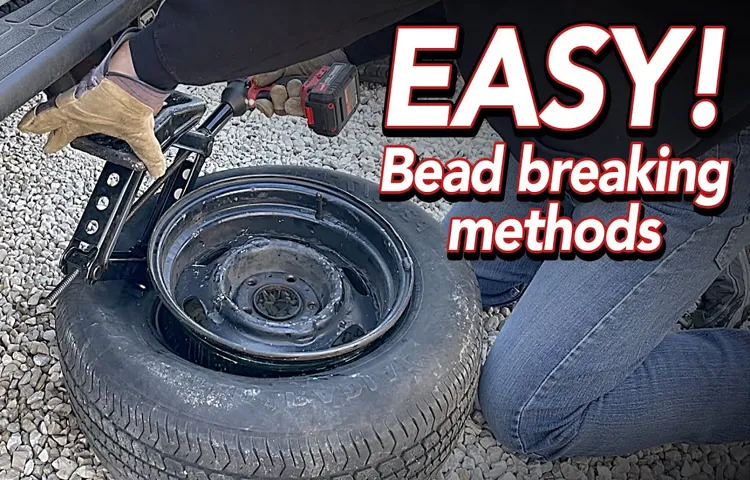
Next, position the tire on a solid surface with the rim facing up, and clamp the rim to keep it steady. You can use a specialized tire bead breaker tool or improvised tools like a pry bar and a block of wood to break the bead. Insert the tool between the tire bead and the rim and apply pressure until the bead pops out.
Repeat on the other side to fully remove the tire from the rim. Remember to wear protective gear like gloves and goggles to avoid injury and work in a safe, well-lit area. By following these steps carefully, you can save money and time by doing it yourself instead of relying on a mechanic or tire shop.
Understanding Tire Beads and Why You Need to Break Them
When it comes to tires, there are a lot of important components that play a role in their functionality. One of these components is the tire bead. Tire beads are the part of the tire that sits against the rim and creates an airtight seal.
It’s important to understand tire beads and why they need to be broken because it can greatly impact your tire changing experience. Breaking the tire bead refers to separating the bead from the rim so that you can remove the tire. This may seem like an unnecessary step, but it’s actually crucial for safety reasons.
Without breaking the tire bead, you risk damaging both the tire and the rim while attempting to remove it. So next time you need to change a tire, don’t forget to break the bead before attempting to remove it.

Tools and Materials Needed
Breaking a tire bead at home can seem like a daunting task, but with the right tools and materials, it can be done easily and quickly. The most essential item is a tire bead breaker, which can either be handheld or mounted to a bench. Additionally, a tire iron, lubricant, safety glasses, and gloves are highly recommended.
The lubricant helps to reduce friction between the tire and rim, making it easier to break the bead. Safety glasses and gloves protect from any potential injury while working with the tools. By using these materials and techniques, you can easily break tire beads at home, saving time and money by not having to make an appointment at a tire shop.
List of Essential Tools
If you’re looking to take on DIY projects or do repairs around your home, there are some essential tools that you’ll need to invest in. These tools will make your life a lot simpler and save you from a lot of frustration. For starters, you’ll need a good set of screwdrivers, both flathead and Phillips head, in various sizes.
A cordless drill is another must-have, as it will allow you to drill holes and drive screws with ease. A hammer is also a critical tool to own, for when you need to pound in nails or pry things apart. A pair of pliers, a saw, and a level should also be part of your toolbox.
In addition to tools, you’ll need materials like nails, screws, bolts, and glue to complete your projects. With these essential tools and materials, you’ll be able to tackle a wide range of tasks with confidence and ease, whether you’re an experienced DIYer or just starting out.
Additional Materials That You May Need
When it comes to DIY projects, having the right tools and materials is crucial to getting the job done right. Depending on the project, you may need a wide range of equipment, from basic measuring tools like a tape measure or level, to power tools like saws, drills, and sanders. Additionally, you’ll need the appropriate materials for the project, such as lumber, screws, nails, paint, or plumbing fixtures.
All of these tools and materials can add up in cost, so it’s important to plan ahead and budget accordingly. You may want to consider borrowing or renting tools as well, to avoid unnecessary expenses. Remember, having the right tools and materials can make all the difference in the success of your project.
Step-by-Step Guide to Break Tire Beads
If you need to change a well-worn tire, the first step is to break the tire bead. Fortunately, with the right tools and some elbow grease, you can do this easily at home. To start, remove the wheel and deflate the tire.
Next, place the wheel and tire on a sturdy surface, with the tire’s sidewall facing upwards. Position a tire breaker or bead breaker tool against the lip of the rim, near the edge of the tire. Apply downward pressure, using your body weight or a hammer, until you hear a loud ‘pop’.
This means the bead has separated from the rim. Repeat the process on the opposite side of the tire to completely break the bead. With both beads broken, you should be able to remove the tire from the rim with ease.
Remember, safety comes first, so always wear proper eye and hand protection while working with tires, and have a friend to assist you if needed. By following these simple steps, you can successfully break tire beads at home and get back on the road with a new tire in no time.
Step 1: Loosen the Lug Nuts
If you’re planning to replace a tire or fix a puncture, the first step is loosening the lug nuts. It might seem like an easy task, but it’s essential to do it correctly to avoid any accidents. To do this, use a lug wrench and insert it onto the first nut.
Turn it counterclockwise to loosen the nut, but don’t remove it yet. Repeat it with the rest of the nuts, but go back to the first one and loosen it more until you can easily remove it by hand. Repeat the same process with the others.
Once you’ve loosened all the nuts, it’s time to lift the car using a jack stand. Remember to read the car’s manual and always prioritize your safety.
Step 2: Jack Up Your Vehicle
When it comes to breaking tire beads, the second step is to jack up your vehicle. This may seem simple enough, but it’s important to take the necessary precautions to ensure both your safety and the safety of your vehicle. Make sure you have a sturdy, level surface to work on and that your jack can support the weight of your vehicle.
Locate the proper jacking points on your vehicle and place the jack there. Begin raising the vehicle slowly and steadily until the tire is off the ground. Remember to always use jack stands to support the vehicle once it’s lifted.
By taking the time to jack up your vehicle correctly, you’ll be able to easily access the tires for the next steps in breaking the bead. Safety is key, so be sure to double-check everything before moving on to the next step.
Step 3: Remove the Wheel from the Vehicle
Removing the wheel from the vehicle is the third step when breaking tire beads. This may seem like a straightforward process, but it’s crucial to do it correctly to prevent any damage to the vehicle or injury to yourself. The first thing you need to do is locate the lug nuts and choose the appropriate sized socket for your wrench.
Then, place the wrench onto the lug nuts and turn them counterclockwise until they are loose. Make sure you’re applying enough force, but not too much that you strip the nuts. Once they are loose enough, jack up the car with the appropriate jack and place the jack stands in the designated areas.
Finally, remove the lug nuts completely and gently pull the wheel off the hub. Remember to do this carefully and keep all the pieces in a secure location to avoid losing anything. It’s always a good idea to check your owner’s manual for specific instructions on how to remove the wheels on your vehicle.
By following these steps, you will successfully remove the wheel from the vehicle, allowing you to continue with breaking the tire beads efficiently.
Step 4: Deflate the Tire
Deflating the tire is a crucial step in breaking the tire beads, and it’s essential to do it safely and correctly. First, remove the valve cap and then press the valve core to release the air pressure. Ensure that you deflate the tire entirely to loosen the tire bead from the wheel rim and make it easier to remove the tire.
Using a tire gauge will help you determine whether the pressure is zero and ensure an accurate reading. Before you start deflating the tire, it’s essential to wear safety gear to protect yourself from any possible injury. Like a surgeon scrubbing up before surgery, you must take the same precautions when dealing with tires.
By following this step-by-step guide on how to break tire beads, you will remove the tire safely without causing any damage to the tire or the wheel rim.
Step 5: Place the Tire on a Bead Breaking Tool
When it comes to breaking tire beads, it is essential to have the right tools and knowledge to ensure a successful process. Once you have removed the valve core and deflated the tire, the next step is to place it on a bead breaking tool. This tool helps to loosen the seal between the tire and rim, making it easier to remove the tire from the rim.
Bead breaking tools come in various forms, such as hydraulic or manual, but the general concept remains the same. Simply position the tire on the tool, adjust the tool’s arm to apply pressure on the tire’s bead, and press down until you hear a loud pop. This sound indicates that the bead has been successfully broken, and you can move on to the next step of removing the tire from the rim.
By following these simple steps, you’ll be able to break tire beads like a pro and handle any tire maintenance or repair with ease. So, take your time, use caution, and be sure to have the proper equipment on hand to make the process as smooth as possible.
Step 6: Hit the Tire with a Hammer
When it comes to changing a tire, breaking the tire beads is an essential task that needs to be done. This may seem like a daunting task, but with the right tools and technique, you can break the tire beads with ease. One of the crucial steps in the process is hitting the tire with a hammer.
You have to hit the tire firmly and repeatedly at the edges so that the beads come loose from the rim. Make sure that you don’t hit the hub or the rim while doing this, as it could cause damage to your car. If you find that hitting the tire with a hammer isn’t working, you may need to consult a professional or invest in a specialized tool to help you with the task.
But with a little patience and persistence, you can successfully break the tire beads and change your car’s tire in no time. So, next time you need to change a tire, remember to hit the tire with a hammer to loosen those stubborn beads.
Step 7: Rotate the Tire and Repeat
When it comes to breaking tire beads, rotating the tire and repeating the process is crucial. After the first bead has been successfully broken, it’s time to move onto the second one. To do this, you’ll need to rotate the tire about a quarter of the way and reposition the breaker bar.
Applying pressure again, you should hear the satisfying pop of the second bead breaking. However, it’s important not to assume the job is done and dusted once you’ve managed to break both beads. The tire should be rotated and the process repeated, just to be on the safe side.
Once you’ve gone all the way around and broken both beads at all points, the tire should be completely loose and ready to be removed. Following these steps methodically will ensure that the tire is safely removed without causing any damage to the rim or the tire itself.
Conclusion
In conclusion, breaking a tire bead at home may seem like a daunting task, but with the right tools and technique, it can be done with ease. With a little bit of elbow grease and some ingenuity, you can save yourself a trip to the mechanic and prove once again that there’s nothing more satisfying than a job well done. So go ahead, break that tire bead and show your wheels who’s boss!”
Safety Tips When Breaking Tire Beads at Home
Breaking tire beads at home can be a challenging task, but with the right safety precautions and steps, it can be done successfully. First and foremost, always wear eye protection and gloves, as broken beads and sharp metal can be hazardous. To begin, remove the valve core and deflate the tire by pushing down on the valve stem.
Next, insert a bead breaker tool between the tire and wheel and gradually apply pressure until the bead breaks. Alternatively, you can use a hammer and chisel to break the bead, but be careful not to damage the wheel or tire. Once the bead is broken, carefully remove the tire from the wheel, taking care not to tug or pull too hard on the tire.
Breaking tire beads can be a tricky process, but by following these steps and safety tips, it can be accomplished safely and effectively at home.
Final Thoughts and Recommendations
In conclusion, breaking tire beads is not an easy task but it’s also not impossible. With the right tools and technique, you can do it without any fuss. To summarize, begin by first loosening the wheel nuts and lifting the car onto its jack stands.
Then, remove the tire valve, followed by releasing the tire pressure and inserting the bead breaker tool in between the tire bead and wheel rim. Push down on the tool to break the bead, repeating the process on both sides. Once the tire’s bead is broken, remove it from the rim using tire irons.
Finally, replace the tire or patch it, and re-inflate it to the manufacturer’s recommended pressure. Don’t forget to check for any leaks before heading back on the road. Remember that practice makes perfect, and always prioritize safety before anything else.
So, are you ready to break some tire beads like a pro?
FAQs
What tools do I need to break a tire bead at home?
You will need a tire bead breaker tool, a tire iron, and a mallet.
Is it possible to break a tire bead without specialized tools?
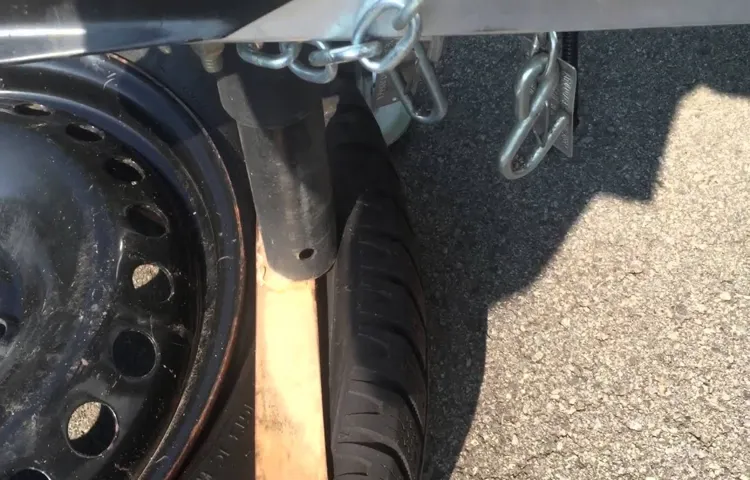
Yes, it is possible. You can use a car jack or a cinder block to press down on the tire sidewall and break the bead.
Can I break a tire bead without damaging my rims?
Yes, use a careful and gentle approach with your tools. Avoid using excessive force as it may bend or scratch your rims.
How should I prepare my tire before attempting to break the bead?
It is recommended to let the tire sit under the sun for a few hours as the heat will soften the rubber. Also make sure to remove the valve stem core to release the air pressure.
What is the safest way to break a tire bead?
The safest way is to use a bead breaker tool and follow the instructions carefully. If you are unsure or uncomfortable, it is best to seek professional help.
How can I tell that I have successfully broken the tire bead?
You will hear a distinct popping or cracking sound as the tire bead separates from the rim. You will also be able to move the tire freely on the rim.
Can I reuse the tire after breaking the bead?
Yes, you can reuse the tire after breaking the bead for repairs or replacement, but it is essential to take proper safety precautions during the process.


