
As summertime approaches, it’s crucial to ensure that your riding lawn mower is in good condition. One of the essential maintenance tasks for your riding mower is changing its tire. You may wonder why you should learn how to change a tire when professional services are available.
Learning how to change a tire on a riding lawn mower is a vital skill that every homeowner should possess. This skill is essential because it saves you the trouble of waiting for a professional, especially when you need to use your mower urgently. Besides, it can be fulfilling when you do it yourself, and you can also save money than hiring a professional.
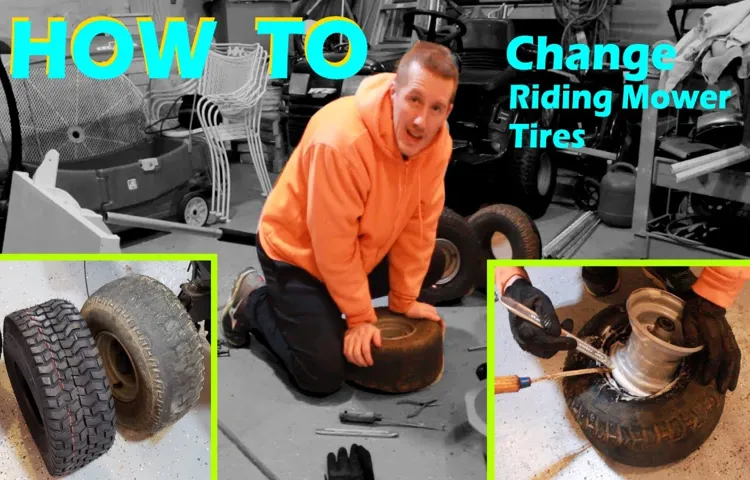
This blog will guide you on how to change a tire on a riding lawn mower without professional help. So put on your working gloves and let’s get started!
Step 1: Prepare Your Mower
Changing a tire on a riding lawn mower can seem like a daunting task, but with a few simple steps, it can be done easily. The first step in changing your mower’s tire is to prepare your mower. Make sure the mower is turned off and parked on a level surface.
It’s important to release the parking brake and lower the cutting deck to the ground to ensure stability. Once your mower is secure, locate the lug nuts and use a lug wrench to remove them. It’s important to keep the lug nuts in a safe place, so they don’t get lost.
After removing the old tire, place the new tire onto the axle and secure it with the lug nuts. Make sure to tighten the lug nuts in a star pattern to ensure proper tightening. Finally, check the tire pressure before using your mower again.
By following these simple steps, you can change a tire on your riding lawn mower and get back to your lawn care routine in no time.
Park the mower on a flat surface and turn off the engine
Before getting down to mowing your lawn, it is essential to prepare your mower. The first step is to park the mower on a flat surface and turn off the engine. This will help to prevent any accidental movement while you are conducting maintenance.
Once your mower is secure, give it a thorough visual inspection, checking for any signs of wear and tear. Look at the wheels, blades, and spark plugs, making sure they are in good condition. It’s also a good time to check the oil and fuel levels, as well as the air filter.
If you need to top up any fluids, make sure to use the recommended products. You don’t want to use the wrong type of oil or fuel and potentially damage your mower. By following these simple preparation steps, you can ensure your mower is in top working condition, giving you the best mowing results.
Engage the parking brake and lower the cutting deck if applicable
If you’re ready to start mowing your lawn, it’s important to prepare your mower properly. The first step is to engage the parking brake and lower the cutting deck if applicable. This will ensure that your mower stays in place and that the cutting blades are positioned correctly.
Engaging the parking brake is vital because it will prevent the mower from moving while you’re working. If you don’t engage it, you could potentially injure yourself or damage your mower. Lowering the cutting deck is also important because it will allow the mower to make even cuts and prevent it from scalping your lawn.
Plus, it will save you time and prevent you from having to go over spots multiple times. By taking the time to properly prepare your mower, you’ll be able to mow your lawn safely and efficiently.
Gather necessary tools: lug wrench, car jack, spare tire
If you ever find yourself with a flat tire while on the road, it’s important to know how to change it safely and efficiently. The first step is to gather the necessary tools, including a lug wrench, car jack, and spare tire. These tools can typically be found in your car’s trunk or under the hood.
Once you have everything you need, it’s time to prepare your mower for the tire change. Turn off the engine and engage the parking brake to ensure the mower is stable and won’t roll away during the process. If possible, move the mower to a flat, stable surface to make the tire change easier.
It’s important to follow these steps carefully to prevent any accidents or damage to your mower or the surrounding area. By taking the time to prepare properly, you can ensure a successful tire change and get back on the road in no time.
Step 2: Remove the flat tire
Now that you have your new tire ready, it’s time to remove the damaged one. Start by turning off the mower and engaging its parking brake. This is an essential safety measure that will prevent the machine from moving while you work on it.
Carefully use a jack or lift to raise the mower so that the flat tire is off the ground. Now remove the hub cap to access the lug nuts. Loosen the nuts, but don’t remove them just yet.
Use your wrench to turn them counter-clockwise until they are just loose enough to remove with your fingers. Now, go ahead and completely remove the lug nuts and gently remove the flat tire from the mower. Remember to keep the lug nuts in a safe place, so you don’t lose them! With the tires swapped, you’re one step closer to a fully functioning lawnmower!
Loosen the lug nuts with the lug wrench
After you make sure that your vehicle is secure, the first step in changing a flat tire is to loosen the lug nuts with the lug wrench. The lug nuts are responsible for holding the wheel in place on the hub of your vehicle. Breaking them loose while the tire is still on the ground can be difficult, so it’s best to do it before you lift the vehicle with the jack.
It’s essential to turn the lug nuts counterclockwise to remove them, but don’t take them completely off yet. Just turn them enough so that they are loose and will be easy to remove when you lift the vehicle. If you use too much force at this stage, you risk damaging the wheel stud or bolt.
Always remember to use the right size socket or lug wrench, which should correspond to the size of the lug nuts on your vehicle. Taking this step saves you time and effort and provides an effortless way to finish the task in no time.
Jack up the mower using the car jack
Now that you have jacked up the mower, let’s move on to the second step of changing the flat tire. The next task is to remove the damaged tire. But, before you start removing the tire, ensure that the parking brake is engaged, and you have turned off the mower engine.
To proceed, locate the lug nuts that are holding the tire in place. These nuts are usually on the spindle and hold the tire in place against the washer. Use a good quality wrench to loosen the lug nuts, but don’t remove them entirely, just loosen them.
If you have trouble loosening the nuts, you can use a breaker bar or a pipe to provide leverage. Once the nuts are loose, place them aside, and then carefully remove the tire. This step can be tricky, so be cautious not to damage the spindle or any other part of the mower while removing the tire.
Congratulations, you have successfully removed the flat tire and are now ready to install the new one.
Remove the lug nuts and remove the tire
Removing a flat tire is not as daunting as it may seem. The second step in removing a flat tire is to remove the lug nuts and the tire. First, place the lug wrench onto each of the lug nuts and turn them counterclockwise until they loosen.
It’s essential to ensure that none of the other lug nuts are holding the tire in place before removing the final lug nut. After you’ve checked, remove the final lug nut and place it in a secure location. Be sure to place it somewhere you will easily find it when re-attaching the tire.
Once all of the lug nuts are removed, gently remove the flat tire from the wheel hub. It may be necessary to rock the tire back and forth to slide it off smoothly. That’s it, the tire is now removed, and you are ready to either put on the spare tire or repair the flat tire.
Remember that safety always comes first, and if you’re unsure about removing a flat tire, seek the help of a professional mechanic.
Step 3: Install the Spare Tire
Now that you’ve removed the old tire from your riding lawn mower, it’s time to install the spare tire. First, make sure the spare tire is properly inflated to the manufacturer’s recommended air pressure. You can use a tire gauge to measure the pressure if needed.
Next, line up the holes on the wheel with the studs on your mower’s axle. Place the spare tire onto the wheel bolts and screw on the lug nuts by hand. Tighten each lug nut with a socket wrench in a star pattern until they are snug.
Avoid over-tightening the lug nuts as this can damage the wheel or cause it to become unbalanced. Once all the lug nuts are tight, carefully lower the mower back to the ground and remove the jack. Give each lug nut a final twist with your wrench and you’re all set to get back to mowing with your newly installed spare tire.
Align the holes on the spare tire with the wheel studs
When it comes to a flat tire, knowing how to install a spare is essential. After removing the flat tire, it’s time to put the spare in place. The first step is to align the holes on the spare tire with the wheel studs.
This can be tricky, especially if you’re not used to handling a spare tire. Take your time and make sure the holes are lined up correctly. Once the holes are aligned, it’s time to put the lug nuts back on.
Remember to tighten them in a star pattern to ensure they’re evenly tightened. This will help prevent any imbalance in the wheel that could lead to further problems down the road. With the lug nuts tightened, you can lower the jack and remove it from under the car.
Finally, give the spare tire a quick inspection to make sure it’s properly installed and ready to go. With these simple steps, you’ll be back on the road in no time, confident in the knowledge that you can handle a flat tire like a pro.
Secure the tire onto the mower with lug nuts
Now that you have safely jacked up your mower and removed the damaged tire, it’s time to install the spare tire. Start by aligning the spare tire’s rim with the wheel hub, making sure the mounting holes match up. Then, slide the tire onto the hub, ensuring that it sits flush against the hub.
Next, screw on the lug nuts by hand, tightening them in a star pattern to ensure a balanced fit. Finally, use a lug wrench to securely tighten the lug nuts, being careful not to overtighten and damage the threads. Remember, the safety of your mower depends on the proper installation of your spare tire, so take your time and follow these steps carefully.
With your spare tire successfully installed, you’re now ready to resume mowing with peace of mind.
Tighten the lug nuts as tight as possible
When installing a spare tire, it’s important to make sure you have the right tools and equipment. Once you have the spare tire in place, it’s time to move on to the next step, which is tightening the lug nuts as tight as possible. This is a crucial step in the process, as it ensures the safety and security of the spare tire.
The keyword for this step is “tighten lug nuts”, as this is the main focus of this particular stage. While it may seem like a simple task, it’s important to keep in mind that you don’t want to over-tighten the lug nuts, as this can cause damage to the tire and potentially lead to an accident. Additionally, you want to make sure that the lug nuts are tightened in a crisscross pattern, as this will help ensure that the tire is evenly secured in place.
By following these simple steps, you can feel confident that your spare tire is installed correctly and will keep you safe on the road.
Step 4: Lower the Mower and Finish up
After placing the new tire onto the axle, secure the lug nuts with your hand. Make sure they’re fastened tightly but don’t over tighten them. Next, lower the mower down to the ground slowly.
At this point, you should check everything to make sure your tire is secure and in good condition. Once you’re satisfied, start the engine and take your mower for a short test drive. This will help determine if the tire is properly aligned and functioning correctly.
Don’t forget to clean up the area after you’re finished, especially if you used a jack to raise your mower. In short, changing a tire on a riding lawn mower is a simple process that can be done yourself. By following these steps and taking time to carefully check your work, you can be sure that you’re able to keep your lawn looking great all season long.
Lower the mower back onto the ground with the car jack
Now that you’ve replaced the blade on your lawmower, it’s time to finish up by lowering it onto the ground with the car jack. Make sure the mower is positioned properly and that the jack is stable before you begin to lower it. Slowly release the pressure on the jack, while simultaneously guiding the mower back down onto the ground.
Once the mower is back on the ground, remove the jack and give the blade a test spin to ensure everything is working correctly. It’s always better to be safe than sorry, so make sure to take your time and follow instructions carefully throughout the entire process. By doing so, you’ll be able to avoid accidents and problems down the road.
Remember, maintaining your lawnmower is essential if you want it to last a long time, so don’t skip any steps!
Double check the lug nuts are tight and secure
After tightening all of the lug nuts, it’s time to lower the mower and finish up. This step is just as important as the previous ones since it ensures that the mower is stable and won’t tip over. Slowly lower the jack until the wheels touch the ground and then gently slide it out from under the mower.
At this point, take a few steps back and admire your work. Job well done! However, before you put your tools away, it’s crucial to take a quick test drive around your yard to ensure that everything is working correctly. If the mower feels unsteady or wobbly, stop and double-check the lug nuts.
It’s better to be safe than sorry. Once you’ve given it the green light, put your tools away and enjoy your newly serviced mower. Remember to do this maintenance at least once a year to extend the life of your mower.
Happy mowing!
Store the flat tire and tools back
Now that you’ve successfully changed the flat tire on your lawn mower, it’s time to finish up the task. The next step is to lower the mower back into its original position. Slowly release the jack and make sure it’s completely lowered before removing it.
Next, store the flat tire and all your tools back in their proper place. It’s important to keep them organized and easily accessible for future repairs. Check to make sure everything is secure and nothing is left behind.
Once you’re sure everything is cleaned up and accounted for, give your mower a quick test run to ensure everything is working properly. The last thing you want is to have to go through this process again too soon. With that, you have successfully changed your flat tire and are now back to having a fully functioning lawn mower once again.
Test the mower to ensure the new tire is working properly
Once you’ve successfully changed the tire on your mower, it’s important to test it out before you start mowing your lawn. You don’t want to get halfway through your yard and realize that the new tire isn’t functioning properly. Start by turning on your mower and engaging the blades, making sure everything is running smoothly.
Then, take it for a test drive around your yard. Pay attention to how the mower handles and if there are any strange noises or vibrations. If everything seems to be working properly, congratulations, you’re ready to get back to mowing! Just remember to take it slow at first and ease into your usual routine.
And don’t forget to keep an eye on that new tire to make sure it holds up over time. Happy mowing!Keyword: mower tire.
Conclusion
Changing a tire on a riding lawn mower may seem like a daunting task, but with the right tools and a little bit of know-how, it can be a breeze. Remember to keep safety in mind, and don’t forget to check your spare tire every once in a while too. And just like that, you’ll be well-equipped to tackle any tire-related mishaps that come your way.
Now, go forth and conquer that lawn maintenance like the champion you are!”
FAQs
What tools do I need to change a tire on a riding lawn mower?
To change a tire on a riding lawn mower, you will need a lug wrench, a car jack, and a replacement tire.
How do I jack up a riding lawn mower to change a tire?
To jack up a riding lawn mower, position the jack under the frame, engage the parking brake, and use the jack handle to lift the mower until the tire is off the ground.
Can I repair a flat tire on a riding lawn mower instead of replacing it?
It is generally recommended to replace a flat tire on a riding lawn mower instead of repairing it, as repaired tires may be less reliable and safe.
How do I remove a damaged tire from a riding lawn mower?
To remove a damaged tire from a riding lawn mower, use a lug wrench to loosen the lug nuts, then carefully lift the tire off the axle.
How do I install a new tire on a riding lawn mower?
To install a new tire on a riding lawn mower, align the tire with the axle and secure it with the lug nuts, tightening them with a lug wrench.
Can I change a tire on a riding lawn mower without a jack?
It is not recommended to change a tire on a riding lawn mower without a jack, as lifting the mower without a jack can be unsafe and potentially cause damage.
Where can I purchase replacement tires for my riding lawn mower?
Replacement tires for riding lawn mowers can typically be found at lawn and garden stores, hardware stores, or online. Be sure to check the size and type of tire required for your specific mower.