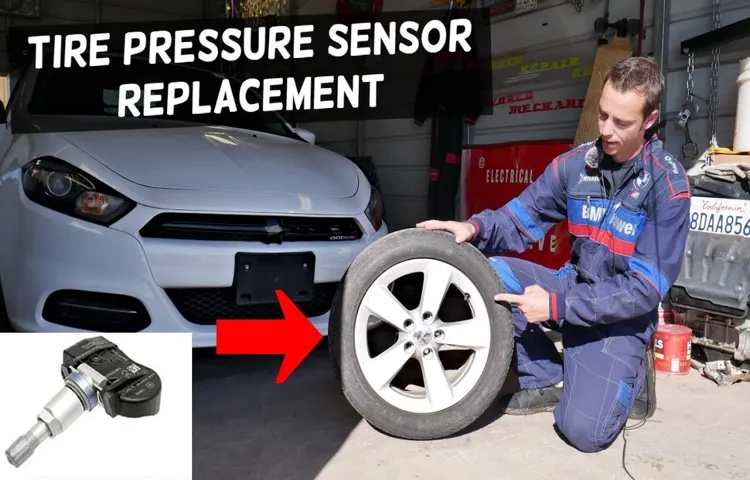
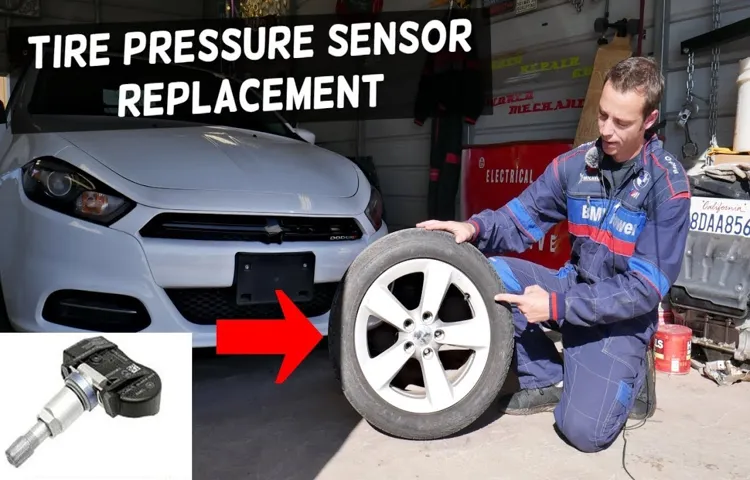
Are you experiencing issues with your tire pressure readings or receiving warning lights on your dashboard? This could be an indication that your tire pressure sensor needs to be changed. Don’t worry; changing your tire pressure sensor is not as complicated as you might think. In fact, with the right tools and knowledge, you can get it done in no time.
Think of your tire pressure sensor as the communicator between your tires and your vehicle’s computer system. When the sensor detects a change in your tire pressure, it sends a signal to your vehicle notifying it of the change. This information is then displayed on your dashboard, allowing you to take the necessary steps to keep your vehicle safe and running smoothly.
Over time, your tire pressure sensor may become damaged, leading to inaccurate readings, or worse, no readings at all. This can make it difficult to monitor your tire pressure and increase the risk of a blowout or flat tire. In this blog post, we’ll walk you through the steps on how to change your tire pressure sensor, ensuring your safety and peace of mind while on the road.
So grab your tools and let’s get started on changing your tire pressure sensor.
Introduction
Changing the tire pressure sensor may seem like a daunting task, but it’s actually a relatively simple process. The first step is to locate the sensor, which is usually positioned in the valve stem of the tire. Once located, use a wrench to remove the sensor from the tire.
Be sure to keep track of the sensor’s position, as it will need to be properly aligned when reinstalled. Once the old sensor is removed, insert the new sensor into the valve stem and tighten it securely with the wrench. Finally, inflate the tire to the manufacturer’s recommended pressure and test the sensor to ensure it is functioning correctly.
And that’s it – you’re all set with a new tire pressure sensor. Remember to check your tire pressure regularly to ensure optimal driving conditions on the road.
Explanation of what a tire pressure sensor is and why it matters
Tire pressure sensors are small devices that are mounted on each tire of a vehicle and help monitor the air pressure of the tire. These sensors send a signal to the car’s computer system, which then alerts the driver if the tire pressure drops below the recommended level. This device is crucial as it can prevent accidents caused by underinflation or overinflation of tires, and it can also improve fuel efficiency.
By ensuring that the tire pressure is at an optimum level, the vehicle can perform better and have a longer lifespan. Having a tire pressure sensor could save you money in the long run as you won’t have to replace worn-out tires prematurely due to issues caused by improper inflation. It is essential to have your tire pressure sensors checked regularly by a professional mechanic to ensure they are functioning correctly.
By doing so, you can be assured of your vehicle’s safety and performance on the road.

Step-by-Step Guide
Changing a tire pressure sensor can be a daunting task, but with the right tools and some patience, it can be done at home. First, locate the sensor on your tire which is typically attached to the valve stem. Next, remove the tire from the wheel and detach the old sensor.
It’s crucial to be gentle when removing the sensor to avoid further damage to your tire or wheel. Once the old sensor is removed, attach the new one in its place and secure it tightly with a wrench. Finally, remount the tire back onto the wheel and repeat the process with the remaining tires.
It’s important to check the tire pressure after the new sensors are added and adjust if necessary. By following these simple steps, you can change your tire pressure sensor quickly and efficiently, ensuring the safety and performance of your vehicle.
Step 1: Gather necessary tools and materials
When it comes to any project, the right tools and materials can make all the difference. Before you start your project, it’s essential to gather all the necessary items you’ll need. For instance, if you’re embarking on a DIY home improvement project, you’ll need a range of tools such as hammers, saws, screwdrivers, measuring tape, and safety goggles.
Ensure that you have all the supplies, including paint, nails, screws, wood, and any other materials that you may require. Don’t forget to factor in any unforeseen expenses that may arise, such as broken tools or additional supplies needed. By taking the time to gather all the necessary tools and materials, you’ll save time and skip the frustration of having to stop your project to run to the hardware store.
In summary, prep work is crucial so that you can start your project on the right foot.
Step 2: Locate the tire pressure sensors
When it comes to checking or replacing your tires, it’s essential to know where the tire pressure sensors are located. These sensors play a vital role in monitoring the air pressure in your tires and sending alerts to the dashboard when they are low or flat. To locate the sensors, start by checking your car’s manual.
You can find a detailed guide on the location of the sensors in the manual. In most cars, the sensors are located inside the tire valve stem, making it easy to spot them. If you have trouble identifying them, you can use a tire pressure gauge to determine which tire is low and then follow the valve stem to locate the sensor.
Always take caution when working on your tires, and be sure not to damage or break off the sensors while attempting to check or replace your tires. By locating the sensors, you will be up to date with your tire pressure and ensure your car runs smoothly on the road.
Step 3: Remove the sensor
Removing a sensor from a machine may seem daunting, but it can be a simple process if done correctly. To remove the sensor, you should first turn off the machine and unplug it for safety. Next, locate the sensor by referring to the machine’s manual or by visually inspecting it.
Once you have located the sensor, you will need to disconnect any wires or cables connected to it. This can be done by carefully following the wire or cable to its connection point and unfastening it. Finally, remove any fasteners holding the sensor in place and gently lift it out of its position.
Remember to handle the sensor with care, as it can be delicate and important to the functioning of the machine. It is also important to keep track of any screws or fasteners that were removed, as they will need to be reattached when the new sensor is installed. By following these steps, you should be able to successfully remove the sensor without causing any damage to the machine.
Step 4: Install the new sensor
Now that you’ve gone through the previous steps and have the old sensor removed, it’s time to install the new one. Make sure the new sensor matches the make and model of your vehicle and carefully insert it into the slot where the old sensor used to be. Gently tighten any screws or bolts needed to secure it in place, being careful not to over-tighten or strip them.
Keep in mind that the sensor is a delicate component, so handle it with care and avoid touching the sensor’s flat surface with your fingers or any tools. Once the sensor is securely in place, you can proceed with reassembling any other parts that you had to remove in the previous steps before testing the new sensor. With your new sensor installed and your vehicle fully reassembled, you’ll be ready to hit the road with confidence.
Step 5: Reset the system
Resetting the system is the final step in fixing any technical issues you might be facing with your device. Before proceeding with the reset, make sure to have all your data backed up as this process will erase all the data from your device. To reset the system, go to the settings menu on your device and click on the reset option.
From there, you can choose the type of reset you want to perform, such as a factory reset or a soft reset. A factory reset will delete all the data on your device and revert it back to its original settings, while a soft reset will just restart the device. It’s important to note that resetting the system should be the last resort when dealing with technical issues.
If the problem persists after resetting, it’s best to contact a professional for assistance. By resetting the system, you can give your device a fresh start and resolve any software glitches, ultimately improving its overall performance.
Tips and Warnings
Changing tire pressure sensors can be a daunting task for many car owners, but with the right tools and guidance, it can be done easily. First, make sure you have the correct replacement sensor for your car. Then, remove the tire from the car and locate the sensor attached to the valve stem.
Use a wrench to remove the nut holding the sensor in place and carefully take it out. The new sensor can then be installed, making sure it is securely tightened in place. It’s important to note that not properly maintaining or ignoring tire pressure sensor issues can lead to reduced fuel efficiency, tire wear, and even a potential blowout.
Regularly checking and replacing tire pressure sensors will ensure the longevity and safety of your car. With these tips in mind, changing tire pressure sensors can be done in no time!
Things to keep in mind when changing a tire pressure sensor
When it comes to changing a tire pressure sensor, there are a few things to keep in mind to ensure a successful replacement. Firstly, it’s important to follow the instructions provided by the manufacturer to avoid damaging the new sensor or the tire. Secondly, never inflate the tire beyond the recommended pressure as this can cause the sensor to malfunction or even break.
A helpful tip is to check the condition of the valve stem before installing the new sensor as this can affect accuracy. Additionally, it’s worth noting that tire pressure sensors can vary between different car models, so make sure to get the correct one for your vehicle. Finally, it’s essential to test the new sensor after installation to ensure proper functionality.
By keeping these tips and warnings in mind, you can replace your tire pressure sensor without any issues and maintain the optimal pressure for a safer and smoother ride.
Conclusion
In conclusion, changing a tire pressure sensor may seem like a daunting task, but with the right tools and steps, it can be done with ease. Just remember, your car’s tire pressure sensor is like a pint-sized superhero. It may be small, but it plays a vital role in keeping you safe on the road.
So, if your sensor is giving you trouble, don’t wait around for someone else to come to the rescue. Take matters into your own hands and become the hero of your own car’s sensor system!”
Final thoughts on changing a tire pressure sensor
Changing a tire pressure sensor can be a daunting task, but with the right tips and warnings, it can be done smoothly. The first thing to keep in mind is to always read the car’s manual and follow the manufacturer’s instructions carefully. Make sure to have the proper tools on hand, including a torque wrench, jack, and lug wrench.
It’s also crucial to be cautious when removing the sensor as it can be delicate and easily damaged. When installing the new sensor, use a torque wrench to ensure it’s tightened properly. Additionally, keep in mind that tire pressure sensors typically have a battery life of around five to ten years, so it’s essential to check them regularly and replace as necessary.
It’s crucial to be extra attentive when changing tire pressure sensors, as they serve an essential function in keeping you safe on the road. By following these tips and being mindful of potential hazards, you can successfully change a tire pressure sensor without any issues.
FAQs
What is a tire pressure sensor and how does it work?
A tire pressure sensor is a small device that is attached to the tire valve stem and measures the tire pressure. It sends the information to the car’s computer system, which alerts the driver if the pressure is too low. The sensor works by using a pressure transducer that measures the pressure inside the tire.
How do I know if my tire pressure sensor is not working?
If your tire pressure sensor is not working, you may notice that the tire pressure warning light on your dashboard stays on, even if you have checked and adjusted the tire pressure manually. You may also hear a beeping sound or receive an alert on the car’s information center.
Can a tire pressure sensor be repaired or does it need to be replaced?
In most cases, a tire pressure sensor cannot be repaired and must be replaced. However, some sensors may be reprogrammed or calibrated if they are not damaged and just need to be reset.
How often should I replace my tire pressure sensors?
Tire pressure sensors typically last for 5-7 years, but their lifespan can be extended by regularly checking and maintaining the tire pressure. It is recommended to replace the sensors if they are damaged, malfunctioning, or if the batteries have died.
Is it safe to drive with a malfunctioning tire pressure sensor?
It is not recommended to drive with a malfunctioning tire pressure sensor, as it can affect the accuracy of the tire pressure readings and put you at risk of tire blowouts, reduced fuel efficiency, and increased tire wear.
How much does it cost to replace a tire pressure sensor?
The cost of replacing a tire pressure sensor can vary depending on the make and model of your car, as well as the location and availability of the sensors. On average, the cost can range from $50 to $200 per sensor.
Can I replace a tire pressure sensor myself or do I need a professional?
While it is possible to replace a tire pressure sensor yourself, it is recommended to have a professional mechanic or tire technician do the job, as it requires specialized tools and equipment. Additionally, improper installation can cause damage to the tire or sensor.


