Have you ever wanted to create realistic tire marks in your artwork? Whether you’re designing a thrilling car chase scene or a gritty urban landscape, the addition of a few convincing tire tracks can make all the difference. But how do you go about creating these marks in a way that looks natural and authentic? The answer lies in understanding the physics of how tires interact with different surfaces, as well as the visual cues that communicate this interaction. In this blog post, we’ll explore some tips and techniques for creating realistic tire marks that will add depth and authenticity to your artwork.
Table of Contents
Introduction
If you’re ever wondering how to draw tire marks, you’re in luck! Tire marks can be a fun addition to your artwork, whether you’re drawing a car chase scene or a burnout. The first step to drawing tire marks is to study them in real life. Take a look at tire marks on a road or parking lot and pay attention to the direction, thickness, and shape of the marks.
When you’re ready to draw, start by sketching the outline of the area where the tire marks will go. Then, draw the tread pattern of the tire, using reference photos if necessary. Finally, add in the tire marks themselves, remembering to make them thicker at the beginning and tapering off towards the end.
With a little practice, you’ll soon be able to add realistic tire marks to your drawings like a pro!
Explaining the Purpose of Tire Marks
Tire marks are often found at the scene of an accident, and they serve a significant purpose in determining what happened during the incident. These marks can provide crucial information, such as the speed and direction of the vehicle that caused them. In addition, they can help determine if the driver was braking or accelerating before the crash occurred.
By analyzing the tire marks, investigators can piece together the sequence of events leading up to the accident. This can help determine who is at fault and provide insight into what safety measures can be taken to prevent similar accidents in the future. Overall, tire marks are a vital tool in accident investigation, and their analysis can have a significant impact on the outcome of an investigation.

Materials Needed for Drawing Tire Marks
As an artist, creating realistic tire marks is an essential skill that enhances the overall realism of your artwork. However, to create tire marks, you need specific materials that are slightly different from the typical drawing tools that you use. These materials include a pencil or charcoal, a ruler or straight edge, an eraser, and blending tools.
While it might seem straightforward, creating perfect tire marks takes some practice and skill. With the right materials and proper technique, you can produce tire marks that add depth and realism to your artwork.
Step-by-Step Guide
Have you ever wanted to add some realistic tire marks to your drawing or artwork? Well, you’re in luck because it’s easier than you might think! To start, you will need a piece of paper, a pencil, and an eraser. Begin by drawing the path where you want to add tire marks, keeping in mind the shape and size of the marks you’re looking to create. Next, use your pencil to lightly sketch out the outline of the tire marks.
Remember, tire marks are not perfect lines and have a slightly jagged texture, so don’t worry about making them too uniform. Once you’re happy with the outlines, darken them with your pencil to add depth and dimension. To make them even more realistic, add some shading and highlights to the marks using your pencil and eraser.
Voila! You now have some realistic tire marks in your artwork. With these simple steps, you can easily add an extra level of realism to your drawings. Give it a try and see how your artwork transforms!
Step 1: Drawing the Outline of the Tire
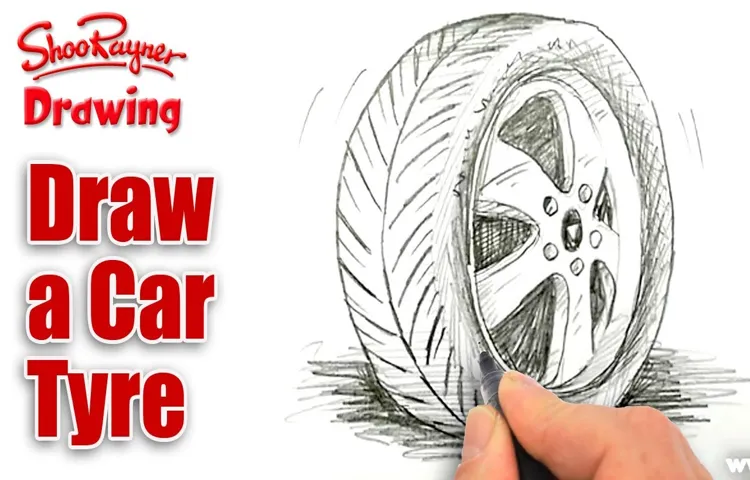
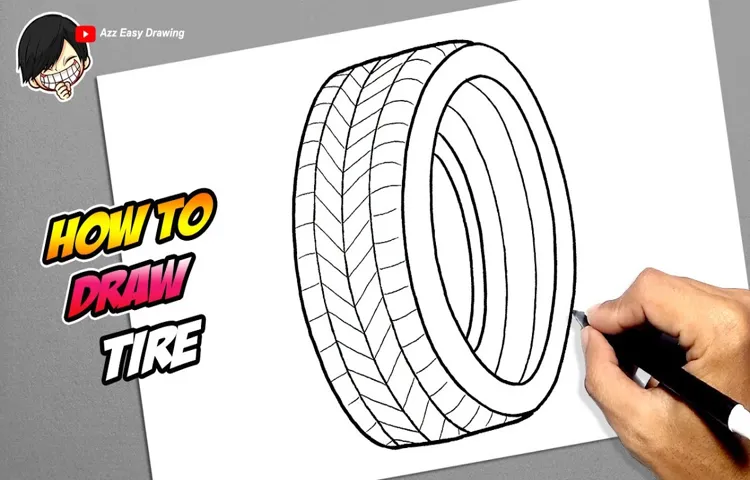
Drawing the outline of a tire is an essential step in creating a realistic-looking tire illustration. To start, sketch the basic shape of the tire, ensuring it’s proportional and symmetrical. Then, create guidelines that will help you draw the rest of the tire accurately.
These guidelines will cover the sidewall, tread, and rim of the tire. Don’t forget about the distance between the sidewalls and the width of the tire’s tread. You can start adding details, like the grooves in the tread or the small raised lettering on the sidewalls, once the guidelines are in place.
Remember to use reference images and photographs to make your tire drawing as accurate as possible. With a bit of patience and practice, creating a realistic tire outline is totally achievable, and the end result will be worth the effort.
Step 2: Adding Details to the Tire Mark
Now that we’ve created the base of our tire mark, it’s time to add some details to make it look more realistic! One way to do this is by varying the width of the tire mark. In real life, tire treads aren’t always the same width, so we want to mimic that in our drawing. Start by using your pencil to lightly sketch in some thinner and thicker sections of the tire mark.
You can also add some texture within the tire mark to give the illusion of tire tread. To do this, use your pencil to add some short, curved lines in the direction of the tire mark. This will create the appearance of grooves within the tire tread.
Don’t worry about making it look perfect – tire marks are often messy in real life, so a bit of imperfection adds to the realism! With these simple steps, your tire mark will look like it was left by a real vehicle.
Step 3: Adding Shadows and Highlights
Adding shadows and highlights is an essential step in creating depth and dimension to any digital artwork. With just a few simple steps, you can turn a flat image into a piece of art that jumps out of the screen. To start, create a new layer and set its blending mode to Overlay.
Next, select a soft brush and choose a color that complements your artwork. Use the brush to paint shadows under objects and highlights on their tops, following the direction of the light source. For more natural-looking results, vary the opacity and size of your brush and add different shades of color for each layer.
Don’t be afraid to experiment with different combinations until you achieve the perfect balance. With a little bit of practice, you’ll be able to add shadows and highlights seamlessly and bring your artwork to life.
Tips for Realistic Tire Marks
Are you struggling to draw realistic tire marks in your artwork? Don’t worry, you’re not alone! Drawing tire marks can be challenging, but with a few helpful tips, you can create a realistic effect that will add depth to your drawings. Firstly, consider the type of tyre used in your image. The size, pattern, and pressure of the tyre will all affect the shape and depth of the marks left on the pavement.
Secondly, pay attention to the speed and direction of the vehicle. Fast, sharp turns will create wider, more dramatic marks, while slow, gradual turns will create more subtle marks. Additionally, think about the surface of the pavement, as a smoother surface will create cleaner marks, while a bumpy surface will create more irregular marks.
Remember to experiment with different techniques until you find the right combination for your specific artwork. By using these tips, you’ll be able to create realistic tire marks that add a touch of realism to your drawings.
Using Reference Images
When it comes to creating realistic tire marks in your artwork, using reference images is key. Look for photos of tire marks on various surfaces, including asphalt, gravel, and dirt. Pay close attention to the shape and texture of the mark, as well as how it fades over time with weather and use.
Experiment with different blending modes and brush settings to create a natural-looking effect. One tip to keep in mind is to create variation in your tire marks. A single tire mark won’t look the same on every surface or in every situation, so make sure to change up the shape, length, and opacity of your marks as needed.
It’s also important to consider the context of the scene. Are the tire marks fresh, or have they been there for a while? Are they on a crowded street or a deserted back road? Ultimately, using reference images and paying attention to the details will help you create more believable tire marks in your artwork. Don’t be afraid to experiment and test out different techniques until you find the perfect look for your piece.
With a little practice and patience, you’ll be creating tire marks that look like they belong in the real world.
Drawing Tire Tread
If you’re drawing a car or truck, it’s important to pay attention to the tire tread. It may seem like a small detail, but accurate tread marks can make a significant difference in the realism of your drawing. To create realistic tire marks, it’s essential to understand the anatomy of a tire and the way it interacts with the road.
Start by drawing the shape of the tire and then adding the tread pattern. Pay attention to the depth and spacing of the grooves, and consider how they might change depending on the conditions of the road. Think about whether the tire is wet, dry, or covered in mud, as this will affect the appearance of the tread marks.
It’s also important to pay attention to the direction of the tread, as this will determine the way the tire interacts with the road surface. By paying attention to these details, you can add a level of realism to your drawing that will make it stand out.
Practicing Different Techniques
When it comes to creating a realistic scene, it’s important to consider every detail – and that includes the tire marks. Tire marks can add a sense of realism and movement to an otherwise static piece. But how exactly do you create them in a way that looks natural? One tip is to consider the surface the tire is on.
A tire mark on dirt will look different than a tire mark on asphalt or gravel. Another tip is to vary the width and depth of the marks, as real tire tracks won’t all be the same size. And don’t forget to add some imperfections, such as smudges or scuffs, to really sell the realism.
By practicing different techniques and paying close attention to the surface and varying the details, you can create tire marks that look like they belong in the scene – making the whole piece come to life.
Conclusion
If you want to leave a lasting impression with your art, learning how to draw tire marks is a handy skill to have up your sleeve. Just remember to pay attention to the texture and shape of the marks, and add a little bit of shading to make them pop. With a bit of practice, you’ll be able to create realistic skid marks that will leave your audience in awe.
So get out there and start practicing – the road to impressive tire marks begins now!”
FAQs
What materials do I need to draw tire marks?
To draw tire marks, you will need a paper or canvas, pencils or charcoal, erasers, and reference images.
What are some techniques for drawing realistic tire marks?
Some techniques for drawing realistic tire marks include observing reference images, sketching lightly and then darkening to create depth, and layering strokes to create a textured effect.
How do I draw tire marks on different surfaces, such as asphalt or dirt?
To draw tire marks on different surfaces, you will need to observe the texture and color of the surface, as well as the shape and size of the tire. For example, tire marks on dirt will have a more irregular shape and be lighter in color, while those on asphalt will be darker and smoother.
Can I use digital tools to draw tire marks?
Yes, you can use digital tools such as drawing tablets and software to create tire marks. Some popular software options include Adobe Photoshop and Procreate.
How do I draw a tire tread pattern?
To draw a tire tread pattern, you will need to observe reference images and sketch the outlines of the tread blocks. Then, you can add texture and shading to create the illusion of depth and dimension.
How can I make sure my tire marks are anatomically correct?
To ensure anatomical correctness when drawing tire marks, it is important to observe reference images and pay attention to details such as the shape of the tire, the direction of the skid, and the amount of pressure applied.
How can I use tire marks in my artwork?
Tire marks can add a sense of motion and energy to your artwork, and can be used to suggest movement or create a sense of tension. They can be used in a variety of mediums, including painting, drawing, and digital art.


