Do you have a tubeless tire that needs filling but you’re not quite sure how to do it? Don’t worry, we’ve got you covered! Filling a tubeless tire can seem daunting at first, but it’s actually a relatively simple process that just requires a bit of know-how and the right tools. In this blog post, we’ll walk you through the steps of filling a tubeless tire so you can get back on the road in no time. First things first, let’s talk about what a tubeless tire is.
Unlike traditional tires that require an inner tube to hold the air, tubeless tires have an airtight seal between the tire and the wheel rim. This means that you don’t need an inner tube to hold the air in place. Instead, you can add sealant directly to the tire to prevent punctures and leaks.
To fill a tubeless tire, you’ll need a few things: an air compressor or a pump with a high-pressure gauge, sealant, and a valve core remover (which may come included in some sealant bottles). Once you have these items, it’s time to get started. Begin by removing the tire’s valve cap and unscrewing the valve core with the removal tool.
This will allow air to flow freely through the valve stem. Next, attach your compressor or pump to the stem and inflate the tire to your desired pressure. Make sure to check the tire’s maximum pressure rating before inflating to avoid over-inflation.
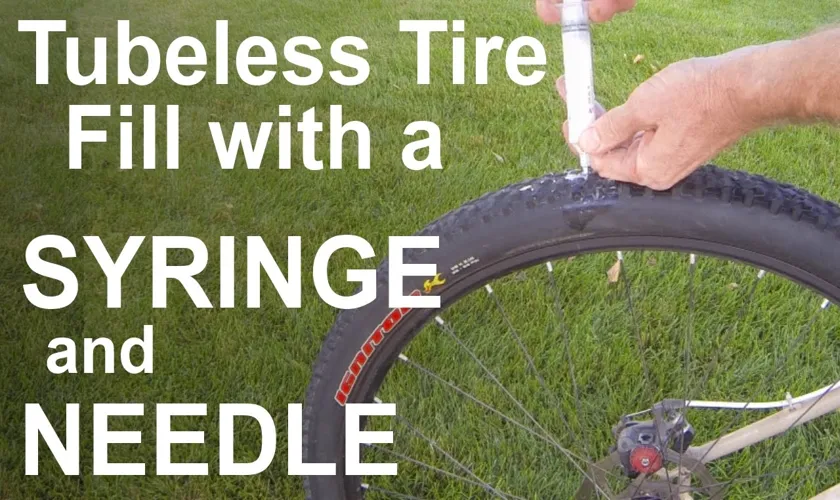
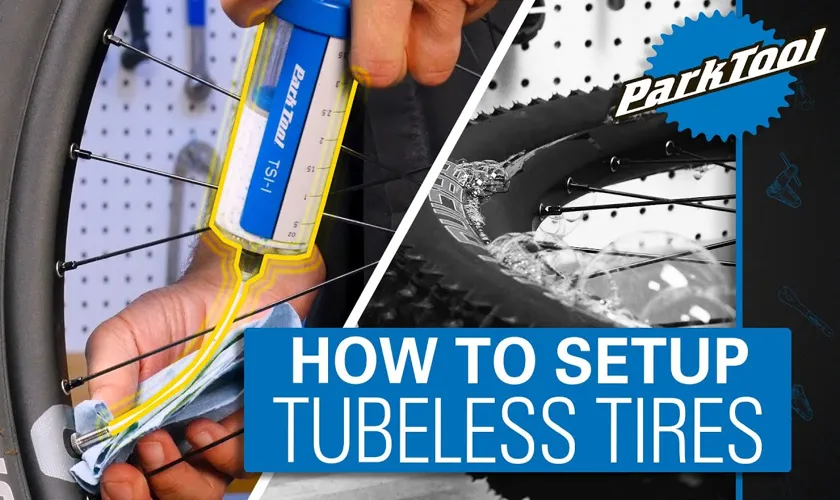
After inflating the tire, it’s time to add sealant. Shake the bottle of sealant to mix it thoroughly and then remove the valve core again. Using the bottle’s built-in applicator, pour the sealant into the valve stem.
You can also pour the sealant directly into the tire through the sidewall if you prefer. Finally, replace the valve core and inflate the tire one more time to distribute the sealant evenly. If you notice any leaks or punctures, pump up the tire again and give it a spin to distribute the sealant until the leak stops.
Table of Contents
Gather Necessary Materials
If you need to fill a tubeless tire, the first step is to gather the necessary materials. You will need an air compressor or a tire inflator, a tire sealant, a valve stem tool, and a tire pressure gauge. Make sure to choose a sealant that is compatible with your tire and follow the instructions carefully.
Using the valve stem tool, remove the valve core from the valve stem and add the recommended amount of sealant to the tire. Then, reinsert the valve core and use the tire pressure gauge to check the tire pressure. Use the air compressor or tire inflator to inflate the tire to the recommended pressure level.
It is important to periodically check the tire pressure and reapply the sealant as required, especially if you frequently ride over rough terrain. Overall, filling a tubeless tire can be an easy process if you have the right equipment and take the time to follow the instructions carefully.
Tire Sealant
If you’re planning to apply tire sealant to your vehicle, you need to gather some necessary materials. First and foremost, you will need the tire sealant itself. You can either buy a pre-made sealant from the market or make one at home using a variety of materials like corn syrup, glycerin, dish soap, and water.
Next, you will need a high-pressure air compressor or a tire pump to inflate the tire once you apply the sealant. Additionally, don’t forget to wear protective gloves and eye gear to prevent sealant from coming into contact with your skin or eyes. Lastly, keep an old towel or cloth handy to wipe off any excess sealant or spills that may occur during the application.
By gathering these materials and being fully prepared, you can ensure a smooth and efficient application of tire sealant to your car’s tires for improved performance and longevity.

Valve Core Remover
If you’re looking to remove a valve core from a tire valve stem, you’ll need a valve core remover. This tool is essential to safely and efficiently remove the valve core without damaging your tire or rim. To get started, gather the necessary materials including the valve core remover, a rag or towel to wipe away any debris or dirt, and a spare valve core in case you accidentally damage or lose the old one during the removal process.
Once you have these items, you’re ready to remove the valve core and ensure your tire stays in top condition. With the right tools and a bit of know-how, you can easily tackle this maintenance task and keep your tires working properly. So don’t hesitate to grab that valve core remover and get to work!
Air Compressor
Before you can begin using an air compressor, it’s important to gather all of the necessary materials to ensure a smooth and efficient process. First and foremost, you’ll need an air compressor itself, which can come in a variety of sizes and styles depending on your specific needs. Additionally, you’ll need an air hose to connect the compressor to your accessories, such as air-powered tools or inflation devices.
It’s also important to invest in a quality set of attachments, including nozzles, adapters, and regulators, to ensure you have everything you need for any job that comes your way. Finally, be sure to have a safe and stable place to operate the compressor, away from any potential hazards or obstructions. With all of these materials at the ready, you’ll be able to get started with your air compressor in no time and tackle any task that comes your way.
Prep the Tire
If you want to learn how to fill a tubeless tire, the first thing you need to do is prepare the tire properly. Make sure you have a compatible valve installed and remove any old sealant residue. Cleaning the tire with soap and water followed by a dry cloth can help ensure there is no debris trapped inside.
To insert new sealant into the tire, start by first shaking the bottle to mix the contents. Then, attach the nozzle to the valve stem and slowly add the sealant until you reach the recommended amount. Don’t overfill the tire since it can lead to further complications.
To test the sealant, give the tire a spin to allow the sealant to evenly distribute. You should see the sealant quickly sealing any punctures or small holes. If not, try adding more sealant or give the tire a more thorough spin.
Keep in mind that once the sealant is in place, don’t forget to check the tire pressure periodically to make sure you’re riding with the correct tire pressure and avoid any issues down the road. In summary, filling a tubeless tire is a simple job that requires proper preparation and attention to detail. By following the steps above, you can have a well-sealed tire ready to go on your next ride.
Remove Tire from Rim
Removing a tire from its rim can seem like a daunting task, but with the right preparation, it can be done with ease. The first step is to ensure that the tire is completely deflated, so that there is no air pressure pushing against the rim. Once the tire is flat, you can move on to removing any wheel weights or valve stems that may be attached.
It’s important to take your time during this process, as rushing can lead to unnecessary damage to the tire or rim. Once you’ve removed any attachments, it’s time to break the bead of the tire from the rim. This can be done using a tire changer or a tire bead breaker.
By breaking the bead, you’ll be able to remove the tire from the rim completely. With the tire now removed, you can move on to any necessary repairs or replacements. With a little patience and attention to detail, removing a tire from a rim can be done quickly and without any issues.
Clean Inside of Tire
If you’re looking for a way to spruce up your tires and give them a brand-new look, cleaning the inside of the tire is a great place to start. However, before you begin, it’s important to prep the tire. The first thing you’ll need to do is remove any debris or dirt from the surface of the tire.
You can use a simple brush or rag to wipe away any dirt that might be stuck to the surface. Once you’ve cleared the debris, you can begin to clean the inside of the tire. It’s important to be cautious while cleaning the inside, else you could end up damaging the tire.
Once you get your tires clean on the inside, you’ll be able to enjoy a new look, and it’ll be easier to spot any wear or damage that could be hidden under dirt or debris. So, if you’re looking to spruce up your tires, give cleaning the inside a try, and enjoy a fresh new look for your ride.
Add Tire Sealant
Are you looking for an effective way to fill your tubeless tire? Look no further, as tire sealant is your solution! Adding tire sealant is an important step in maintaining a tubeless tire. It helps to fill in any small punctures or leaks in the tire, preventing air from escaping and keeping your tire inflated. Filling your tire with sealant is a simple process that can be done at home with the right tools.
First, remove the valve core from the tire and add the recommended amount of sealant to the tire through the valve stem. Next, reinsert the valve core and give the tire a good spin to distribute the sealant evenly. Finally, inflate the tire to the desired pressure and you’re good to go! It’s important to note that tire sealant does have a shelf life, so be sure to check the expiration date before use.
By adding tire sealant to your tubeless tire, you can ensure a longer lifespan and lessen the need for frequent repairs.
Shake Sealant Bottle
If your tire is flat, adding sealant can get you rolling again. But before you do, you need to shake the sealant bottle to ensure the contents are properly mixed. This is important because sealant separated over time and settled at the bottom of the bottle.
So, give it a good shake before use. When you’re ready to add the sealant, remove the valve stem cap and attach the hose of the sealant bottle to the stem. Then, squeeze the bottle to distribute the sealant into the tire.
You can use a gauge to ensure you’re using the right amount of sealant. Once you’re finished, put the valve stem cap back on and inflate the tire to the proper pressure. With the right amount of sealant added, you can drive confidently on the road without worry of flat tires.
Remove Valve Core
If you’re looking to add tire sealant to your bike tires, the first step is to remove the valve core. This is the small, cylindrical piece that sticks up from the valve stem and controls the flow of air in and out of the tire. To remove it, you’ll need a valve core removal tool, which can be found at most bike shops or online retailers.
Simply insert the tool into the valve, turn it counterclockwise, and the core should come loose. Once it’s out, you can add your sealant by injecting it through the valve stem. The sealant helps to seal any small punctures in the tire and can save you from getting a flat on your ride.
Be sure to check the recommended amount of sealant to add for your tire size and type, and to inflate your tires to the recommended pressure after adding the sealant. With a little bit of preparation and the right tools, you can easily add tire sealant to your bike tires and enjoy a smoother, more puncture-resistant ride.
Pour Sealant into Tire
Adding tire sealant to your bike or car tire is a great way to prevent flat tires and ensure a smoother ride. To pour sealant into your tire, first, remove the valve core from the valve stem. Then, attach the sealant bottle to the stem and squeeze the recommended amount into the tire slowly.
Once you have added the desired amount, replace the valve core and inflate your tire to the recommended pressure. It is essential to ensure that you do not add too much sealant as it can cause an imbalance in the tire and lead to other issues. Additionally, it is important to regularly check your tire pressure and adjust it as needed to maintain optimal performance.
By regularly adding tire sealant, you can enjoy a safer and smoother ride with fewer disruptions and a reduced risk of flat tires.
Reinstall Valve Core
After removing the valve core from your tire to add sealant, it’s important to properly reinstall it to ensure your tire stays inflated. Begin by checking the valve stem for any dirt or debris that could prevent the core from properly screwing in. Next, insert the core into the valve stem and use a valve core tool or pliers to fasten it tightly.
It’s important not to overtighten the core as this can cause damage to the valve stem. Once the core is securely in place, it’s time to add your tire sealant. Shake the bottle well before attaching it to the valve stem and slowly squeeze the desired amount into the tire.
Be sure to remove the bottle from the valve stem carefully so as not to dislodge the core. After adding the sealant, reinstall your valve cap and inflate your tire to the recommended pressure. With proper installation and sealant, your tire will be ready to hit the road again in no time.
Inflate the Tire
So, you’ve got a flat tire and need to know how to fill a tubeless tire. Don’t worry, it’s not as complicated as it may seem. First, make sure you have the right equipment on hand, including an air compressor or hand pump and a tire gauge.
Next, remove the valve cap from the tire’s valve stem. Connect the air pump or compressor to the valve stem and begin inflating the tire. Keep an eye on the tire pressure gauge to make sure you don’t overinflate the tire, which can lead to a blowout.
Once the tire is filled to the correct pressure, remove the pump or compressor from the valve stem and replace the valve cap. It’s important to regularly check your tire pressure and inflate your tires as necessary to ensure safe and smooth driving. And that’s all there is to it – now you can hit the road with confidence knowing your tire is properly inflated and ready to go!
Attach Air Compressor
When it comes to inflating a tire, attaching an air compressor is an essential step in the process. An air compressor is a tool that supplies compressed air to inflate tires. First, ensure that the air compressor is in good working condition.
Next, grab the air hose and attach it to the valve on the tire. Tighten it securely, making sure it is seated properly. Then plug in the air compressor and turn it on.
Wait for the compressor to build up the necessary pressure, and then begin inflating the tire. Keep an eye on the pressure gauge to ensure that the tire is inflated to the correct pressure. It is important not to overinflate the tire, as this can cause it to burst.
Once you have reached the desired pressure, turn off the compressor and remove the hose. Check the pressure of the tire using a tire pressure gauge and adjust as necessary. Remember, regular tire maintenance is crucial for safe driving, so check your tire pressure regularly, and if you notice any damage or wear, replace your tires promptly.
Inflating a tire may seem like a hassle, but with the right tools and a little know-how, it can be a quick and easy task. Attaching an air compressor to inflate your tire is a crucial step, and ensures your tire is properly inflated to the correct pressure. Think of an air compressor as your tire’s personal fitness trainer — it helps to keep your tire in tip-top shape.
Just like you wouldn’t expect to run a marathon without some training beforehand, you shouldn’t expect your tires to perform at their best if you don’t take the time to properly inflate them. So give your tire the love it deserves and attach that air compressor to ensure it runs smoothly and safely on the road.
Inflate Tire to Recommended PSI Level
Inflating your tire to the recommended PSI level is an important step in maintaining the safety and longevity of your vehicle. When you have the correct PSI level, your tires will perform optimally, providing better fuel efficiency and handling. Most importantly, it reduces the risk of tire blowouts, which can be dangerous and costly.
To inflate your tire, you’ll need a tire pressure gauge and an air compressor. First, remove the valve cap and attach the pressure gauge to the valve stem. Read the pressure reading and compare it to the recommended PSI level in your car’s manual or on the tire sidewall.
If the reading is too low, use the air compressor to fill the tire to the recommended level. Remember to recheck the pressure with the gauge and adjust as needed. Taking this simple step can save you from costly repairs and keep you safe on the road.
So, next time you fill up your gas tank, take a few minutes to inflate your tires to the recommended PSI level and give yourself peace of mind on the road.
Check for Leaks
One of the most important steps when filling a tubeless tire is to check for leaks. This is because tubeless tires rely on an airtight seal between the tire and the rim to maintain pressure. Even the tiniest puncture or gap can lead to a flat tire and potentially dangerous driving conditions.
To check for leaks, start by inflating the tire to the recommended pressure and spraying soapy water over the entire surface of the tire. Look for bubbles forming, which indicates air escaping. You can also use a tire pressure gauge to check the pressure over several hours or days to see if it remains consistent.
If you detect any leaks, you will need to remove the tire and patch the puncture or replace the tire altogether. By checking for leaks and addressing them promptly, you can ensure a safe and smooth ride on your tubeless tires.
Spray Soapy Water on Tire
One of the best ways to check for leaks in your car tire is by spraying soapy water on them. This is a simple and effective method that can help you identify any leaks on your tire. All you need to do is mix water with soap in a spray bottle, then apply the mixture on the surface of your tire.
Once you have done that, look for any bubbles that may form on the surface of the tire. If you see bubbles, that means there is a leak. The soap solution works by making the escaping air visible through the formation of bubbles.
This method is a great way to locate leaks on your tire so you can attend to them immediately before they become a bigger problem. So next time you suspect a leak, try this soapy water trick and be sure to catch it early. It could save you the trouble of dealing with a flat tire on the road.
Look for Bubbles
When it comes to checking for leaks, one important tip is to look for bubbles. If you suspect a leak, one way to confirm it is to apply a soapy water solution around the area in question. When air escapes from a leak, it can create bubbles in the soapy water, indicating the location of the issue.
This can be especially helpful for finding smaller leaks that may be difficult to locate otherwise. By fixing leaks promptly, you can save water and money on your utility bills. Plus, addressing leaks can prevent more serious issues down the line, such as water damage or mold growth.
So, if you notice any signs of a leak, don’t delay in addressing it. By checking for bubbles and taking action quickly, you can keep your home safe and efficient.
Rotate Tire to Check for Leaks
Checking for leaks is an essential part of maintaining your tires and ensuring your safety on the road. One way to perform this check is to rotate your tires. By doing so, you can easily inspect each tire for any leaks or punctures.
Start by removing each tire and examining it carefully for any signs of damage. Look for bumps or bulges in the sidewall, as well as any cuts or tears on the tread. If you spot any issues, you’ll need to have the tire repaired or replaced immediately.
Remember, driving on a tire with a leak can be dangerous and may result in a blowout. So, take the time to inspect your tires regularly and have them serviced by a professional if you spot any problems. Keeping your tires in good condition is essential for your safety and the longevity of your vehicle, and checking for leaks is a crucial part of that maintenance routine.
So, don’t neglect this critical task, and you’ll be rewarded with safer, smoother driving in the long run.
Conclusion
In summary, filling a tubeless tire is like trying to make a good joke – it’s all about the right amount of pressure. Too much and you risk bursting the tire, too little and it won’t hold up to the road. Just like adding the right punchline can make or break a joke, finding the perfect level of air pressure can make all the difference in keeping your ride smooth and safe.
So, remember to follow the manufacturer’s guidelines, use the correct tools, and most importantly, don’t be afraid to have a little fun along the way!”
FAQs
What is a tubeless tire?
A tubeless tire is a type of tire that doesn’t require an inner tube to hold the air.
How do I know if my tire is tubeless?
Generally, tubeless tires will have the letters “TL” or “Tubeless” on the sidewall.
What are the benefits of a tubeless tire?
Tubeless tires provide better control, stability, and traction. They are also more resistant to punctures.
Can tubeless tires be repaired?
Yes, tubeless tires can be repaired with a plug kit or by patching from the inside.
How do I fill a tubeless tire?
Use a tire gauge to check the recommended air pressure, remove the valve core with a valve stem tool, attach an air compressor hose, and inflate the tire to the recommended pressure.
What should I do if I can’t inflate my tubeless tire?
Check for any leaks or damage to the tire or valve stem. If there are no visible issues, use a sealant to fill any small holes or punctures.
Can I convert my tire to tubeless?
Yes, it is possible to convert some types of tires to tubeless. However, it should only be done by a professional mechanic.


