
So you’re out on a scenic mountain bike ride when suddenly, you feel your tire losing air. You stop and check it out, only to find a flat tire. It’s not uncommon for mountain bikers to deal with flat tires, but it can be frustrating and ruin your ride if you’re not prepared.
This is where knowing how to fix a flat tubeless mountain bike tire becomes essential.Tubeless tires have slowly but surely become the norm in the mountain biking world. One of the significant advantages of using a tubeless tire is the ability to run at lower pressures, which provides better grip and control on the trails.
However, this doesn’t mean that they are immune to flats. In fact, with tubeless tires, you can even experience flats caused by punctures that sealant cannot seal.Fortunately, fixing a flat tubeless mountain bike tire is not too difficult, but it does require some practice and patience.
You will need some essential tools like tire levers, a pump, and a tire plug kit. With these tools and a little bit of know-how, you can get back on the trail quite quickly.In this blog, we will go over the steps to fix a tubeless mountain bike tire, from finding the puncture to using a tire plug kit.
We will also cover some basic tips to prevent flats and how to maintain your tubeless tire to prolong its lifespan. So let’s get started and get you back on the trail in no time!
Materials Needed
If you’re looking to fix a flat tubeless mountain bike tire, you’ll need a few materials to get started. Firstly, you’ll need a tubeless repair kit with plugs and a reamer tool. Additionally, you’ll need a tire lever to remove the tire from the rim, as well as a pump or CO2 inflator to air up the tire once it’s fixed.
Another helpful tool is a valve core remover, which can simplify the process of injecting sealant into the tire. If you don’t have sealant on hand, be sure to grab a bottle before you begin the repair process. Lastly, make sure you have a clean work surface and a little bit of patience.
Fixing a flat tubeless tire can be a bit of a finesse game, but with the right materials and a little know-how, you can get back on the trail in no time.
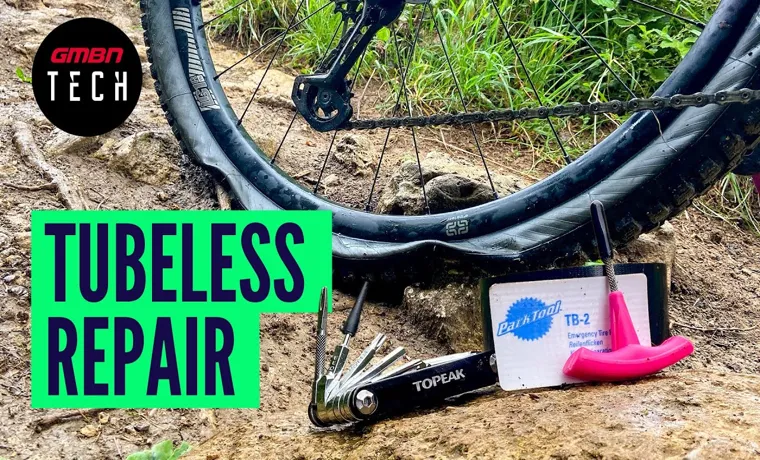
Tubeless Tire Repair Kit
If you’re an avid mountain biker, you understand the frustration of a flat tire in the middle of a trail. That’s why having a tubeless tire repair kit is essential. It’s important to know which materials you’ll need to get the job done.
First up, you’ll need a tire plug tool, which is used to insert plugs into a punctured area. You’ll also need replacement tire plugs, which come in a variety of sizes and shapes. Another vital tool in your kit is a CO2 inflator, which will inflate your tire in seconds.
Lastly, it’s important to have a valve core remover to access the valve in your tubeless tire. With these materials handy, you’ll be able to fix a flat tire in no time and get back to enjoying your ride.
Tire Levers
When it comes to changing a tire, tire levers are an essential tool that can make the whole process easier. These levers are designed to remove the tire from the rim, allowing you to access the inner tube and replace it if necessary. The good news is that you don’t need a lot of materials to use tire levers effectively.
All you need are the levers themselves, a new inner tube, a pump to inflate the tire after you’ve replaced the inner tube, and a bit of know-how. It’s important to choose the right tire levers for your specific tire size and type. Some levers are designed specifically for road tires, while others are better suited for mountain bike tires.
Make sure you do some research before you buy to ensure that you’re getting the right tool for the job. With the right equipment and a little bit of practice, changing a tire with tire levers can be a quick and painless process.
Pump or CO2 Inflator
When it comes to inflating your bike tires, you have two options: a pump or a CO2 inflator. Each option has its pros and cons, and it’s up to you to decide which one suits your needs. For a pump, you’ll need a floor pump or a mini pump, depending on your preference.
A floor pump is great for home use as it provides a stable base and has a long hose for easy reach. On the other hand, a mini pump is portable, making it perfect for on-the-go use. For a CO2 inflator, you’ll need CO2 cartridges and the inflator itself.
CO2 inflators are faster and more convenient than pumps. They’re also lightweight and portable, making them ideal for race day. However, they’re a bit pricier, and you’ll need to remember to carry extra cartridges with you.
Ultimately, the choice between a pump and CO2 inflator depends on your specific needs and preferences.
Locating the Flat
One of the first steps to fixing a flat tubeless mountain bike tire is locating the source of the issue. Start by spinning the tire and visually inspecting it for any visible cuts or punctures on the outer tread. If you don’t find any, remove the tire and check the inside for any damage, such as holes or slices.
It’s important to locate the flat before attempting to fix it, as patching a damaged area that is not the source of the problem will not solve the issue and may cause further damage. Once you find the culprit, clean the area with alcohol and allow it to dry completely before patching or replacing the damaged section. Remember to always check your tire pressure before every ride to prevent flats and maintain optimal performance.
With these simple steps and a little bit of know-how, you can quickly and efficiently fix a flat tubeless mountain bike tire, getting back on the trails in no time.
Listen and Inspect
When searching for a new home, it’s important to know how to locate a flat. One useful strategy is to listen and inspect. As you approach a potential flat, listen for any noise that could be problematic, such as traffic or neighbors playing loud music.
Once inside, inspect every inch of the flat carefully, looking for any signs of damage or wear and tear. This includes checking walls for cracks, examining flooring for scratches or stains, and looking for any signs of pests or mold. By thoroughly inspecting the flat, you can avoid any unpleasant surprises down the road.
Additionally, it’s important to consider the location of the flat. Is it in a safe area? Is it convenient to public transportation and other amenities? By taking the time to evaluate these factors, you can find the perfect flat for you.
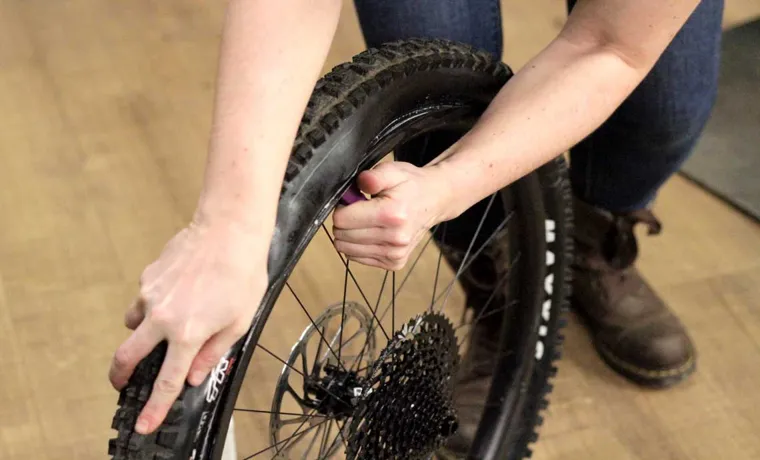
Remove Tire from Rim
When you discover a flat tire, the first step is to locate the puncture. Look closely at the tire tread and check for any visible damage, such as cuts, nails or screws. If you cannot find any visible puncture, it may be an internal puncture where the air leaks out from the inside of the tire.
In such cases, you can use a spray bottle of soapy water and spray it over the tire surface while it is inflated. Any air leak will produce bubbles, making it easier to identify the location. Once you have identified the spot, it’s time to remove the tire from the rim.
This process involves detaching the tire bead from the rim, which can be tricky, but with the right tools and expertise, it’s not so complicated. Removing the tire yourself can save you money, but you must ensure that you have the necessary knowledge and tools to complete the task safely.
Repairing the Flat
If you’re a mountain biker, you know that getting a flat tire can be a frustrating and potentially dangerous situation. Fortunately, fixing a tubeless mountain bike tire is relatively simple. First, remove the tire from the wheel, and then locate the puncture.
If it’s small enough, you may be able to simply use a tire plug to fill the hole. If the puncture is larger or if the sidewall is damaged, you’ll need to use a patch kit to seal the hole from the inside. Next, you’ll need to re-inflate the tire and double-check that the sealant is still working properly.
Overall, fixing a flat tubeless mountain bike tire is a routine maintenance task that every rider should know how to handle. By following these steps and taking care of your tires, you can enjoy your rides with confidence and avoid any unwanted surprises.
Insert Repair Plug
Insert Repair PlugWhen it comes to repairing a flat tire, inserting a repair plug might be an option to consider. This process involves inserting a flexible rubber plug into the nail hole or puncture in the tire, sealing it from the inside and keeping it from losing air. First, you need to remove the object that caused the damage and use a reaming tool to clean the hole’s inner surface.
Then, lubricate the insertion tool with rubber cement, insert the repair plug into the tool’s eye, and push it into the hole till it’s flush with the tire surface. Cut off the excess of the plug, and voila, your tire is ready to be inflated and ridden. Keep in mind that this method is not suitable for all types of punctures and might only be a quick fix to get you to the nearest mechanic.
In summary, if you have a puncture that can be fixed with a repair plug, it’s a straightforward and cost-effective solution to consider.
Seal with Tire Sealant
When you’re on the road and suddenly get a flat tire, it can be a frustrating experience. Fortunately, tire sealant can help you repair the flat quickly and easily. This product is designed to prevent air from escaping through holes or punctures in your tire, and it can be applied in just a few minutes.
To use tire sealant, start by removing the valve stem cover and attaching the sealant canister to the valve stem. Next, inject the sealant into the tire according to the instructions on the canister. Once the sealant is applied, use your car’s built-in compressor to inflate the tire to the recommended pressure level.
You’ll then be able to drive on the repaired tire as if nothing happened. The best part about using tire sealant is that it’s a relatively inexpensive solution that can save you time and money compared to replacing the tire altogether. So if you find yourself with a flat on the road, keep tire sealant in your trunk as a reliable backup.
Re-seating the Tire
If you’re out on the trails and get a flat tubeless mountain bike tire, don’t panic! It’s a common occurrence, but luckily it’s also an easy fix. The first step is to locate the puncture and remove any debris from the tire. Once that’s done, re-inflate the tire to a high pressure.
Then, using a spray bottle with soapy water, spray the tire and look for any bubbles. The bubbles will indicate where the air is escaping through the puncture. Take note of the punctured area and release the air from the tire.
The next step is to re-seat the tire onto the rim. With a tubeless tire, it can sometimes be challenging to re-seat the tire properly, but with a bit of patience and persistence, it can be achieved. Using a floor pump or air compressor, inflate the tire rapidly, and make sure it pops back onto the rim.
If it doesn’t immediately pop back on, try using a tire lever or your hands to work the tire onto the rim. Once the tire is back on the rim, add sealant to the tire, reinflate to the recommended pressure, and spin the wheel to distribute the sealant evenly. With these steps, your tubeless mountain bike tire will be back to fighting form, and you can go back to shredding the trails!
Clean and Inspect Rim
When it comes to re-seating a tire, it’s important to start by cleaning and inspecting the rim. Any debris or damage could cause the tire to not fit securely, leading to potential safety hazards on the road. So, grab a rag and some cleaner and give the rim a good scrub down.
Next, check for any cracks or bends in the rim that could prevent proper seating of the tire. It’s better to catch any issues early on than to have them cause bigger problems down the line. Once the rim is clean and inspected, it’s time to move on to the actual re-seating process.
Remember to use the appropriate tire size and to fully inflate the tire before attempting to seat it on the rim. It may take some elbow grease and patience, but with a little effort, the tire should slide onto the rim snugly and securely. Happy driving!
Use Pump or CO2 Inflator to Re-seat Tire
If you’ve ever experienced a flat tire while cycling, you know how frustrating it can be. However, it’s not uncommon for a tire to become unseated from the rim which can also cause issues. Luckily, there are a few ways to re-seat the tire, including using a pump or CO2 inflator.
First, ensure the tire bead is in the correct position by pushing it to the center of the rim. Then, insert the inflator or pump nozzle into the valve stem and inflate the tire quickly to the recommended PSI. If that doesn’t work, try removing the valve core to allow for a faster airflow.
Remember to be cautious when using a CO2 inflator and wear gloves to protect your hands from the cold temperature. With these tips, you’ll be back on the road in no time!
Check for Leaks and Inflate Tire to Desired Pressure
When it comes to maintaining your vehicle’s performance, one important aspect is making sure your tires are properly inflated. Not only does it improve your car’s fuel economy and handling, it also extends the lifespan of your tires. However, over time, it’s common for tire pressure to decrease due to small leaks or fluctuations in temperature.
That’s why it’s essential to regularly check for leaks and inflate your tires to their desired pressure. One easy method for re-seating the tire is to use a tire inflator or air compressor. Simply remove the valve cap and attach the inflator, ensuring a tight seal around the valve stem.
Then, inflate the tire to the recommended pressure, which can be found in your car’s owner’s manual or on a sticker inside the driver’s door. Checking your tire pressure and re-seating your tires might seem like a small task, but it can have a big impact on your car’s overall performance and safety on the road.
Conclusion
In conclusion, fixing a flat tubeless mountain bike tire may seem like a daunting task, but with the right tools and a bit of know-how, it can be a quick and easy process. Remember to always carry a tubeless repair kit and spare CO2 cartridges on your rides and to take your time when inspecting and repairing your tire to ensure a safe and reliable ride. So don’t let a flat tire deflate your spirits, get back on the trails with confidence knowing you can handle any unexpected mishaps that come your way.
Happy riding!
FAQs
What tools are needed to fix a flat tubeless mountain bike tire?
You will need a tubeless tire plug kit, tire levers, and an air pump or CO2 inflator.
How do you locate the puncture in a tubeless mountain bike tire?
Look for any visible cuts or punctures on the tire’s surface or listen for a hissing sound. You can also use soapy water to locate the leak.
Can you use a regular patch kit on a tubeless mountain bike tire?
No, tubeless tires require a specific tubeless tire plug kit to repair a puncture.
How do you install a tubeless tire plug?
Remove the debris from the puncture, insert the plug tool with the plug strip attached, and push it into the hole. Then, remove the tool and trim the excess plug material.
What are common causes of flat tubeless mountain bike tires?
Punctures from sharp objects, air leaks due to a faulty valve or rim tape, or worn-out tire tread can cause flat tubeless mountain bike tires.
How do you prevent future flat tires on a tubeless mountain bike tire?
Use sealant to plug small punctures before they become larger, regularly check tire pressure, and replace worn-out tires before they are completely worn down.
Can a tubeless tire be repaired without removing it from the wheel?
Yes, small punctures can be repaired using a tubeless tire plug kit without removing the tire from the wheel. However, if the puncture is too large, the tire may need to be replaced.