Did your tire go flat and you don’t have access to a tire-changing machine? No worries. You can still remove the tire from the rim by hand. It’s not as complicated as you might think! All you need is a few simple tools and tricks, and you’re good to go.
In this blog post, we’ll walk you through the process of removing a tire from a rim by hand, step-by-step. So, roll up your sleeves, grab your tools, and let’s get started!
Necessary Tools
If you’re looking to change a tire but don’t have access to professional equipment, it’s important to know how to get a tire off a rim by hand. To do so, you’ll need a few necessary tools, including a tire iron or pry bar, a rubber mallet or hammer, and some lubricant like WD-40. First, loosen the lug nuts with your tire iron or pry bar to remove the tire from the car.
Then, using the mallet or hammer, gently tap around the edge of the tire to break the seal between the tire and the rim. You can then use the pry bar to work the tire off the rim by carefully prying around the edge until it comes free. Be sure to use caution and wear protective gloves to avoid injury.
With these simple tools, you can easily remove a tire from a rim without needing expensive equipment or professional help.
Tire Changing Irons
Tire changing irons are a must-have tool for any roadside emergency or DIY mechanic. When it comes to changing a tire, a jack and spare tire alone won’t cut it. Tire changing irons, also known as tire levers, are essential for removing and installing tires.
These irons come in a variety of sizes and shapes, including straight, curved, and S-shaped, to accommodate different tire sizes and bead types. The most common tire changing irons are made of steel or aluminum, making them durable and long-lasting. Using these irons can be a difficult and time-consuming process, especially for those with little experience.
However, once mastered, it can save time and money for drivers in need of a tire change. When purchasing tire changing irons, it is important to invest in high-quality ones that will withstand the pressure and not damage the tire or rim. Overall, tire changing irons are a necessary tool in any car owner’s toolkit.

Rubber Mallet
When it comes to home improvement and DIY projects, having the right tools is essential. One tool that should be in every homeowner’s toolkit is a rubber mallet. This simple yet effective tool is perfect for tasks such as assembling furniture, laying down tile or laminate flooring, and various other projects where you need to use force without damaging the materials.
Unlike a regular hammer, a rubber mallet will not leave dents or marks on your project. Another great benefit of using a rubber mallet is that it reduces vibration, creating a safer and more comfortable experience for the user. Overall, a rubber mallet is an inexpensive but necessary tool that can make any DIY project a breeze.
So, if you’re getting ready to tackle a home renovation or simply need a reliable tool for various projects around the house, a rubber mallet is a must-have addition to your toolkit.
Lug Wrench
When it comes to maintaining your vehicle, having the necessary tools is crucial to ensure that you can address any issues that may arise. One of the essential tools you should have in your trunk is a lug wrench. A lug wrench is specifically designed to tighten or loosen the lug nuts that secure your vehicle’s wheels.
It’s a simple tool that comes in different sizes to fit the lug nuts of various types of vehicles. When it comes to changing a flat tire or replacing your wheels, a lug wrench is necessary to remove the lug nuts from the wheel. It’s a perfect tool for when you need to change a tire on the side of the road or in an emergency.
Without a lug wrench, you may struggle to remove the lug nuts, which can be a frustrating and time-consuming process. In extreme cases, you may even get stuck and require a tow truck to fix the issue. In conclusion, having a lug wrench in your vehicle’s tool kit is essential.
It’s a small but powerful tool that can get you back on the road quickly and safely. Remember to check your lug wrench’s size before hitting the road, and make sure to keep it in your trunk at all times.
Safety Precautions
If you ever find yourself needing to change a tire but don’t have access to professional tools, it is possible to take off the tire from the rim by hand. However, before attempting to do so, it is important to take some safety precautions to avoid any accidents. First and foremost, make sure the vehicle is parked on a flat surface and the parking brake is engaged.
Then, loosen the lug nuts on the wheel you need to remove before using a car jack to lift the car off the ground. It is crucial that you use proper jacking points indicated in your car’s manual to ensure stability. Once the tire is off the ground, completely remove all the lug nuts and slowly pull the tire off the wheel by hand.
Remember, taking off a tire by hand can be physically demanding and may require the use of gloves to avoid cuts and blisters. By following these safety precautions, you can safely and confidently remove a tire from its rim by hand.
Protective Gloves
Protective gloves are a crucial piece of safety equipment in many industries that involve exposure to hazardous materials or sharp objects. If you work in such an industry, it is essential to take the appropriate safety precautions to protect yourself from harm. One of the most crucial safety measures is to wear the proper protective gloves.
Gloves come in various materials and designs, so it’s important to choose the right one for your specific job. For instance, if you work in an environment where you may encounter chemicals or solvents, select gloves made of materials such as neoprene, nitrile, or PVC that are chemical-resistant. On the other hand, if you work with sharp objects, opt for gloves that provide puncture resistance.
Furthermore, always ensure that your gloves fit snugly and correctly to avoid any gaps through which harmful substances can penetrate. By taking these safety precautions, you can minimize your risk of injury and ensure your well-being while on the job.
Eye Protection
As the saying goes, “an ounce of prevention is worth a pound of cure.” This couldn’t be more relevant when it comes to protecting our eyes. Eye protection, whether at the workplace or during recreational activities, is crucial in preventing injuries that can cause temporary or permanent damage to our vision.
One of the primary safety precautions we can take is wearing appropriate eye protection. This can include safety glasses, goggles, face shields, and even full-face respirators for certain hazards. These protective gears are designed to shield our eyes from hazards such as flying debris, chemicals, and radiation.
It’s also important to choose the right type of eye protection for the job or activity. For example, if you’re doing welding work, you’ll need special goggles or helmets with specific filters to protect your eyes from the bright light. Similarly, if you’re working with chemicals, you need goggles that seal tightly to prevent any splash or droplets from entering your eyes.
Another safety precaution is to ensure that everyone in the workplace or activity is aware of the potential eye hazards and the importance of eye protection. This includes providing training on when and how to use eye protection, as well as displaying signs and posters that remind people to use the gear. In summary, eye protection is crucial in preventing eye injuries that can result in temporary or permanent damage to our vision.
By wearing appropriate eye protection, choosing the right gear for the job, and raising awareness about eye hazards, we can prevent such injuries and keep our eyes safe and healthy.
Vehicle Stability
When it comes to vehicle stability, safety should always be a top priority. There are several precautions that drivers can take to ensure that their vehicle stays stable on the road. Firstly, it is important to check tire pressure regularly and ensure that all tires are in good condition.
This will not only help to maintain stability but also improve fuel efficiency. Secondly, it is important to avoid overloading the vehicle as this can cause instability, especially when going around corners. Additionally, drivers should avoid making sudden movements and abrupt turns, as this can also cause instability.
Finally, it is important to maintain a safe speed and keep a distance from other vehicles, allowing for enough time to react in case of sudden stops or turns. By following these simple precautions, drivers can ensure that their vehicle remains stable and safe on the road.
Step-by-Step Guide
If you’ve ever been stuck with a flat tire on the side of the road, you know how important it is to be able to change it yourself. One of the trickiest parts of the tire-changing process is getting the tire off the rim. Luckily, with a few simple steps, you can learn how to get a tire off a rim by hand in no time.
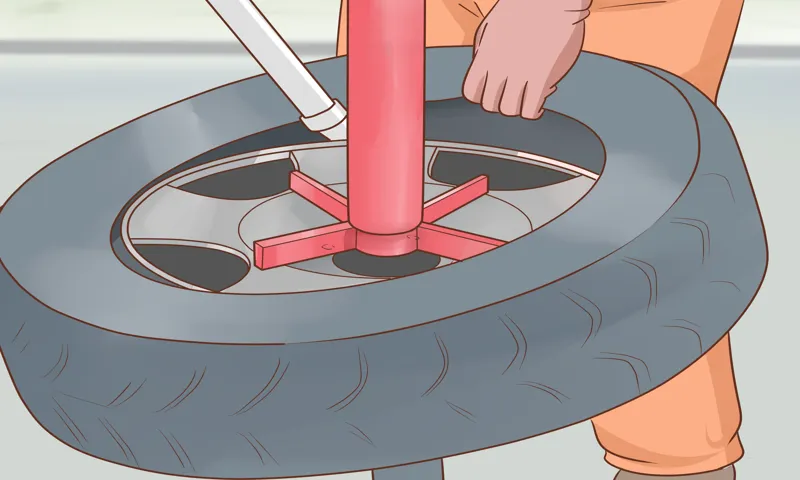
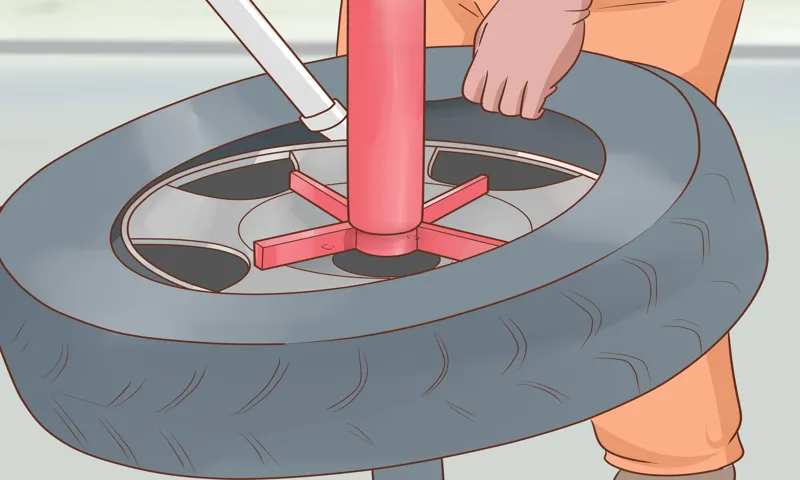
Start by deflating the tire completely and then breaking the bead seal. You can do this by using a bead breaking tool or by placing the tire on a flat surface and stepping on the sidewall to break the seal. Then, use your hands to pry the tire off the rim starting at one side and gradually working your way around.
This can be a bit of a workout, so take breaks if you need to. Once you’ve gotten the tire off, you can inspect it for any damage or wear and replace it as needed before putting it back onto the rim. With a little practice, you’ll be a tire-changing pro in no time.
Loosen the Lug Nuts
Loosening the lug nuts is a crucial step when changing a tire. This step ensures that the tire can be removed without difficulty. To loosen the lug nuts, use a lug wrench and attach it to the nuts.
Then turn the wrench counterclockwise. Make sure to use enough force to loosen the nuts, but not to the point of stripping them. If the nuts are too tight, use your body weight to leverage the wrench for extra force.
It is important to loosen the nuts in a star pattern, rather than working in a circle. This will prevent damaging the wheel and ensure that each nut is loosened evenly. Once the nuts are loosened, don’t remove them just yet, wait until you’ve jacked up the car to remove the tire.
Remember, the key to successfully changing a tire is to take your time and follow each step carefully.
Jack up the Vehicle
“jacking up a vehicle” Jacking up a vehicle is an essential skill that every driver needs to learn. Whether you need to change a tire or perform maintenance underneath the car, learning how to safely jack up your vehicle is crucial. Here is a step-by-step guide to help you through the process.
First, make sure you are on level ground and that your emergency brake is engaged. If you have a manual transmission, put it in gear or park if you have an automatic transmission. Next, locate the jacking points on your vehicle, which are usually found behind or in front of the wheels.
Slide the jack into the jacking point and pump the lever until the vehicle starts to lift. After the vehicle is in the air, slide jack stands underneath and slowly lower the vehicle onto the stands. Once the vehicle is securely on the stands, you can safely proceed with your repairs.
Remember to always double-check that the vehicle is fully supported before getting underneath and keep safety as your top priority when working on your car.
Remove the Hubcap
Removing a hubcap from your car can be a relatively easy task, but it’s important to do it carefully to avoid any damage to the wheel or hubcap. Firstly, locate the valve stem on the hubcap, and use a flathead screwdriver to remove the plastic cover. Once the plastic cover is removed, you’ll see a small metal clip or a plastic lug nut that secures the hubcap to the wheel.
If it’s a metal clip, you can gently pry it off with a screwdriver, or if it’s a plastic lug nut, use a lug wrench to unscrew it in an anti-clockwise direction. Once the clip or lug nut is removed, put on a pair of gloves and wiggle the hubcap off the wheel gradually. If it seems stuck, do not force it off as this could result in damage to the wheel or hubcap.
Instead, gently tap around the edges of the hubcap with a rubber mallet until it loosens and can be easily removed. With the hubcap off, inspect it for any damage, and if necessary, make any repairs or replacements before putting it back on the wheel. By following these simple steps, you can safely remove your car’s hubcap without causing any harm to your vehicle.
Remove the Lug Nuts
Removing lug nuts is an essential part of changing a flat tire. To remove the lug nuts, you will need a lug wrench. First, locate the lug wrench in your car’s toolkit and fit it onto one of the lug nuts.
Then, turn the wrench counterclockwise to loosen the lug nuts. If the lug nuts are too tight, try using your body weight by placing your foot on the wrench handle and putting pressure on it. Loosen each lug nut one at a time and repeat the process until all the nuts are removed.
Remember to keep the lug nuts and wheel in a safe place so that they don’t get lost. It’s important to note that lug nuts can vary in size and shape, so make sure to use the correct lug wrench that matches your car’s lug nuts. By following these simple steps, you will successfully remove the lug nuts and be one step closer to changing your flat tire.
Dislodge the Tire from the Rim
Dislodging a tire from its rim can be a tedious and time-consuming task, but with the right tools and techniques, it can be accomplished relatively easily. First, make sure to deflate the tire completely to avoid any unnecessary damage. Then, using a tire lever or pry bar, insert it between the tire and rim and pry the tire upwards, slowly working your way around the circumference of the tire.
Be careful not to damage the tire or rim in the process, as this could cause irreversible damage. Once the tire is dislodged, inspect it carefully for any signs of wear or damage that may need to be addressed. With a little patience and care, dislodging a tire from its rim can be a simple and straightforward task that saves you time and money in the long run.
Remove the Tire from the Rim
When it comes to changing a tire, removing the tire from the rim can seem like a daunting task, but with a few simple steps, it can be done in no time! First, you need to loosen the lug nuts on the tire using a lug wrench, but don’t remove them yet. Next, use a jack to lift the vehicle off the ground and remove the lug nuts completely. From there, you can easily pull the tire off the hub.
To remove the tire from the rim, use a tire iron to pry the tire away from the rim and work your way around the entire tire until it is free. It may take a bit of effort, but with patience and persistence, the tire will come off. Make sure to inspect the tire and rim for any damage before continuing the tire replacement process.
By following these steps, you’ll be able to remove the tire from the rim confidently and with ease.
Conclusion
Well folks, getting a tire off a rim by hand may seem like a daunting task, but with a little patience and persistence, it can be done. Remember to use the right tools, take your time and put a bit of elbow grease into it. And if all else fails, don’t be afraid to call in the pros.
Just be sure to tell them that you tried to make it a DIY project first, because who doesn’t love a good challenge? So go forth, and show that tire who’s boss!”
FAQs
What tools do I need to remove a tire off a rim by hand?
Some essential tools to remove a tire off a rim by hand are a tire iron or bead breaker, a valve core remover, and a flathead screwdriver.
Can I remove a tire off a rim without any tools?
It is highly recommended to use tools such as a bead breaker or tire iron to remove a tire off a rim by hand. However, it is possible to remove a tire using only a flathead screwdriver and a lot of patience.
How do I loosen the tire bead from the rim while removing it by hand?
You can loosen the tire bead from the rim by applying a lubricant, using a bead breaker or tire iron, and gently working your way around the tire until it comes off.
Is it easier to remove a tire off a rim if the tire is flat or inflated?
It is easier to remove a tire off a rim if the tire is deflated. This is because the tire’s sidewalls become less stiff and more flexible, making it easier to break the bead and remove the tire.
What is the best way to remove a tire off a rim by hand?
The best way to remove a tire off a rim by hand is to work slowly and methodically. Use a tire iron or bead breaker to loosen the bead, and then work your way around the tire, using your hands to push the tire off the rim.
How long does it take to remove a tire off a rim by hand?
The time it takes to remove a tire off a rim by hand depends on many factors, such as the size of the tire, the condition of the tire, and the tools you are using. On average, it can take anywhere from 20 minutes to an hour.
Do I need to balance the tire after removing it from the rim by hand?
Yes, it is recommended to balance the tire after removing it from the rim by hand. This is because the tire’s balance may have shifted during the removal process, which can cause vibrations and uneven wear.


