Imagine being in the middle of a long drive home with your family, and suddenly, you feel the car shaking and hear a loud thud. You quickly realize that you have a flat tire. In a situation like this, the last thing you want to deal with is a tire that won’t go back on the bead.
Frustrating, right? Don’t worry, we’ve got your back. In this blog post, we’ll be sharing some tips and tricks on how to get a tire back on the bead. Whether you’re a newbie or an experienced driver, we guarantee that these tips will come in handy the next time you find yourself in a similar situation.
Table of Contents
Clean and Inspect the Tire and Rim
Getting a tire back on bead can be a frustrating task, but it’s essential to ensure safe driving. One of the crucial steps involves cleaning and inspecting the tire and rim. Dirt, debris, and rust can prevent the tire bead from seating correctly and cause damage to the tire.
First, remove any visible debris from the rim and tire surfaces. Then, use a wire brush or sandpaper to remove rust, dirt, or corrosion from the rim where the tire seal contacts it. Inspect the tire for any cuts, punctures, or other damage that may compromise the tire’s integrity.
If there is damage, it’s best to replace the tire rather than risk a blowout. Once you’ve cleaned and inspected both the tire and rim, you can move onto the next step in getting the tire back on bead. Remember, taking the time to clean and inspect the tire and rim can save you time and money in the long run by preventing tire failure.
Remove the tire from the rim and clean both surfaces
When it comes to maintaining your vehicle’s tires, it’s important to clean and inspect them regularly. One key task is removing the tire from the rim and cleaning both surfaces. This can help prevent rust and other damage that can occur over time.
To start, use a tire iron to loosen the lug nuts and lift the wheel off the ground. Then, remove the valve cap and use a valve tool to release the air from the tire. Next, use tire levers to work the tire off the rim, being careful not to damage the rubber.
Once the tire is off, use a wire brush or sandpaper to clean both sides of the rim. You’ll also want to inspect the tire for any signs of damage, such as punctures or cuts, and check the tread depth to ensure it’s not worn down too far. By taking these steps, you can help extend the life of your tires and keep your vehicle running smoothly on the road.

Inspect the tire and rim for damage or debris
When it comes to maintaining your vehicle, cleaning and inspecting your tire and rim can go a long way in improving your overall driving experience. Inspect the tire and rim for any visible signs of damage or wear and tear, such as cracks, bulges, or punctures. If you notice any issues, it’s important to address them promptly to avoid a potential blowout or accident on the road.
Additionally, make sure to clear any debris such as rocks or pebbles that may be lodged in the tire tread or rim. These small objects can cause significant damage over time and affect your vehicle’s handling and performance. Remember, a clean and well-maintained tire and rim not only enhance the look of your vehicle but also contribute to its safety and longevity on the road.
Don’t wait until it’s too late, take the time to inspect and clean your tire and rim regularly to ensure a smooth and safe driving experience.
Use Lubrication and Technique
If you ever find yourself struggling to get your tire back on the bead, don’t panic! There are a few steps you can take to make this task more manageable. First, lubrication is key. Use a generous amount of soap and water or a dedicated tire lubricant around the rim to make it easier to slide the tire onto the bead.
You’ll also need to use a bit of technique- try starting at the valve stem and work your way around the tire, applying equal pressure with your hands. If you’re still struggling, try using a tire lever to gently pry the tire onto the bead. Remember to be patient and take your time- rushing this task can result in damaging your tire or rim.
By using a combination of lubrication and technique, you’ll have your tire back on the bead in no time.
Apply a generous amount of lubricant to the rim and tire bead
“Lubricant” Applying lubrication to the rim and tire bead is crucial in mounting tires. Lubricant helps to ease the process and reduces the risk of damaging the tire during installation. However, not all lubricants are equal, and it’s important to use the right type of lubrication to ensure successful tire mounting.
Be sure to avoid using petroleum-based lubricants or solvents, as they can weaken the rubber compound of the tire. Instead, opt for water-soluble lubes that won’t damage the tire. Applying a generous amount of lubrication to the rim and tire bead is also important.
However, it’s not just about the amount of lubrication; proper technique is also critical. You should gently massage the lubricant into the tire bead, ensuring it coats the entirety of both the rim and the tire bead. Doing so helps to prevent the tire from slipping out of place during the mounting process and provides enough lubrication to ensure the job is done with ease.
So, if you want to make tire mounting less of a chore, be sure to use the right lubricant and techniques to get the job done right.
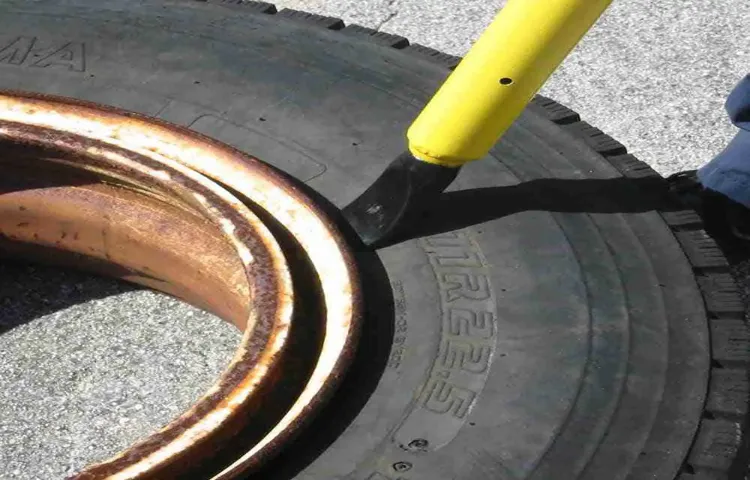
Position the tire at an angle and use a pry bar to leverage it back onto the bead
When trying to put a tire back onto its bead, it can be a frustrating experience. But fear not, with a bit of lubrication and some proper technique, you’ll have that tire back on in no time. First, try to position the tire at an angle, so that you can get some leverage when pushing it onto the bead.
Then, add some lubrication to the bead and rim to help ease the tire onto the rim. You can use dish soap, silicone spray, or even WD-40 as a lubricant. After lubricating the bead and rim, insert a pry bar between the tire and rim and use it to pry the tire onto the bead.
Be sure to work slowly and methodically, checking that the tire is seated correctly as you go along. With this technique, you’ll be back on the road in no time! So, the next time you find yourself struggling with a stubborn tire, remember to use a little lubrication and technique to get the job done.
Or try using a ratchet strap to force the tire onto the bead
When it comes to getting a tire onto a bead, there are a few effective methods to try. One option is to use lubrication and technique. Lubricating the tire with a soapy water solution can make it easier to slide onto the rim.
Start by applying the solution on the inside of the tire and then work the tire over the edge of the rim, using a tire lever and your hands to help guide it into place. It’s important to use proper technique by applying even pressure and not using excessive force, which can damage the tire or the rim. Another important tip is to make sure the tire is properly seated on the rim before inflating it to the recommended pressure.
If this method doesn’t work, you can try the alternative method of using a ratchet strap to force the tire onto the bead. Remember, patience and persistence are key when it comes to tire maintenance, and it’s always best to seek the assistance of a professional if you’re uncertain about any aspect of the process. So, whether you’re a seasoned mechanic or a DIY enthusiast, give it a try and see how easy it can be to get your tire onto the bead with the right lubrication and technique.
Safety Precautions
Getting a tire back on its bead can be a challenge, but there are a few safety precautions you should take before attempting it. First, make sure the car is parked on a flat surface and the parking brake is engaged. Then, use the lug wrench to loosen the lug nuts, but don’t remove them completely just yet.
Jack the car up so that the tire is off the ground and remove the lug nuts. Be sure to use a jack stand to support the car so that it doesn’t fall and cause injury. Once the tire is off, inspect it for any punctures or damage that may have caused it to come off the bead in the first place.
If it looks okay, spray some soapy water on the tire and rim to help the tire slide back onto the bead. Use a tire iron to push the tire onto the bead, working your way around the tire until it pops into place. Tighten the lug nuts and lower the car back down to the ground.
Finally, check the tire pressure to make sure it is at the recommended level. By following these safety precautions, you can successfully get your tire back on its bead without any accidents or injuries.
Wear eye protection and gloves
Safety Precautions for Eye Protection and Gloves When it comes to personal protective equipment, eye protection and gloves are two of the most crucial. It’s important to wear them when handling hazardous materials or operating dangerous machinery. Eye protection can prevent eye damage from blunt force trauma, flying debris, and chemicals.
Meanwhile, gloves can protect your hands from cuts, punctures, and chemical exposure. However, not all gloves and eye protection are created equal, so it’s important to choose the right ones for the task at hand. Make sure you choose gloves made of materials that are appropriate for the chemical or substance you are handling.
Also, consider the fit and durability of the gloves. As for eye protection, go for goggles or face shields that completely cover your eyes and provide a tight seal to prevent any hazardous substances from entering. With proper eye protection and gloves, you can prevent serious injuries that can harm not just your health but also your livelihood.
So always remember to wear them whenever you’re working with hazardous materials or operating hazardous machinery.
Never use flammable substances as lubricants
When it comes to lubricating machinery or equipment, it’s crucial to prioritize safety. Many people make the mistake of using flammable substances as lubricants, which can lead to disastrous consequences. Not only can it cause fires or explosions, but using flammable substances as lubricants can also cause damage to your machinery or equipment.
It’s essential to always read the label on any lubricant you plan to use and ensure it is safe for your specific equipment. Remember that safety should always come first in any work environment. Using flammable substances as lubricants is a recipe for disaster, so be sure to choose a lubricant that is safe and effective for your equipment.
Your safety and the safety of those around you should never be compromised for the sake of convenience. So let’s take safety precautions seriously and keep our work environment safe.
Final Check
If you’re struggling to get your tire back on the bead, don’t panic. There are a few steps you can take to make sure everything is in order before you try again. First, check the valve stem to make sure it’s straight and not crimped.
If it’s crooked, it can cause air leaks. Next, inspect the rim for any damage or sharp edges that may be preventing the tire from sliding on properly. If you spot any damage, lightly sand it down.
Lastly, make sure the tire is clean and lubricated. Using soap and water, clean the tire and spray it with lubricant before trying again. With these steps done, place the tire back on the rim, and slowly inflate it.
Keep a close eye on the tire as it inflates, and make sure it’s sitting on the rim properly. If it’s still not sitting right, use a tire lever to gently push the tire onto the rim. With a little bit of patience and equipment, you can successfully get your tire back on the bead.
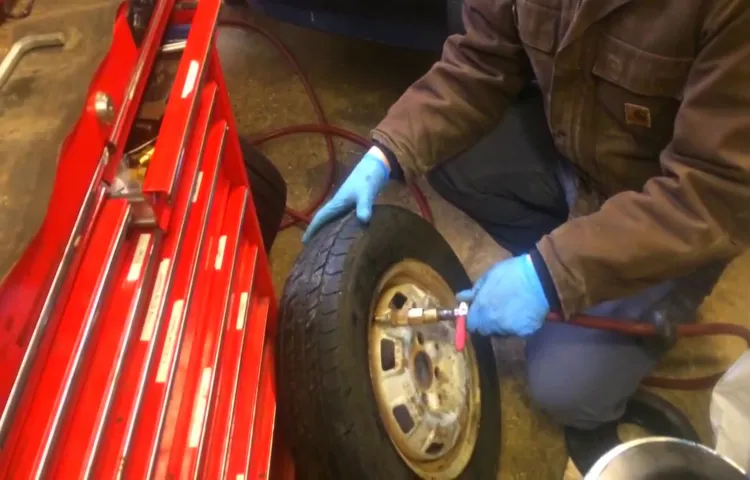
Once the tire is back on the bead, inflate to manufacturer’s specifications and check for leaks
After successfully putting the tire back on the bead, it’s important to perform a final check before hitting the road. Inflate the tire to the recommended pressure as stated by the manufacturer. This information can usually be found in your car’s owner manual or on a sticker located on the driver’s side door.
Once inflated to the correct pressure, give the tire a thorough check for any signs of leakage. Listen for any unusual hissing sound, and visually inspect the tire for any punctures or openings. If everything looks good, give it a final spin and listen for any wobbling or unusual noise.
Remember, a proper tire check ensures not only a smooth and safe ride but also extends the life of your tire. Don’t forget to perform regular tire maintenance to stay safe on the road and avoid any unexpected troubles while driving.
Conclusion
And there you have it, folks! Getting your tire back on its bead may seem like a daunting task, but with a little bit of patience, elbow grease, and maybe even some colorful language, you’ll have your tire back on the road and ready to roll. Just remember, there’s no shame in enlisting the help of a professional if you’re feeling overwhelmed. After all, sometimes the best way to get back in the game is to admit when you need a little backup.
Happy wrenching!”
FAQs
What are the steps for getting a tire back on the bead?
First, deflate the tire completely. Then, spray a generous amount of tire lubricant on the rim and bead. Make sure the tire is properly aligned on the rim before using a tire lever or pry bar to force the bead over the edge of the rim and into place. Finally, inflate the tire to the recommended pressure.
Can I use dish soap instead of tire lubricant when getting a tire back on the bead?
While dish soap may work in a pinch, it is not recommended as it can cause the tire to slip on the rim once it is inflated. Tire lubricant is specifically designed for this task and provides a better grip for the tire.
Why won’t my tire go back on the bead even with lubricant and a pry bar?
It is possible that the tire or rim is damaged or bent, preventing the tire from seating properly. In this case, it is best to take the tire to a professional for repair or replacement.
What is the recommended tire pressure for a tire that has been reseated on the bead?
The recommended tire pressure can usually be found on the tire itself or in the owner’s manual for your vehicle. Be sure to inflate the tire to the correct pressure before driving on it.
How long does it take to get a tire back on the bead?
The time it takes to reseat a tire on the bead depends on several factors, including the size of the tire and the amount of lubricant used. Generally, it should take no more than 15-20 minutes to complete the task.
What are some common reasons why a tire may come off the bead?
A tire may come off the bead due to low tire pressure, driving on rough or uneven terrain, or hitting a curb or other object. It is important to regularly check tire pressure and inspect tires for any signs of damage.
Can I reseat a tire on the bead without a pry bar or tire lever?
While it is possible to reseat a tire on the bead without these tools, it is not recommended as it can be difficult and may cause damage to the tire or rim. It is best to use the appropriate tools for the job.


