Have you ever found yourself standing by the side of the road, frustrated at the sight of your deflated tire? And despite all your efforts, you just can’t seem to get the bead to seal? A tire bead that won’t seal can be a real headache, and it’s not only an inconvenience but also potentially dangerous. This is a common problem faced by many car owners, but the good news is that it’s fixable. In this post, we’ll share with you some tips and tricks on how to get your tire bead to seal, so you can get back on the road quickly and safely.
So, grab a cup of coffee, and let’s get started, shall we?
Table of Contents
What is Tire Bead and Why is It Important?
Tire bead, also known as the tire’s edge, is the part of the tire that sits on the rim and helps to create an airtight seal. It is an important component of the tire because if the bead isn’t properly seated against the rim, air can leak out and cause the tire to lose pressure. Getting the tire bead to seal can be achieved by properly cleaning the rim, ensuring the tire is properly seated, and using a bead sealer if necessary.
To clean the rim, remove any dirt or debris and make sure the rim is dry. Then, ensure the tire is properly seated by pushing it onto the rim and making sure the bead is evenly distributed around the rim. Finally, a bead sealer can be applied to help create a stronger seal between the tire bead and the rim.
Making sure the tire bead is properly sealed is essential for maintaining tire pressure and avoiding flat tires.
Definition of Tire Bead
Tire bead is a term used to describe the part of the tire that fits onto the rim of a wheel. It consists of a bundle of wires that are tightly wound together and coated with rubber, providing a secure seal between the tire and rim. The bead is an essential component of a tire, as it ensures that the tire remains firmly in place and does not slip or come off the wheel while in use.
Without a proper bead, a tire is not safe to drive on and can lead to accidents or other serious issues. Therefore, it is crucial to ensure that your tire has a strong, intact bead that fits perfectly onto your wheel’s rim. If you are unsure about your tire’s bead, it is always better to consult a professional to check it out and make sure it is secure and safe to use.
Remember, the bead is what keeps you safely on the road.

Why Is It Important to Have Your Tire Bead Sealed?
Tire bead sealing is a crucial step in ensuring the safety and performance of your vehicle’s tires. The tire bead is the part of the tire that sits on the rim and forms an airtight seal so that the tire can hold air pressure. Without a properly sealed tire bead, the tire can lose air pressure and cause dangerous handling issues, including instability, decreased braking effectiveness, and poor fuel economy.
Furthermore, a leak from the tire bead can also result in tire blowouts, putting the driver and passengers at great risk. Therefore, it is essential to have an expert mechanic inspect and seal the tire bead to ensure proper tire performance and safety on the road. Don’t take risks with your tire’s bead sealing; give it the care it deserves to keep you and your loved ones safe on the road.
Causes of Poor Tire Bead Seal
When it comes to tire maintenance, ensuring that the bead of your tire is properly sealed is crucial for both your safety and the performance of your vehicle. Poor bead sealing occurs when your tire doesn’t fit snugly around the rim, leading to air leakage and a host of other issues. The most common causes of poor bead sealing include improper installation, damaged bead cores or flanges, mismatched tire and rim sizes, rust or corrosion on the rim, and debris or dirt buildup on the rim.
To get your tire bead to seal, it’s important to conduct routine checks, clean your tires and rims regularly, and make sure you have the right size tire for your specific rim. Proper installation also requires tightening the lug nuts in a star pattern, ensuring that the bead seats correctly, and properly inflating the tire to the manufacturer’s recommended pressure. By taking these simple steps, you can help prevent poor bead sealing and keep your tires in top condition for longer.
Worn or Damaged Tires
Worn or Damaged Tires One of the major causes of poor tire bead seal is worn or damaged tires. When tires are old or have been used for a long time, their rubber may start to break down, causing cracks and other forms of damage that can affect the tire’s ability to maintain a secure seal. Additionally, tires that have been punctured or damaged in the past may also have weakened areas that can cause leaks.
In addition to regular wear and tear, extreme temperatures can also contribute to tire damage, particularly if a tire is exposed to prolonged periods of high heat or cold. To avoid poor tire bead seal caused by worn or damaged tires, it’s important to inspect your tires regularly and replace them as needed. It’s also essential to properly store and care for your tires when they’re not in use to prevent damage from environmental factors.
By taking these steps, you can help ensure that your tires maintain a strong bead seal and stay safe on the road.
Rim Damage or Warping
Rim Damage or Warping If you’ve ever had trouble with your tire bead seal, you know how frustrating it can be. But what causes poor tire bead seal? One culprit could be rim damage or warping. Even a small dent in your rim can cause the tire to lose its seal, leading to a slow leak or even a blowout.
Warped rims, on the other hand, can cause the tire to wobble or vibrate, making it difficult to maintain a good seal. Both of these issues can be caused by hitting potholes or curbs or even just general wear and tear over time. If you suspect your rims may be damaged or warped, it’s important to get them checked out by a professional before they cause even more damage to your tires.
Regular maintenance and careful driving can help prevent these issues before they occur.
Incorrect Tire Pressure
One of the main causes of poor tire bead seal is incorrect tire pressure. This might not seem like a big deal, but it can actually have a significant impact on the performance of your tires. If your tire pressure is too low, the tire bead will not be able to seal against the rim properly, which could lead to leaks and even blowouts.
On the other hand, if your tire pressure is too high, it can cause the tire bead to stretch and deform, again leading to poor seal and potentially dangerous driving conditions. It’s essential to ensure that your tires are inflated to the manufacturer’s recommended levels to avoid these problems. Investing in a good quality tire pressure gauge can help you keep track of your tire pressure and address issues before they become a serious problem.
By doing so, you’ll be able to reduce the risk of poor tire bead seal and keep your vehicle operating at peak performance.
Steps to Get Your Tire Bead to Seal
If you’ve ever tried to inflate a tire and found that the bead just won’t seal properly, you know how frustrating it can be. Thankfully, there are a few steps you can take to get your tire bead to seal effectively. First, make sure the tire and rim are both clean and free of debris.
Then, try using a bead lubricant to help the tire slide onto the rim more easily. If that still doesn’t work, you can try seating the bead manually by pushing it into place with your hands or a tire lever. Once you have the bead in place, inflate the tire slowly and check to make sure it’s seated properly all the way around.
If you still can’t get the tire to seal, it may be time to take it to a professional for help. By following these steps, you can ensure that your tire is properly sealed and ready for your next adventure on the road.
1. Clean the Tire and Rim Surfaces
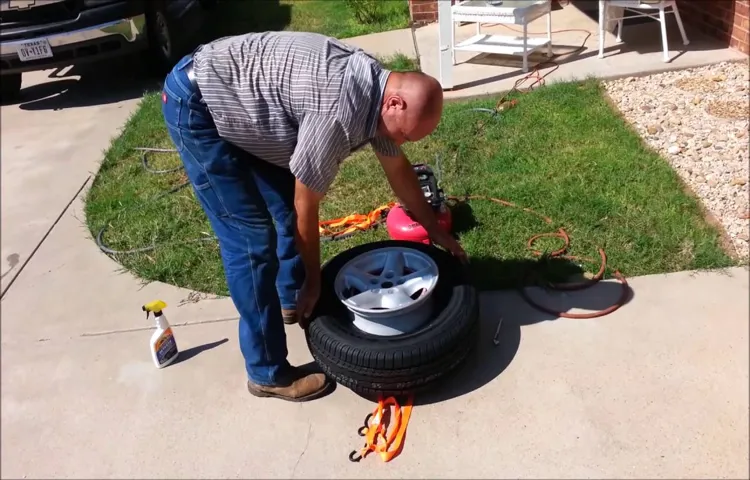
When it comes to getting your tire bead to seal, the first step is to clean the tire and rim surfaces thoroughly. This ensures that there are no dirt, debris, or rust particles that can prevent the tire bead from making a tight seal. You can use soap and water to clean the surfaces, or you can opt for a specially formulated tire cleaner.
After cleaning, dry the surfaces with a clean towel or let them air dry completely. This step is critical because any small particles left on the tire or rim could interfere with the seal between the tire bead and the rim. By taking the time to clean the surfaces thoroughly, you could save yourself from a potential flat tire or blowout on the road.
So, take your time and do it right the first time!
2. Use Bead Sealant or Lubricant
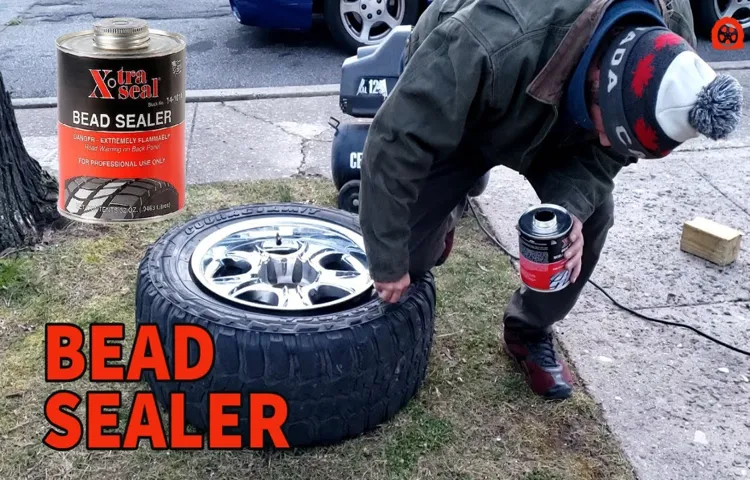
If you are having trouble sealing your tire bead, you can try using bead sealant or lubricant. Bead sealant is a liquid solution that helps create a seal between the tire bead and the rim. Meanwhile, lubricant, such as soapy water, can help ease the process of mounting your tire onto the wheel as well as help create a seal.
To use a bead sealant, first, you need to clean the tire bead and rim thoroughly. Then, apply a small amount of the sealant onto the tire bead, making sure to spread it evenly. Afterward, inflate the tire slowly and check for any leaks.
If there are no leaks, you can now use your tire confidently. Alternatively, to use a lubricant, mix a small amount of dish soap with water and apply it to the tire bead and rim before mounting the tire onto the wheel. This will help lubricate the surface and make it easier to mount your tire.
Using these solutions can help ensure that your tire is properly sealed and will prevent any air leaks.
3. Inflate the Tire Carefully – Never Exceed Recommended PSI
When it comes to inflating your tires, it’s important to be careful and avoid exceeding the recommended PSI (pounds per square inch). Not only can overinflation cause uneven wear and tear on your tires, but it can also lead to blowouts or other safety issues on the road. Follow these steps to ensure your tire bead seals properly: First, remove any debris or dirt from the tire and rim.
Next, place the tire onto the rim and add a little bit of air to help the bead sit in place. Then, use a tire inflator to slowly add more air while keeping a close eye on the pressure gauge. As the pressure builds, make sure the tire bead stays in place and doesn’t pop off.
Finally, double-check the pressure with a tire gauge and adjust as needed. By taking these careful steps, you can help ensure your tires are properly inflated and ready for safe driving.
4. Tap the Tire with a Rubber Mallet
When it comes to sealing your tire bead, there are a few steps you can take to ensure success. One of those steps includes tapping the tire with a rubber mallet. This technique helps to seat the tire bead properly, which is essential for a secure and safe tire.
To do this, first make sure your tire is properly inflated and mounted on the wheel. Then, use a rubber mallet to gently tap around the circumference of the tire, applying even pressure to the entire surface. This will help to evenly distribute the tire’s weight and ensure a snug fit with the wheel.
It’s important to use a rubber mallet rather than a metal one, as a metal mallet can damage the tire or wheel. With this simple step, you can improve the durability and safety of your tires, ensuring they are ready for the road ahead.
5. Monitor the Tire for Leaks
When it comes to keeping your tires in tip-top shape, it’s important to monitor them for leaks. Leaks can not only cause your tire to lose air pressure, but they can also lead to bigger problems down the road if left unchecked. To get your tire bead to seal properly, there are a few steps you can take.
First, clean the bead area of any debris or buildup. This will ensure a tighter seal between the tire and the rim. Next, apply a lubricant around the bead area to help it “pop” into place.
Be sure to use a proper tire lubricant and not just any type of lubricant. Finally, inflate the tire to the recommended pressure and monitor it closely over the next few days to ensure there are no leaks. By taking these steps, you can help keep your tires in good condition and avoid any potential problems on the road.
Remember, regular tire maintenance is key to getting the most out of your tires and ensuring your safety while driving.
Conclusion – Drive with Confidence
In conclusion, getting the tire bead to seal is a delicate dance between pressure, lubrication, and patience. It’s like trying to find true love – you need to apply just the right amount of pressure, use a little bit of lube, and be patient enough to wait for the seal to form. With a little bit of perseverance and some clever tricks, you too can get your tire bead to seal and enjoy a smooth ride.
Just remember to always practice safe tire maintenance and don’t be afraid to ask for help when you need it!”
FAQs
What causes tire bead to not seal properly?
Tire bead can fail to seal properly due to a few reasons such as debris or corrosion on the wheel rim, damaged tire bead or valve stem, or improper installation of the tire.
What is the best way to clean the wheel rim before installing a tire?
Use a wire brush or sandpaper to remove any debris and rust from the wheel rim. Use a solvent to clean the surface and ensure it is dry before installing a tire.
Can I reuse a damaged tire bead to seal the tire?
No, a damaged tire bead cannot be reused as it will not seal the tire properly. It is important to replace the tire if the bead is damaged.
How tight should the lug nuts be when installing a tire?
The lug nuts should be tightened to the manufacturer’s specification using a torque wrench to ensure proper installation and prevent damage to the wheel.
How can I tell if the tire bead has sealed properly?
Inflate the tire to the recommended pressure and spray soapy water around the bead area. If there are no bubbles, the tire bead has sealed properly.
Can I drive on a tire with a bead that has not sealed properly?
No, driving on a tire with a failed bead seal can cause loss of air pressure and lead to a dangerous blowout.
Should I apply any sealant to the bead area to help with sealing?
No, using additional sealant is not recommended and may interfere with proper tire installation. It is important to clean and inspect the wheel rim and tire bead for any damage or debris before installation.


