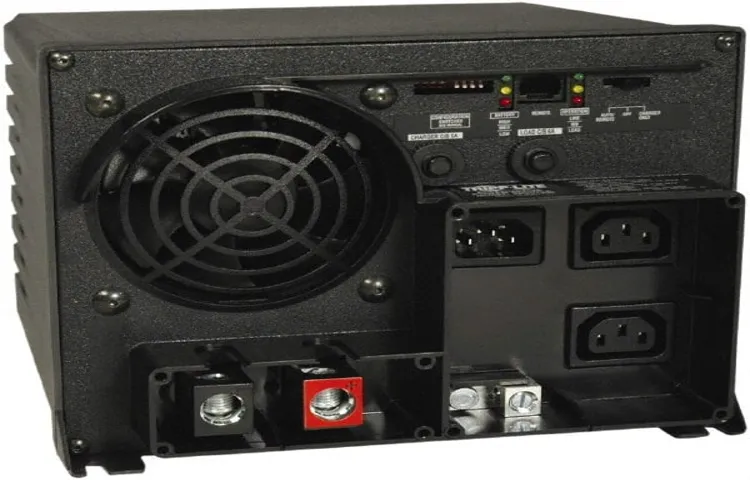
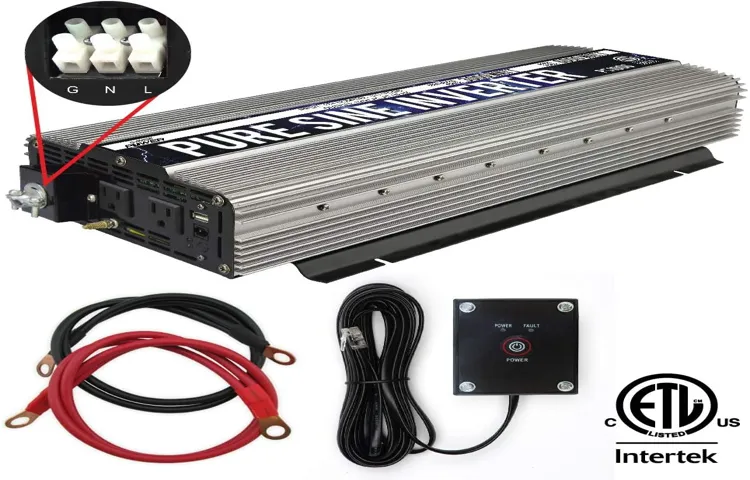
Imagine you’re on a road trip, and suddenly, your laptop battery dies. You desperately need to charge it, but there’s no power outlet in sight. What do you do? This is where a power inverter comes to the rescue.
A power inverter is a device that lets you convert DC (direct current) power from your car’s battery into AC (alternating current) power, just like the one you have at home. But how do you go about hardwiring a power inverter into your vehicle? In this blog post, we’ll walk you through the process step by step, so you can have a reliable power source whenever and wherever you need it. So, buckle up and let’s dive in!
Table of Contents
- 1 Introduction
- 2 Step 1: Gather the necessary materials
- 3 Step 2: Plan the installation location
- 4 Step 3: Disconnect the battery
- 5 Step 4: Choose the circuit to tap into
- 6 Step 5: Install the fuse holder
- 7 Step 6: Connect the power inverter to the battery
- 8 Step 7: Secure the wiring
- 9 Step 8: Test the power inverter
- 10 Conclusion
- 11 FAQs
Introduction
Are you looking to power your electronic devices while on the go? One great option is to use a power inverter. A power inverter converts DC (direct current) power from your car battery into AC (alternating current) power, allowing you to use household appliances and electronics while on the road. But how do you hardwire a power inverter? Well, it’s actually quite simple.
First, you’ll need to find a suitable location to install the inverter. This could be under the seat, in the trunk, or anywhere else that allows for easy access and ventilation. Once you’ve found the perfect spot, you’ll need to connect the inverter directly to your car’s battery.
This will require running cables from the inverter to the battery terminals. It’s important to ensure that these cables are properly insulated and secured to prevent any accidents. Once everything is connected, you can simply turn on the inverter and start enjoying the convenience of powering your electronic devices on the go.
With a little bit of patience and careful planning, you’ll have your power inverter hardwired and ready to use in no time.
What is a power inverter?
power inverter

Why hardwire a power inverter?
hardwire a power inverter
Step 1: Gather the necessary materials
If you’re looking to hardwire a power inverter, the first step is to gather all the necessary materials. This will ensure that you have everything you need to complete the project without any hiccups along the way. The list of materials may vary depending on the specific setup you have, but some common items you will need include an inverter, cables, fuses, fuse holder, wire connectors, and a multimeter.
It’s important to choose the right size inverter for your needs and make sure it is compatible with your vehicle’s electrical system. Additionally, you’ll want to ensure that you have the appropriate gauge of wire for the amperage of your inverter. Taking the time to gather all the necessary materials upfront will save you time and frustration later on.
So, grab your shopping list and get ready to tackle the first step in hardwiring a power inverter!
Power inverter
power inverter, materials.
Wire
To start wiring a project, you’ll need to gather a few essential materials. First and foremost, you’ll need wire. Depending on your project’s specific requirements, you may need different types and gauges of wire.
For example, if you’re working on a small electronics project, you may need thin and flexible stranded wire. On the other hand, if you’re setting up a network or installing electrical fixtures, you may require thicker and more rigid solid wire. Make sure to choose the appropriate wire based on the project’s needs.
Additionally, you’ll need wire strippers to remove the insulation from the ends of the wire. These tools come in different sizes, so select one that matches the gauge of your wire. Don’t forget to have some electrical tape on hand as well.
This handy adhesive tape can insulate and protect the exposed wire ends after you’ve made your connections. By gathering these materials, you’ll have everything you need to start wiring your project successfully.
Fuse
fuse, gather materials, steps, preparation, project
Wire connectors
wire connectors
Step 2: Plan the installation location
When it comes to hardwiring a power inverter, planning the installation location is an important step. You need to find a suitable spot in your vehicle or boat where the inverter can be securely mounted and easily accessible. Consider factors such as available space, proximity to the battery, and ventilation.
You’ll want to ensure that the location is durable and can handle the vibrations and movement that comes with driving or sailing. Additionally, you’ll want to choose a location that is convenient for you to reach when you need to use the inverter. Once you’ve selected the ideal spot, you can move on to the next step of the installation process.
Considerations for installation location
When it comes to installing a new system, choosing the right location is crucial. This step is often overlooked, but it is essential for maximizing the efficiency and lifespan of your system. There are several factors to consider when planning the installation location.
First, you need to ensure that the area is easily accessible for maintenance and repairs. It should also be well-ventilated, as the system will generate heat during operation. Additionally, you should consider the noise level of the system and its impact on nearby occupants.
Lastly, take into account the structural integrity of the installation location to ensure that it can support the weight of the system. By carefully considering these factors, you can ensure that your system is installed in the optimal location for peak performance and longevity.
Safety precautions
When planning the installation location for your new appliance, it’s important to prioritize safety precautions. One of the first steps you should take is to ensure that the area you have chosen is suitable for the appliance’s requirements. This includes checking for proper ventilation, adequate space, and a stable surface.
Consider the proximity to flammable materials and potential hazards, such as water sources or electric outlets. It’s crucial to read the manufacturer’s instructions and guidelines to understand the specific requirements for installation. By taking these safety precautions into account, you can help prevent accidents or damage to your property.
So, before you begin the installation process, make sure to plan the location carefully to ensure a safe and efficient operation.
Step 3: Disconnect the battery
So you’ve decided that you want to hardwire a power inverter into your vehicle. That’s a great idea! Hardwiring your power inverter has many advantages, such as providing a more stable power source and eliminating the need for messy cables. But before you start, it’s important to disconnect the battery.
This step is crucial for your safety and the safety of your vehicle. To disconnect the battery, you’ll first need to locate it. Depending on the make and model of your vehicle, the battery may be under the hood, in the trunk, or even under one of the seats.
Once you’ve found the battery, you’ll need to determine which terminal is positive and which is negative. Usually, the positive terminal is red, and the negative terminal is black. To disconnect the battery, start by using a wrench or socket to loosen the nut on the negative terminal.
Once it’s loose, gently pull the cable away from the terminal. Make sure to keep the cable away from the battery while you work on the positive terminal. Next, repeat the process for the positive terminal.
Loosen the nut and pull the cable away from the terminal. Once both cables are disconnected, you can safely proceed with the hardwiring process. By disconnecting the battery, you’re ensuring that there’s no power running through the vehicle while you work on the power inverter.
This reduces the risk of electrical shock or damage to your vehicle’s electrical system. So take your time, double-check your work, and stay safe as you move on to the next step of the hardwiring process.
Step 4: Choose the circuit to tap into
Choosing the right circuit to tap into is an important step when hardwiring a power inverter. The circuit you choose will determine the amount of power you can draw from it, so it’s crucial to select one that can handle the load of the inverter. Before making a decision, consider the specific requirements of the devices you plan to power with the inverter.
For example, if you plan to run high-power devices like refrigerators or air conditioners, you’ll need to tap into a circuit that can handle the heavy load. On the other hand, if you only plan to power smaller devices like laptops or smartphones, a circuit with a lower load capacity may suffice. It’s also important to consider the location of the circuit.
Tapping into a circuit that is close to where you plan to install the inverter can minimize the length of the wiring and reduce energy loss. Additionally, ensure that the circuit you choose is designed for continuous use and can handle the constant draw of the inverter. By carefully selecting the circuit and considering the power requirements of your devices, you can ensure a successful and efficient hardwiring process for your power inverter.
Step 5: Install the fuse holder
Now that you have your power inverter and cables all set up, it’s time to install the fuse holder. The fuse holder is an important component that will protect your power inverter and the electrical system of your vehicle from any potential electrical surges or overloads. To install the fuse holder, you’ll need to locate a suitable location near your power inverter to mount it.
Make sure the location is easily accessible and away from any heat sources or moving parts. Once you’ve found the perfect spot, you can use self-tapping screws or zip ties to secure the fuse holder in place. Next, you’ll need to connect the positive and negative wires from the inverter to the corresponding terminals on the fuse holder.
Make sure to match the wire sizes to the proper terminal sizes for a secure connection. Lastly, you’ll need to insert the appropriate fuse into the fuse holder. Typically, the fuse amperage should match the maximum capacity of your power inverter.
This will ensure that the fuse will blow if there is an electrical overload, protecting your inverter and your vehicle’s electrical system. With the fuse holder securely installed and the appropriate fuse in place, you’re now ready to start using your power inverter with confidence and peace of mind.
Step 6: Connect the power inverter to the battery
When it comes to hardwiring a power inverter, connecting it to the battery is a crucial step. This is because the power inverter converts the DC power from the battery into AC power that can be used to run various devices. To connect the power inverter to the battery, you will first need to locate the positive and negative terminals on the battery.
Once you have done that, you will need to connect the positive terminal of the inverter to the positive terminal of the battery and the negative terminal of the inverter to the negative terminal of the battery. It is important to make sure that the connections are secure and tight so that there are no loose or faulty connections. Additionally, it is recommended to use proper gauge wires that are capable of handling the amount of power required by the inverter.
By following these steps, you can safely and effectively connect your power inverter to the battery.
Connect the positive terminal
power inverter, battery, connect, positive terminal. In this step, we will be connecting the power inverter to the battery. This is a crucial part of the installation process, so make sure you follow these steps carefully.
First, locate the positive terminal on your battery. It is usually marked with a plus sign or the letters “POS.” Once you have located it, you will need to connect the positive terminal of the power inverter to the positive terminal of the battery.
This is typically done by inserting the red wire with the connector on the end into the positive terminal of the battery. Make sure the connection is secure and tight so that there are no loose or exposed wires. This step is important because it ensures that the power from the battery is properly transferred to the power inverter, allowing it to convert the DC power from the battery into AC power for your electrical devices.
Without a secure connection, the power inverter may not work correctly or may not work at all. So take your time and double-check your connections to ensure a proper and safe installation.
Connect the negative terminal
power inverter”, “connect power inverter to battery”, “negative terminal”, “battery connection It’s time to connect the power inverter to the battery so you can start using it to power your devices. This step is crucial to ensure that your power inverter functions properly and provides the necessary power for your needs. To connect the power inverter, start by locating the negative terminal on your battery.
It is usually labeled with a minus (-) symbol. Once you’ve found it, you will need to use a wrench or a socket to loosen the nut on the negative terminal. This will allow you to attach the cable from the power inverter securely.
Make sure you have a firm connection and tighten the nut to ensure a solid electrical connection. Connecting the negative terminal is an important step in the process as it completes the circuit and allows the power inverter to draw power from the battery. So, double-check your connections and make sure everything is secure before moving on to the next step.
Step 7: Secure the wiring
When it comes to hardwiring a power inverter, one of the most important steps is to secure the wiring. This ensures that the connection between the inverter and the battery is safe and reliable. First, you’ll want to choose the right size wire for your inverter.
The wire should be able to handle the maximum amperage of the inverter without overheating or causing a voltage drop. Next, you’ll need to connect the wire to the battery terminals. Make sure to use the appropriate size connectors and tighten them securely.
It’s also a good idea to use heat shrink tubing or electrical tape to protect the connections from moisture and corrosion. Finally, you’ll want to route the wire to the inverter, making sure to keep it away from any moving parts or hot surfaces. Use zip ties or adhesive clips to secure the wire in place and prevent it from getting tangled or damaged.
By taking these steps to secure the wiring, you can ensure a stable and safe connection for your power inverter.
Step 8: Test the power inverter
So you’ve got your power inverter all set up and wired in your vehicle, but now it’s time to test it out! Testing the power inverter is an important step to make sure everything is working properly before relying on it for powering your devices on the go. To start, make sure you have the power inverter connected to a power source, either through the vehicle’s battery or a separate power supply. Once the power is connected, turn on the inverter and check for any indicators or lights that show it is receiving power.
Most power inverters will have a green light to let you know it’s on and ready to go. Next, plug in your device or appliance that you plan on using with the power inverter. It can be anything from a laptop to a small appliance like a toaster or coffee maker.
Make sure the device is turned off before plugging it in. Once the device is plugged in, turn it on and see if it powers up. If the device turns on and functions normally, then congratulations – your power inverter is working! You can now safely use your devices while on the go, knowing that you have a reliable power source.
However, if the device doesn’t turn on or if the power inverter makes strange noises or emits an odor, then there may be a problem with the wiring or the inverter itself. In this case, it’s best to consult the user manual or contact the manufacturer for assistance. It’s better to be safe than sorry when it comes to electrical issues.
In conclusion, testing the power inverter is an essential step in the process of hardwiring it in your vehicle. By following these steps and checking for any issues or malfunctions, you can ensure that your power inverter will provide you with the reliable power source you need while on the go. So go ahead and give it a test – your devices will thank you!
Checking for proper voltage and functionality
power inverter, voltage, functionality
Conclusion
So there you have it, the secret to hardwiring a power inverter. It may seem like a daunting task at first, but with a little patience and a handy guide like this one, you’ll be well on your way to enjoying the convenience and versatility of a permanently installed power inverter. But remember, with great power comes great responsibility (and hopefully no electrical fires).
Always follow proper safety precautions and consult a professional if you’re unsure about any step. So go ahead, ditch the tangled mess of extension cords and let your imagination run wild with all the possibilities a hardwired power inverter can offer. From charging your gadgets on the go to powering up a mini fridge in your man cave, you’ll be the envy of all your friends and the hero of every camping trip.
Now go forth, fellow DIYers, and may your power always be with you (in a safe and efficient manner, of course). Happy hardwiring!”
FAQs
What is a power inverter and how does it work?
A power inverter is a device that converts DC (direct current) power into AC (alternating current) power. It works by taking the DC power from a battery or other power source and using electronic circuitry to convert it into the AC power that is commonly used in homes and businesses.
Why would I need to hardwire a power inverter?
Hardwiring a power inverter allows you to connect it to your vehicle’s electrical system or to a dedicated power source in your home or business. By hardwiring the inverter, you can create a more permanent and secure connection, ensuring that you have access to AC power whenever you need it.
Can I hardwire a power inverter to my car’s electrical system?
Yes, it is possible to hardwire a power inverter to your car’s electrical system. However, it is important to consult your vehicle’s manual or seek professional assistance to ensure that the inverter is properly connected and that it does not exceed the vehicle’s electrical capacity.
What tools and materials do I need to hardwire a power inverter?
To hardwire a power inverter, you will need the following tools and materials: a power inverter, electrical wire, wire connectors, a fuse holder, a fuse, a switch (optional), wire strippers, a wire cutter, and electrical tape.
Are there any safety precautions I should follow when hardwiring a power inverter?
Yes, there are several safety precautions to follow when hardwiring a power inverter. These include ensuring that the inverter is properly grounded, using the appropriate size wire and fuse, protecting the wires from damage and short circuits, and following the manufacturer’s instructions and recommendations.
Can I hardwire a power inverter to a solar panel system?
Yes, it is possible to hardwire a power inverter to a solar panel system. By doing so, you can convert the DC power generated by the solar panels into usable AC power for your home or business.
Is it necessary to hire a professional to hardwire a power inverter?
While it is possible to hardwire a power inverter yourself, it is recommended to hire a professional electrician, especially if you are not familiar with electrical work. They can ensure that the inverter is properly installed and connected, reducing the risk of damage to your electrical system or personal injury.


