Getting a flat tire in the middle of nowhere is every biker’s nightmare. Whether you are on a long-distance ride or a casual trail, flat tires can put a damper on your entire journey. In times like these, fixing the puncture yourself can save you a lot of time and money.
But if you are riding a tubeless bike, you might be wondering how to go about it. Don’t worry; it’s not as complicated as it seems. In this blog, we will guide you through step-by-step instructions on how to patch a tubeless bike tire, and we promise it’s as easy as fixing a puncture in a regular tire.
So, grab a cup of coffee, and let’s get started.
Table of Contents
Gather Necessary Tools and Materials
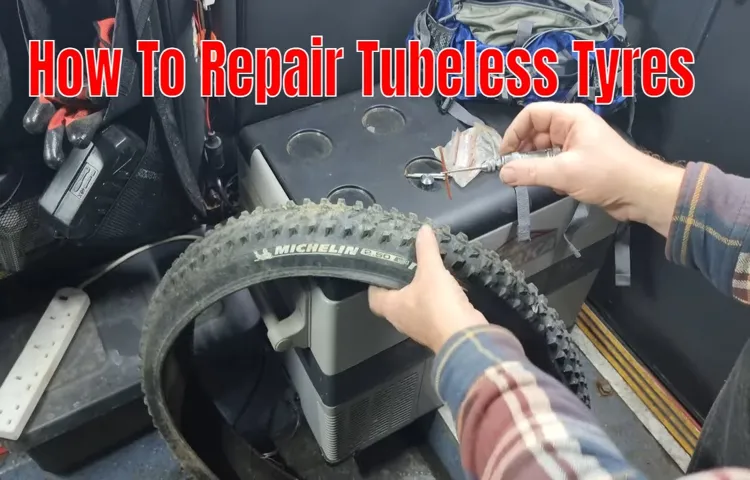
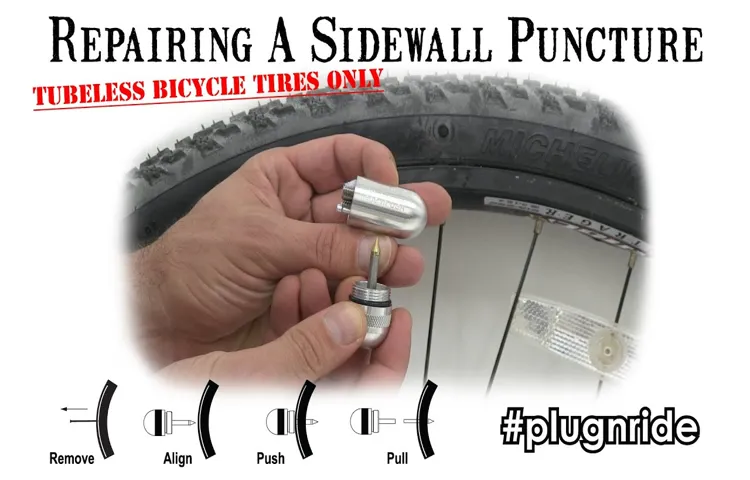
Before you start patching a tubeless bike tire, make sure to gather all the necessary tools and materials. You will need a tubeless tire repair kit, which typically includes rubber plugs, a plug insertion tool, and a reamer tool. It’s also important to have a hand pump or CO2 inflator to re-inflate the tire after the patching process.
Additionally, it’s recommended to have bike tire levers to remove the tire from the rim, as well as a bucket or basin to hold soapy water and locate the punctured area. Overall, having all the tools and materials readily available will make the patching process quicker and more efficient.
Tubeless Tire Patch Kit, Tire Levers, and Pump
When it comes to fixing a tubeless tire, having the right tools and materials can make all the difference. First off, you’ll need a tubeless tire patch kit. Make sure to choose a kit that is specifically designed for tubeless tires, as these patches are designed to bond directly onto the tire’s surface and seal up any punctures or cuts.
You should also have a set of reliable tire levers on hand to help you remove the tire from the rim and get access to the puncture. Finally, a good pump is essential for re-inflating the tire once you’ve made your repair. Whether you prefer a hand pump or an electric one, make sure it’s capable of delivering the right amount of pressure for your tire.
With these tools on hand, you’ll be well-equipped to handle any puncture, cut, or tear that comes your way on the road or trail.

Locate and Remove the Puncture
If you’re dealing with a punctured tubeless bike tire that needs patching, the first step is to locate and remove the puncture. Start by inspecting the tire to identify the source of the puncture. If you have a sealant-filled tire, you might notice a visible sealant leak.
Next, remove the tire from the wheel and deflate it completely. Check the inside of the tire for any debris or foreign objects that might have caused the puncture. Once you’ve located the puncture, use a sharp tool like a needle or an awl to remove any remaining debris from the inside of the hole.
It’s essential to ensure the inside of the tire is clean before applying a patch. After cleaning, apply a tubeless bike tire patch kit to cover the hole from the inside of the tire. Make sure the patch is securely in place, and then re-inflate the tire to the proper pressure and check that there are no further leaks.
Your tire is now ready to hit the road!
Spray Soapy Water and Listen for Hissing
After experiencing a flat tire, it can be frustrating to try and locate the puncture amongst the rubber. One effective way to locate it is by spraying soapy water on the tire’s surface and observing for hissing sounds. The air escaping from the puncture will create bubbles in the soapy solution, making it easier to pinpoint the hole’s location.
Once identified, carefully remove the object that caused the puncture. It may be a nail or piece of glass, but whatever it is, make sure to remove it entirely to prevent further damage to the tire. Be sure to also check the tire’s interior to ensure there are no remaining pieces of debris.
After removing the object, assess the damage to the tire and either patch or replace it. Remember to drive cautiously on a repaired tire and have regular tire checkups to prevent future flats. By utilizing the spray and listen method, finding and removing a puncture can be a quick and easy task.
Insert Tire Levers and Remove Tire from Rim
After successfully removing the tire from its rim using the tire levers, it’s time to locate and remove the puncture. Begin by inspecting the inside and outside of the tire for any debris or sharp objects that may have caused the puncture. If you can’t locate the puncture visually, inflate the tire slightly and listen for a hissing sound to help pinpoint the location.
Once you’ve located the puncture, use the tire levers to gently pry the tire away from the rim. Avoid using excessive force as this can cause further damage to both the tire and rim. Once the tire is removed, using a pair of pliers or tweezers and carefully remove the object causing the puncture.
If the object cannot be removed, it’s recommended to replace the tire entirely to avoid future issues. Inspect the inside of the tire for any damage caused by the puncture and make any necessary repairs before putting the tire back on the rim. With the puncture located and removed, you can now proceed to patch or replace the tire.
Clean and Prep Puncture Area
When it comes to patching a tubeless bike tire, the first step is to clean and prep the puncture area. A dirty or greasy surface can prevent the patch from properly sealing the hole in your tire, so it’s important to thoroughly clean the area with rubbing alcohol or another strong cleaner. After cleaning, allow the area to dry completely before continuing.
Next, use a sharp tool to carefully remove any debris or foreign objects that may be stuck in the puncture, such as thorns or small rocks. Finally, roughen the surface of the puncture area with sandpaper or a file to provide better adhesion for the patch. By taking the time to properly clean and prep the puncture area, you’ll ensure a stronger and more secure seal for your tubeless tire patch, and you’ll be back on the road or trail in no time.
Wipe with Alcohol and Let Dry
When it comes to administering injections, it’s important to ensure that the puncture area is clean and prepped before inserting the needle. One of the most effective ways to do this is by wiping the area with alcohol and allowing it to dry. Alcohol works to kill any bacteria or germs on the skin’s surface, reducing the risk of infection.
It’s crucial to wait for the alcohol to dry completely before administering the injection, as wet skin can cause the needle to slip and increase the chances of bruising or bleeding. By taking the time to properly clean and prep the area, you can help ensure a safe and successful injection. So, next time you’re getting ready to administer a shot – remember to wipe with alcohol and let dry!
Apply Patch to Puncture
Patching a tubeless bike tire may seem daunting at first, but with a few simple steps, you can do it yourself in no time. The first step is to locate the puncture in the tire using soap and water or a tire sealant. Once you have found the puncture, remove any debris or foreign objects that may be stuck in the tire.
Next, use a tire patch kit that contains a small piece of rubber and glue. Apply the glue to the patch and then press the patch firmly onto the puncture, ensuring that the patch is securely stuck. Allow the glue to dry for a few minutes, and then inflate the tire to the recommended pressure.
Ensure that the tire is holding air properly by listening for any hissing sounds and checking for any leaks using soap and water. Once you have confirmed that the patch is holding, you’re ready to hit the road once again! Remember to always carry a tire patch kit with you during your bike rides to be prepared for any potential punctures. By following these simple steps, you can save yourself time and money by patching your tubeless bike tire on your own.
Peel Back Protective Film, Apply Patch, and Smooth Edges
When it comes to fixing a punctured bike tire, applying a patch can be a simple and effective solution. The first step is to peel back the protective film on the patch, revealing the adhesive surface. Next, carefully apply the patch over the puncture, making sure to center it on the hole.
Use your fingers to smooth out any wrinkles or bubbles in the patch, ensuring a secure bond. Finally, take a moment to smooth the edges of the patch, ensuring that no corners or edges are lifting up. With these simple steps, your bike tire should be ready to ride again in no time.
Just remember to test the patch by inflating the tire and checking for leaks before hitting the road. Overall, using a patch to fix a puncture is a straightforward process that can save you time and money compared to replacing the entire tire. So next time you run into a flat, give it a try!
Reinstall Tire and Inflate
So, you’ve got a flat on your tubeless bike tire? No need to panic! Here’s a step-by-step guide on how to patch it up. First, locate the puncture in your tire. If it’s a small puncture, you can insert a tire plug into the hole.
If the puncture is larger, you’ll need to patch it using a tire patch kit. Once you’ve plugged or patched your tire and removed any debris from the area, it’s time to reinstall the tire. Make sure the tire bead is seated properly all around the rim before adding air.
Pump the tire up to the recommended pressure indicated on the sidewall of your tire and give it a spin to make sure it’s seated correctly. Congratulations! You’ve just fixed your tubeless bike tire and are ready to hit the road again. Remember to always carry a patch kit and tire plugs with you on your rides, just in case of emergencies.
Insert Valve Stem and Reinstall Tire on Rim
After removing the old valve stem, it’s time to insert a new one and reinstall the tire onto the rim. Start by lubricating the valve stem with a small amount of tire lubricant or soap. Then, using pliers or a valve stem tool, insert the stem into the hole on the rim and secure it in place.
Next, position the tire onto the rim, ensuring that the bead is seated all the way around. Using a tire iron, work your way around the tire, levering it onto the rim. Once the tire is fully mounted, inflate it to the recommended pressure and check for any leaks using soapy water.
It’s important to use the correct pressure to ensure the tire wears evenly and provides optimal performance. With the tire fully inflated and secure, it’s ready to be put back onto your vehicle and get you back on the road. Remember to always double-check your work to ensure your safety on the road.
Inflate Tire to Recommended PSI and Check for Leaks
Inflating your car tires to the recommended PSI is crucial for a smooth and safe ride. Before you reinstall the tire, make sure to thoroughly check for any leaks by spraying a solution of soapy water onto the tire. If bubbles form, there may be a leak that needs fixing before you proceed.
Assuming everything checks out, it’s time to reattach the tire to the wheel. Tighten the lug nuts in a star pattern, working your way around the wheel to ensure an even and secure fit. Finally, inflate the tire to the recommended PSI, which can be found in your vehicle’s owner’s manual or on the inside of the driver’s side door.
Overinflating the tire can be just as dangerous as underinflating, so be sure to use a reliable tire pressure gauge to get an accurate reading. By taking the time to properly reattach and inflate your tires, you’ll be ensuring a safer and more comfortable ride for yourself and your passengers.
Conclusion
Patching a tubeless bike tire is like performing a surgical operation on your bike – with a little bit of patience and precision, you can successfully bring your tire back to life. Just remember to inflate your tire with a bit of humor and don’t let any punctures deflate your adventurous spirit. Happy biking!”
Tubeless Tire Patches are Essential for On-the-Go Repairs
If you’re an avid cyclist, you know that a flat tire can ruin your ride. That’s why it’s essential to have a tubeless tire patch kit on hand for quick repairs. Once you’ve located and removed the puncture from your tire, it’s time to reinstall the tire and inflate it.
Start by making sure the tire is seated correctly on the rim, then use a tire lever to help push the tire back onto the rim. Once the tire is in place, it’s time to reinflate it. Use a pump or CO2 cartridge to inflate the tire to the recommended pressure.
It’s important to monitor the pressure and adjust as needed during your ride. With a tubeless tire patch kit and a few quick steps, you can be back on the road in no time. Don’t let a flat tire ruin your day – be prepared with a tubeless tire patch kit and the know-how to use it.
FAQs
What tools do I need to patch a tubeless bike tire?
You will need a tubeless tire repair kit, which includes a reamer, plug insertion tool, and tire plugs.
Can you patch a tubeless bike tire without removing the tire from the rim?
Yes, it’s possible to patch a tubeless bike tire without removing the tire from the rim using a small puncture repair kit.
How long does a patch on a tubeless bike tire last?
A properly installed patch on a tubeless bike tire can last indefinitely, but it’s recommended to replace the tire if the puncture is in the sidewall or larger than 6mm.
Can you use a regular bike tire patch kit on a tubeless bike tire?
No, a regular bike tire patch kit is not designed for tubeless tires and will not work on them.
How do you locate the puncture on a tubeless bike tire?
You can locate the puncture on a tubeless bike tire by listening for air escaping, submerging the tire in water and looking for bubbles, or using a tire pressure gauge to find the lower tire pressure.
Can a tubeless bike tire be patched multiple times?
It’s possible to patch a tubeless bike tire multiple times as long as the punctures are not too close together and are located in the tread area, but it’s best to replace the tire if it has been patched multiple times.
How do you prevent punctures in tubeless bike tires?
You can prevent punctures in tubeless bike tires by using a sealant, keeping the tires properly inflated, avoiding sharp objects, and using puncture-resistant tires.


