Flat tires happen to the best of us, and they always seem to pop up at the most inconvenient times. Whether you’re on your way to work or heading out on a weekend road trip, a flat tire can quickly derail your plans if you’re not prepared. That’s where a tire plug kit comes in handy.
With a plug kit, you can quickly and easily repair a punctured tire and get back on the road in no time. But if you’ve never used a tire plug kit before, the process can seem intimidating. Don’t worry – in this post, we’ll break down how to plug a tire with a plug kit step by step so you can confidently handle the situation if it ever arises.
Materials Needed
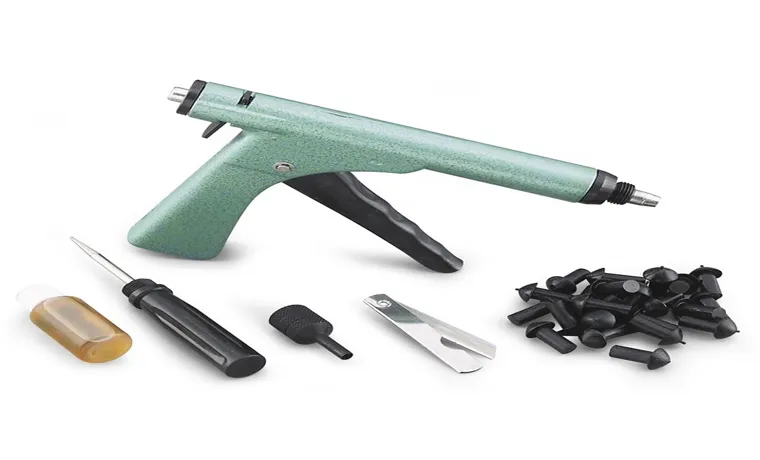
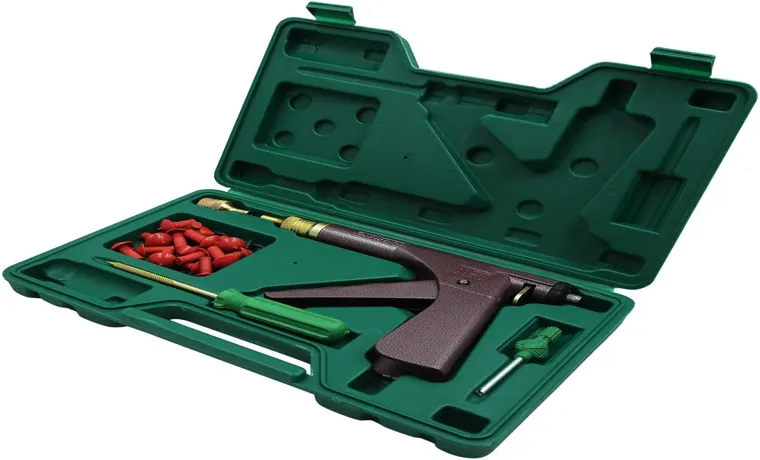
When it comes to plugging a tire with a plug kit, the materials needed are pretty straight forward. First and foremost, you will need a tire plug kit which typically comes with rubber plugs and a tool to insert the plug. Some kits may also include lubricant and a rasp tool to prepare the puncture site.
In addition to the plug kit, you will need a tire pressure gauge and a source of air such as an air compressor or tire inflator. It’s also recommended to have a pair of pliers on hand to help remove any debris from the puncture site. Overall, the materials needed for plugging a tire are relatively simple and readily available at most auto parts stores.
By having these materials on hand, you can quickly and easily patch a punctured tire and get back on the road safely.
Tire Plug Kit
If you’re someone who likes to take road trips, you know the importance of having a tire plug kit in your car. This handy tool can help you fix a punctured tire quickly and easily, allowing you to get back on the road without having to wait for a tow truck. So, what do you need to make use of a tire plug kit? Firstly, you’ll need a kit, which typically includes a spiral reamer and an insertion tool.
You’ll also need rubber cement, a plug, and a pair of pliers to cut the excess plug material. Additionally, having a tire pressure gauge on hand is critical to ensuring that you fill the tire to the right level. And lastly, a small portable air compressor can also come in handy in case you need to inflate the tire after you’ve plugged it.
With these materials, you’ll be ready for any puncture that comes your way on the road.

Pliers
When it comes to working with pliers, it’s important to have the right materials on hand to ensure your safety and efficiency. First and foremost, you’ll need the right type of pliers for the job at hand – whether that’s needle-nose pliers, lineman’s pliers, or something else entirely. Additionally, you’ll want to make sure you have a sturdy work surface to ensure stability and precision.
Depending on the task, you may also need additional tools such as wire cutters or crimping tools. Finally, it’s always a good idea to wear protective gear such as gloves or safety goggles to prevent injury. By having all the necessary materials on hand, you’ll be able to work with your pliers confidently and effectively, no matter what the job requires.
Tire Pressure Gauge
If you’re a car owner, you know the importance of maintaining proper tire pressure. It can lead to better fuel efficiency, optimal tire performance, and a smoother ride. That’s where a tire pressure gauge comes in.
You’ll need a few materials to check your tire pressure accurately. Firstly, you’ll need a tire pressure gauge, which can be mechanical or digital. It’s up to you to decide which one is more convenient for your needs.
Additionally, you’ll need a tire valve stem cap remover to access the tire valve. This can also be helpful if you live in a cold climate where the valve can freeze shut. Lastly, you’ll need a tire inflator or an air compressor to add air if required.
A tire pressure gauge combined with these materials can ensure that your tires are always in good shape and can save you money on gas and tire replacements in the long run.
Step-by-Step Instructions
If you find yourself with a flat tire and are out of reach of a mechanic, using a tire plug kit can save you a lot of time and money. Here’s how to plug your tire with a plug kit in just a few simple steps. First, remove the foreign object that caused the puncture and use a reaming tool to enlarge the hole so that the plug can easily fit inside.
Next, insert the plug into the puncture with the insertion tool, ensuring that it is flush with the tire. Use pliers to pull the insertion tool straight out of the tire, leaving the plug securely in place. Finally, trim any excess plug material flush with the tire using a pair of scissors or a box cutter.
Remember, a tire plug is meant to be a temporary fix and it is still recommended to have the tire professionally repaired or replaced as soon as possible. By following these simple steps, you’ll be able to get back on the road quickly and safely with your newly plugged tire.
1. Remove the Object from the Tire
When you have an object stuck in your tire, it can be a frustrating situation. However, with these step-by-step instructions, removing the object is made easy. First, locate the object in your tire and assess the size and shape.
If it is a small object like a nail, it can usually be pulled out with pliers. For larger objects like a screw or bolt, you may need a tire iron or crowbar to pry it out. Once the object is removed, inspect the tire’s inner lining to ensure there is no damage.
If there is, it may be necessary to replace the tire entirely. Overall, removing an object from your tire requires patience and attention to detail, but with these instructions, you can ensure a job done safely and effectively.
2. Locate the Puncture
When it comes to fixing a punctured tire, the first step is to locate the puncture. This means identifying the spot where the air is leaking out of the tire. But how do you find it? Well, the first thing to do is to remove the wheel from the vehicle and remove the tire from the wheel.
Then, you can inspect the tire for any obvious signs of damage such as a nail or screw. If you can’t see anything, you might need to immerse the tire in water to identify the location where the air is escaping. If bubbles appear, you have found the puncture.
Keep in mind that the puncture may be on the tread, the sidewall, or even the inner liner of the tire. Once you have located the puncture, you can move on to repairing or replacing the tire. Remember to always wear gloves when handling a punctured tire to avoid any injury.
3. Prepare the Tire Plug
Preparing the tire plug is an important step in fixing a punctured tire, and it can be easy to overlook it in the rush to get back on the road. To prepare the tire plug, you need to obtain a tire plug kit and follow the instructions on how to use it. Most kits will include a plug insertion tool and rubber plugs, which are ready to use right out of the package.
The first step is to select the appropriate size plug for the puncture and thread it onto the insertion tool. Then, you will need to lubricate the plug with rubber cement or lubricating fluid to help it slide into the puncture more smoothly. You should also make sure to cut the excess plug material flush with the tire once it has been inserted to ensure a secure seal.
Remember to always follow the instructions provided with your tire plug kit, and if you are unsure about any step in the process, seek guidance from a professional tire technician.
4. Insert the Plug into the Puncture
Inserting a plug into a puncture can be tricky, but it is a vital step in repairing a flat tire. Follow these step-by-step instructions to ensure a successful repair. First, locate the puncture on the tire.
Make sure the area is clean and dry, and remove any debris that may be lodged in the hole. Take the plug and insert it into the eye of the insertion tool, making sure that the plug is centered on the tool. Next, gently insert the tool and plug into the puncture, with the plug facing towards the center of the tire.
Push the tool all the way in until it is flush with the tire. Finally, pull the tool out quickly and firmly, leaving the plug firmly in place. Check the tire for any leaks and adjust the tire pressure as needed.
With these simple steps, you’ll be able to insert a plug into a puncture with ease and get back on the road in no time.
5. Trim the Excess Plug
Now that you have inserted the plug into the wall and connected your device, it’s time to trim the excess. The excess plug can pose a safety hazard, so it is crucial to cut it off with caution. Firstly, unplug the device before cutting the plug.
Use a pair of wire cutters to snip off the excess plug and discard it properly. Ensure that you cut far enough from the device to avoid damaging it, but not too close to the plug to leave exposed wires. You can use electrical tape to secure the cable to the plug to avoid any accidental tugging.
In conclusion, trimming excess plugs is a simple but necessary step in securing the safety of your electrical devices. So, don’t forget to handle it carefully and dispose of it safely.
6. Re-Inflate the Tire
When it comes to re-inflating a tire, there are a few simple steps you can follow to get your vehicle back on the road. First, locate the valve stem on the tire and remove the dust cap. Attach the air nozzle to the valve stem and begin inflating the tire to the recommended level, typically found on the tire sidewall or in the owner’s manual.
Use a tire pressure gauge to ensure you reach the correct pressure. It’s important to inflate the tire slowly to prevent over-inflation, which can lead to a blowout. Once the tire is inflated, check for any leaks by listening for hissing sounds or using a soapy water solution on the valve stem and around the tire to see if bubbles form.
If there are no leaks, replace the dust cap and you’re good to go. Keep in mind that it’s important to regularly check the tire pressure and re-inflate as needed to ensure safe driving and prevent unnecessary wear and tear on your tires.
Additional Tips
If you’re searching for how to plug tire with plug kit, here are some additional tips you need to keep in mind. Firstly, ensure that the puncture is not too close to the sidewall. If it is, it may not be repairable.
Secondly, once you locate the puncture, mark it with chalk or a marker to avoid losing it. Thirdly, use the reaming tool in the kit to clean the hole out. This gives the plug a better chance at sealing the puncture.
Fourthly, when inserting the plug, do it slowly and carefully to avoid any air leaks. Lastly, keep in mind that a tire plug is only a temporary fix, and you should replace the tire as soon as possible to ensure your safety on the road. By following these tips, you’ll be able to plug your tire and extend its lifespan until you can get it properly repaired.
Check the Tire for Other Punctures
When dealing with a punctured tire, it’s crucial to check for any additional punctures. Even if the initial puncture seems small, there may be other punctures or damages that can make the situation worse. Inspect the tire thoroughly by running your hand over the tire’s surface to feel for any other holes or gouges.
If you find any other punctures, it’s important to address them as soon as possible to prevent further damage to the tire. Additionally, take a close look at the tire’s sidewall and tread for any cuts or bulges that can lead to blowouts or other safety hazards. Remember, even a minor puncture can seriously impact your vehicle’s performance, so always be vigilant when it comes to maintaining your tires.
Monitor the Tire Pressure
One of the most important things you can do for your vehicle’s safety and performance is to monitor the tire pressure regularly. Tires that are under-inflated can cause poor handling, reduced fuel efficiency, and even blowouts on the road. On the other hand, overinflated tires can reduce traction, increase the risk of skidding, and lead to excessive wear on the tread.
To avoid these issues, use a tire pressure gauge to check the pressure at least once a month and adjust it as needed to meet the manufacturer’s recommendations. Not sure what that is? Check the sticker on the driver’s side door jamb or your owner’s manual. By keeping your tires properly inflated, you can help ensure a smooth, safe driving experience and save money at the pump.
In addition to monitoring your tire pressure, there are a few other tips to keep in mind to help extend the life of your tires. First, make sure that they are properly aligned and balanced. Misalignment or imbalance can cause uneven wear, which can lead to premature replacement of your tires.
Second, rotate your tires regularly to keep the wear even across all four tires. This can also help extend their lifespan and improve your vehicle’s handling. Finally, be mindful of your driving habits.
Rapid acceleration, hard braking, and sharp turns can all take a toll on your tires. By driving more cautiously and avoiding potholes and other road hazards, you can help preserve the health of your tires and your vehicle overall.
Consider Permanent Tire Repair
When it comes to tire repair, many people opt for a temporary fix, such as a patch or plug. However, it may be worth considering a permanent solution. Permanent tire repair involves filling the punctured area with a sealant that hardens and creates a permanent seal.
This method not only provides a long-lasting solution but also eliminates the need for a spare tire, saving you space and weight in your vehicle. It’s important to note that not all punctures can be fixed permanently, and in some cases, a new tire may be necessary. Additionally, make sure to use a reputable sealant and follow the manufacturer’s instructions for best results.
By considering a permanent tire repair, you can enjoy a more convenient and worry-free driving experience.
Conclusion
Congratulations! You are now well-versed in the art of plugging a tire with a plug kit. Remember, if you have a punctured tire, don’t panic – simply follow these easy steps and plug away! With a little practice and patience, you’ll be back on the road in no time with a tire that’s as good as new. Just be sure to avoid those pesky nails and screws in the future, and leave the puncturing to the professionals.
Happy plugging!”
FAQs
What is a tire plug kit?
A tire plug kit is a tool used to repair punctures in a tire without having to replace the entire tire.
Can a tire plug kit repair all types of punctures?
No, a tire plug kit can only repair punctures in the tread of the tire and not on the sidewalls.
How do I know if a tire plug kit is the right solution for my puncture?
If the puncture is in the tread of the tire and less than ¼ inch in diameter, then a tire plug kit is an appropriate solution.
How do I use a tire plug kit?
First, remove the object that caused the puncture. Then, use the reamer tool to clean out the hole. Insert the plug strip into the insertion tool, and slowly insert it into the hole until only about ½ inch of the strip is sticking out. Then, pull the insertion tool out, leaving the plug strip in the puncture. Trim the excess plug strip with scissors or a knife.
Can I drive on a tire repaired with a plug kit?
Yes, but you should only drive on the repaired tire at a reduced speed and for a limited time. It is recommended that you get the tire professionally repaired or replaced as soon as possible.
How long will a tire repair made with a plug kit last?
A tire repair made with a plug kit is considered a temporary solution and may last several months or longer, depending on the condition of the tire and how well the plug was inserted.
Can I use a tire plug kit on a run-flat tire?
No, run-flat tires should not be repaired with a plug kit. You should have the tire professionally repaired or replaced.


