Picture this: you’re driving down the road, enjoying the scenery when suddenly you hear a loud pop. Next thing you know, you’re at the side of the road with a flat tire. No big deal, you think to yourself, I have a spare.
But wait, where did you put that spare tire? Was it under the car? If so, how on earth do you put it back there? Don’t worry, we’re here to help. In this blog post, we’ll give you a step-by-step guide on how to put a spare tire back under your car so that you can get back on the road in no time. So grab a cup of coffee, put on your reading glasses, and let’s get started!
Table of Contents
Step 1: Locate the Spare Tire and Tools
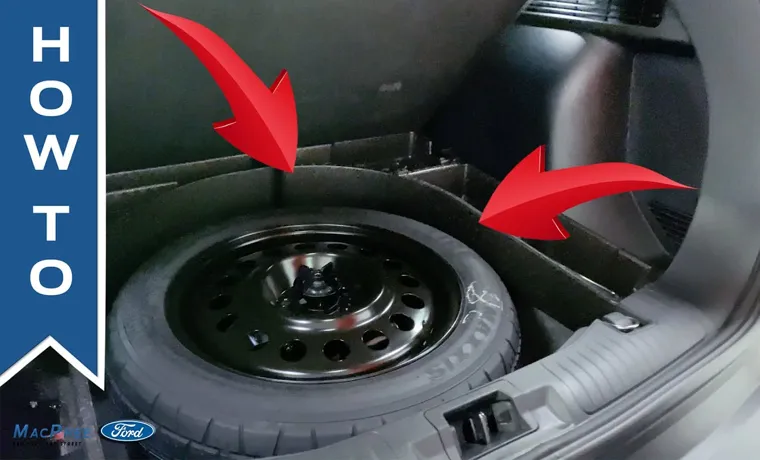
If you ever find yourself in a situation where you need to use your spare tire, it’s important to know how to put it back under your car. The first step is to locate the spare tire and the necessary tools. Your spare tire is typically located in the trunk of your car or underneath the vehicle.
Check your owner’s manual if you’re unsure. Once you have located the spare tire, you’ll also need to retrieve the jack and lug wrench. These tools are essential for removing the old tire and installing the spare.
Make sure they are easily accessible before starting the process. By following these steps and being prepared, you’ll be able to change a tire and get back on the road in no time.
Find the tire and tools in the trunk or under the vehicle.
When faced with a flat tire, the first step is to locate your spare tire and tools. Most vehicles come equipped with both, and they are typically located in the trunk or under the vehicle. In the trunk, you may find the spare tire and tools stored in a compartment specifically designed for them.
Under the vehicle, you may find the spare tire located on the underside of the vehicle, secured with a bolt. To access it, you may need to turn a small crank or use a tire iron to loosen the bolt. It’s important to locate the spare tire and tools before you need them so that you can easily access them in the event of an emergency.
By taking the time to locate your spare tire and tools now, you can save yourself time and frustration later on.

Step 2: Align the Hoist Bracket
So you’ve got your spare tire out and ready to go, now it’s time to put it back under the car where it belongs. The next step is to align the hoist bracket with the bracket on the spare tire. You can do this by positioning the hoist rod through the center of the wheel and slowly raising it until the bracket lines up.
Make sure the spare tire is centered and level, and double-check that it’s securely attached to the hoist before lowering it back down. This step is crucial to ensure your spare tire is safely stowed away and won’t come loose while you’re driving down the road. Remember, safety always comes first, so take your time and make sure everything is lined up properly before moving on to the next step.
Line up the hoist bracket with the spare tire mechanism.
When it comes to changing a flat tire, the process can seem daunting. However, with the right tools and a little bit of know-how, it can be a breeze. One crucial step in the process is aligning the hoist bracket with the spare tire mechanism.
This ensures that your spare tire will be securely fastened to your vehicle. To do this, start by locating the hoist bracket and positioning it directly under the spare tire mechanism. It may take some maneuvering, but be patient and take your time.
Once the hoist bracket is in place, double-check that it lines up with the spare tire mechanism and that there are no gaps or spaces between the two. This step is essential for not only a secure tire change but also for your safety while driving. So take your time and align the hoist bracket with care, and you’ll be back on the road in no time.
Step 3: Crank the Tire Up
Now that you have properly positioned the spare tire under the car, it’s time to crank it up! This step requires using the jack handle to turn the crank and lift the tire off the ground. Depending on the type of jack, you may need to twist the handle or pump it up and down to get the tire elevated enough. Make sure to keep a firm grip on the handle and rotate it slowly.
Once the tire is at the right height, stop cranking and take a moment to double-check that it is securely in place. The last thing you want is for it to fall off while you’re driving! Remember, safety should always be your top priority. By following these simple steps, you’ll be able to put a spare tire back under your car in no time!
Use the tools to crank the tire up until it’s secured in place.
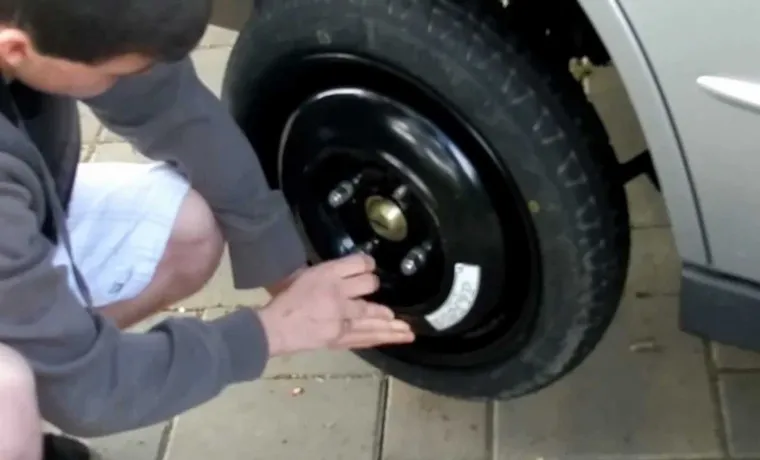
Once you’ve aligned the spare tire with the wheel hub, it’s time to start cranking it up. This is where the tools that came with your spare tire kit come in handy. Place the lug nuts back on the bolts and use the wrench to tighten them as much as possible.
Then, use the tire iron to start cranking the tire up. As you do this, keep an eye on the tire to ensure that it’s aligned properly. It’s important that the tire goes on straight and doesn’t wobble as it goes up.
Once the tire is secured in place, you’ll be able to lower the car back down to the ground and remove the jack. Make sure to tighten the lug nuts as much as possible once the car is lowered. Your spare tire is now installed and you’re ready to hit the road again – just make sure to get your flat tire repaired or replaced as soon as possible!
Step 4: Ensure Proper Placement
After successfully lifting your car and mounting your spare tire back on, you need to ensure its proper placement under the car. This critical step will ensure that the tire stays in place while driving and won’t cause any safety hazards. First, make sure that the tire is aligned with the holding bracket and the holes on the rim match the pins on the bracket.
Then, slowly lower the tire back under the car, making sure it clicks into the bracket securely. Once you hear the clicking sound, give the tire a slight tug to ensure it won’t come off. It’s important to keep in mind that the tire should be centered with the bracket and not tilted to either side.
Proper placement is essential to ensure the safety of everyone in the car and other drivers on the road. So, take your time, and double-check that the tire is securely in its place before hitting the road.
Make sure the tire is centered and aligned before lowering the vehicle.
When it comes to changing a tire, properly aligning and centering it is crucial for safety on the road. Before lowering the vehicle, take a moment to check that the tire is snugly in place, with all lug nuts securely fastened. Make sure that the tire is centered and aligned with the other tires on the vehicle, using a level or a visual inspection.
If the tire is not properly aligned, it could cause problems with handling and balance, leading to a potentially dangerous situation while driving. Think of it like building a tower out of blocks – if one block is off center, the whole tower could come tumbling down. By double-checking the alignment and centering of the tire, you can ensure that your vehicle is safe and stable for driving.
So don’t rush the process – take the time to make sure your tire is in the right position before hitting the road.
Step 5: Lower the Vehicle
Now that you have successfully mounted the spare tire back onto the car, the final step is to lower it down to the ground. This step is crucial to avoid any potential damage or injury while driving. To do this, use the jack handle to slowly turn the crank counterclockwise until the tire touches the ground.
Make sure to watch the tire carefully as it touches the ground, and once it’s fully lowered, use your hand to unscrew the spinner from the end of the carrier and tighten the wing nut. This will secure the tire back underneath the car and prevent it from falling out while driving. Congratulations, you have now successfully put the spare tire back under the car and are ready to hit the road again!
Slowly lower the vehicle back down to the ground.
Now it’s time to carefully lower your vehicle back down to the ground in the last step of the process. First, make sure the jack is securely in place and double-check that all the bolts and lug nuts are tight. Then, slowly lower the jack, keeping an eye on the tire to make sure it’s properly aligned with the ground.
It’s important to lower the vehicle evenly, so use a steady hand and keep an eye on the jack to make sure it stays centered. If you’re confident everything is securely in place, you can start to lower the vehicle more quickly, but be sure to keep a hand on the jack at all times to be safe. Once the vehicle is fully on the ground, give the lug nuts one last tighten and you’re all set! Remember to always double-check your work and never rush through the process to avoid any accidents.
Step 6: Tighten the Lug Nuts
As you proceed with replacing your punctured tire with a spare one, make sure to tighten the lug nuts securely in place to avoid any accidents while driving. Begin by using your hands to twist the nuts counter-clockwise until you can remove them completely. Next, take the lug wrench and align the socket on each lug nut before tightening it clockwise.
Make sure to tighten them by hand first and then use the wrench to give them an extra turn or two. This will help ensure that the lug nuts are tight enough and keep the wheel in place as you drive ahead. Remember, a loose lug nut can cause the wheel to wobble or even fall off completely, which can lead to a severe accident.
Therefore, be extra cautious while tightening them and double-check if they are secured tightly enough. Once you have completed tightening all the lug nuts, you’re done! Your spare tire is installed and ready to use.
Tighten the lug nuts on the tire using the tools.
When it comes to changing a tire, the final step is to tighten the lug nuts using the tools provided. This step is crucial because if the lug nuts are not tightened properly, the wheel could come loose while driving, which is incredibly dangerous. To ensure that the lug nuts are tightened correctly, use a star pattern – tighten one lug nut, skip the next, tighten the third, skip the fourth, and so on until all the lug nuts are tight.
Once all the nuts have been tightened, go back and check them again to make sure they are all secure. Remember, it’s better to be safe than sorry when it comes to tightening lug nuts. So, take the time to do it right, so you can drive safely with confidence.
Conclusion
In conclusion, putting a spare tire back under the car may seem daunting at first, but it’s really just like playing a game of Tetris. The key is to carefully align the tire with the mechanism and use steady pressure to slide it back into place. So next time you find yourself with a flat tire, don’t panic! Just remember that with a little bit of patience and finesse, you can put that spare tire back where it belongs.
“
Putting a spare tire back under a car doesn’t have to be difficult. Follow these steps to do it safely and efficiently.
Now that you’ve successfully raised your car and put the spare tire in place, it’s time to tighten the lug nuts. This is a crucial step to making sure the tire stays securely on the car while you drive. Start by hand-tightening each lug nut in a star pattern – this means tightening the nut directly across from the one you’re currently tightening.
This will help ensure even pressure and prevent the tire from wobbling. Once all the nuts are hand-tightened, use a lug wrench to tighten them further. Again, use the star pattern and tighten each nut a little at a time, rather than all at once.
You want the nut to be snug, but be careful not to overtighten, as this can warp the brake rotor or damage the studs. If you’re not sure how tight to make the lug nuts, check your car’s owner’s manual for the manufacturer’s specifications. Once you’ve successfully tightened all the lug nuts, your spare tire is securely in place and you’re ready to hit the road again.
FAQs
How do I access the spare tire on my car?
The spare tire is typically located in the trunk or under the car. To access it, consult your car’s manual for instructions specific to your vehicle.
How do I safely jack up my car to change a tire?
First, ensure that you are parked on a flat surface. Next, use a jack and the designated jacking points on your car to raise it off the ground. Always make sure the car is stable and secure before working on it.
Can I use any type of spare tire on my car?
It’s best to use a spare tire that matches the specifications of the other tires on your car, including size and type. Consult your car’s manual or a professional for guidance.
How do I remove a flat tire from my car?
Use a lug wrench to loosen the lug nuts on the tire, then jack up the car and remove the lug nuts and tire. Be sure to place the tire in a safe location.
How do I put a spare tire back under the car?
Follow the specific instructions in your car’s manual, but generally, you’ll need to lift the tire back onto the mechanism holding it in place and tighten any bolts or screws as necessary.
Can I drive on a spare tire for an extended period of time?
Spare tires are intended for temporary use and should not be driven on for extended periods. It’s best to replace the flat tire with a new one as soon as possible.
How can I prevent a flat tire from happening in the first place?
Regularly checking the air pressure in your tires, rotating them periodically, and avoiding rough roads or debris can all help prevent flat tires.


