Putting a tire on a rim might look quite easy, but it requires a bit of skill and knowledge. If you are a newbie in the world of mechanics, you might find it challenging to accomplish this task without help. But don’t worry, with a little learning, you can do it easily.
In this blog, we will guide you on how to Put a Tire on a Rim. It is a step-by-step guide for those people who don’t have any experience, but want to learn this simple but essential task. By the end of this blog, you’ll have a good grasp of what you need to do to ensure your tire is properly and safely mounted on the rim without damaging either one.
Get ready to learn and let’s dive into the process!
Table of Contents
Gather Materials and Tools
When putting a tire on a rim, you will need to gather the right tools and materials. You will need a new tire to replace the old or damaged one, as well as a rim that matches the tire size. You will also need a jack or stand to lift the vehicle off the ground and a lug wrench to remove the lug nuts from the old tire.
Other tools you may need include pliers for removing wheel weights and a valve stem tool if you need to replace the valve stem. Additionally, it’s always a good idea to have safety glasses and gloves to protect your hands and eyes from any flying debris. By having all the proper tools and materials, you can ensure that the tire changing process goes smoothly and without any hiccups.
Remember, safety is always a top priority, so make sure to double-check everything before starting the job.
Rim and Tire
When it comes to replacing the rims and tires on your vehicle, it’s important to know what materials and tools you’ll need before getting started. First and foremost, you’ll need to purchase the new rims and tires. Consider the size and type of tire that is appropriate for your vehicle’s make and model.
Additionally, you’ll need a lug wrench or impact wrench to remove the lug nuts on your old rims. A jack and jack stands will also be necessary to safely lift and secure your vehicle so that you can remove the old rims and tires. It’s important to make sure that all tools and materials are high-quality and suitable for the job at hand to ensure a safe and successful installation.
With the right materials and tools, replacing your vehicle’s rims and tires can be a relatively straightforward process that can significantly improve your car’s appearance and performance.

Tire Irons or Bead Breaker
When it comes to changing a tire, having the proper tools is essential. Two tools that you may need are tire irons and a bead breaker. Tire irons are used to pry the tire off the rim, while bead breakers are used to separate the tire from the rim entirely.
Before you start, gather all the required materials and tools, including tire irons, a bead breaker, safety glasses, and gloves. Having these tools can make the process much easier and save you time. Plus, using the right tools can also help prevent damage to your tires.
So, make sure you have everything you need before getting started to make the process smoother.
Lubricant
When it comes to lubricating your machinery, it’s important to have all the right materials and tools on hand to ensure a smooth process. One essential material is the lubricant itself, which can come in various types such as synthetic or mineral oil, grease, or silicone spray. Depending on your machinery and its specific needs, you’ll want to choose the appropriate type of lubricant.
In addition to the lubricant, you’ll also need a rag or paper towel to wipe away any excess and a brush or applicator to spread the lubricant evenly. Finally, you’ll want to make sure you have a designated container or tray to hold the materials and catch any drips or spills. With these materials and tools on hand, you’ll be well-equipped to keep your machinery running smoothly and efficiently.
Preparing the Tire and Rim
Putting a tire on a rim can be a challenging task, but with proper preparation, it can be done with ease. To begin with, make sure to clean the rim thoroughly. You can use a wire brush or a towel to remove any rust, dirt, or debris from the rim.
Next, inspect the rim for any damage like cracks, bends, or dents. If you find any damage, it’s best to replace the rim rather than risk a blowout while driving. Once the rim is clean, you’ll need to find the correct tire size for your rim.
This information is usually printed on the side of the tire. Make sure the tire you’re using matches the size requirements of the rim to ensure a proper fit. After you have the right tire size, you’ll want to lubricate the rim with a tire mounting lubricant.
This will make it easier to mount the tire onto the rim. With these preparations, you’re ready to move onto the next step of putting the tire on the rim.
Deflate the Tire
If you’re looking to deflate a tire for maintenance or repair, the first step is to prepare the tire and rim. Before you start, make sure your vehicle is on a flat surface and in park. Then, locate the valve stem on the tire, which is the small protruding piece that allows air in and out of the tire.
Next, remove the valve cap if there is one and use a tire pressure gauge to check the current tire pressure. Once you know the current pressure, you can use a valve stem tool or a small screwdriver to press down on the center pin in the valve stem to release the air. Keep your eye on the tire pressure gauge and continue releasing air until you’ve reached your desired pressure or until the tire is fully deflated.
When you’re finished, replace the valve cap and you’re ready to move onto your next step. Remember to always check your tire pressure regularly to ensure a safe and comfortable driving experience.
Break the Bead
Preparing the tire and rim is a critical step in the “break the bead” process. This involves removing the tire from the rim, which may seem like a daunting task, but it’s straightforward if you follow the correct procedure. Firstly, ensure that the tire is fully deflated and remove the valve cap.
Then, use a tire lever or similar tool to carefully pry the lip of the tire away from the rim. Work your way around the wheel, gradually easing the tire away from the rim until you can access the inner tube. Once you’ve removed the inner tube, you can begin to break the bead.
It’s essential to work progressively, breaking the bead around the entire circumference of the tire to avoid damage. By completing this step correctly, you’ll be able to separate the tire from the rim, making it easy to replace the inner tube or repair the tire. Remember to take your time, use the right tools, and work carefully, and you’ll have the job done in no time.
Clean the Rim
Preparing your tire and rim is essential before you can start cleaning your car. The first step is to clean the rim of your tire. You might think the rim is part of the tire, but it is not.
The rim is actually the outer part of the wheel that holds the tire. By cleaning the rim, you can get rid of any dirt and grime that may have accumulated there. First, you need to remove any large debris from the rim, using a brush or a cloth.
Once you remove the debris, you can proceed to wash the rim with water, soap, and a brush. Use a soft-bristled brush to prevent damaging the rims. Be sure to scrub thoroughly and remove all dirt and grime.
A clean rim not only looks good, but it also prevents rust and other damages that may occur to the wheel.
Installing the Tire on the Rim
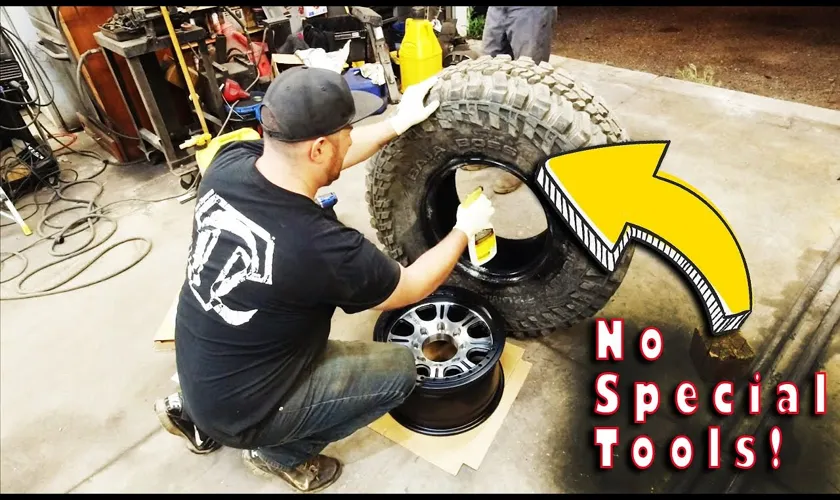
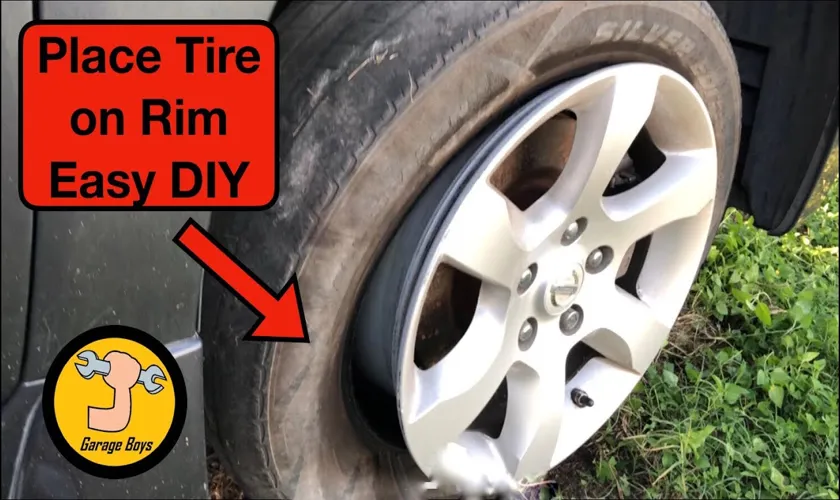
When it comes to putting a tire on a rim, it’s important to have the right tools and techniques to make the job easier and more efficient. First, make sure the tire and rim are clean and free of any debris. Next, line up the valve stem on the tire with the valve hole on the rim and push the tire onto the rim, starting at the top and working your way around.
Use a tire lever or two to help guide the tire onto the rim if needed. Make sure the tire is evenly seated on the rim before inflating it to the recommended pressure. Then, double-check the alignment of the tire and valve stem to ensure it is properly installed.
With a little patience and practice, putting a tire on a rim can be a quick and simple task that anyone can do.
Put the Tire on the Rim
Installing the tire on the rim is one of the most critical steps in maintaining your vehicle’s safety and performance. It may seem like a simple process, but incorrect installation can result in inconsistencies in handling and poor road grip. To start, ensure that the tire and rim are compatible in size and type.
Next, lubricate the rim’s bead seating area with soap or a special lubricant. With the help of a tire machine, position the tire onto the rim. Make sure the tire’s valve stem is correctly aligned with the valve hole in the rim.
Then, evenly inflate the tire and inspect for any misalignments or bulges. Finally, balance the tire to ensure even weight distribution. Taking these steps when installing a tire onto a rim ensures optimal performance, safety, and longevity of your vehicle.
Push the Tire onto the Rim
When installing a tire on a rim, it’s important to push the tire onto the rim carefully and evenly. One way to do this is to begin by positioning the tire halfway on the rim and then pushing down on one side while pulling up on the opposite side. This will help the tire gradually work its way onto the rim and prevent any damage to the tire or rim.
It’s also important to take breaks and give your hands a rest during this process, especially if the tire is stiff and difficult to work with. Pushing too hard or unevenly can cause the tire to pop off the rim or damage the rim itself, so take your time and don’t rush the process. By taking these steps, you’ll be able to successfully install your tire onto the rim with ease.
Inflate the Tire
Inflating the tire is a vital step towards installing the tire on the rim. Before inflating, it is crucial to ensure that the right amount of air pressure is required for the particular tire model. This information is usually available on the side of the tire.
Using a tire pressure gauge can help you correctly assess the pressure and ensure accurate inflation. Overinflating or underinflating the tire can be dangerous and detrimental to the longevity of the tire. Once you’ve determined the correct pressure, align the tire’s valve stem with the hole on the rim and press it in by hand.
Then, attach the inflation hose to the valve, lock it in place, and begin inflating the tire. To avoid overinflating, periodically check the air pressure with a gauge as you inflate. Once you’ve achieved the correct pressure, detach the hose, and double-check the tire for leaks and any apparent defects before installing it on the vehicle.
Final Checks
When learning how to put a tire on a rim, it’s important to do some final checks before hitting the road. First, make sure the valve stem is straight and tight. This will prevent any air from leaking out while driving.
Next, inflate the tire to the recommended pressure using a tire pressure gauge. A tire that is over or underinflated increases the risk of a blowout. Finally, check the lug nuts to ensure they are tightened to the proper torque specifications.
This will prevent the wheel from coming loose while driving. Remember, regular tire maintenance is essential for safe and efficient driving.
Check Air Pressure
“Check Air Pressure” Before you hit the road, it’s important to check your tire pressure, as doing so will help keep you safe and make sure your vehicle is performing at its best. If your tires aren’t properly inflated, you could end up with uneven wear or even worse, a flat tire. To check your tire pressure, first, you’ll need to refer to your owner’s manual to find your recommended PSI.
Once you have that, you can use a tire gauge to check the pressure of each tire. If your tire pressure is too low, head to a gas station to fill it up. It’s crucial to note that overinflating your tires can be dangerous, so be sure not to exceed your vehicle’s recommended PSI.
Properly maintained tire pressure can help increase your vehicle’s fuel efficiency, extend the life of your tires, and improve handling. So, before you hit the road on your next adventure, double-check your tire pressure to ensure a smooth and safe journey.
Inspect the Wheel and Tire
Inspecting the wheel and tire is one of the most important final checks you should perform before hitting the road. First, check the tires for any visible damage such as punctures or bulges. Next, inspect the tire pressure and ensure it’s within the recommended range.
Don’t forget to check the tread depth, as worn-out tires can significantly increase your risk of hydroplaning or losing control of your vehicle. Additionally, inspect the wheel rims for any cracks or dents, as they can lead to vibrations or even a blowout. Finally, check that the lug nuts are tightened properly, as they secure the wheel to the hub.
Neglecting these crucial final checks can put you and your passengers in danger on the road. Remember to prioritize your safety by taking these simple, yet important steps.
Reinstall the Tire and Wheel
After completing all the necessary steps for changing a tire, it’s time to reinstall the tire and wheel onto your vehicle. Begin by lining up the wheel studs with the holes in the wheel. Make sure the wheel is flush against the hub and slide it onto the studs.
Once the wheel is in place, thread the lug nuts onto the studs, but do not tighten them all the way just yet. Tighten them in a star pattern to ensure even tightening and avoid warping the rotor. Once the lug nuts are snug, use a torque wrench to tighten them to the manufacturer’s recommended torque specification.
Finally, give the wheel a spin to make sure it’s rotating smoothly without any wobbling or noise. And just like that, you’re ready to hit the road again with a safely secured tire and wheel.
Conclusion
Putting a tire on a rim may seem like a daunting task, but fear not my friends! With a little bit of patience, perseverance, and elbow grease, you too can become a tire mounting maestro. First, make sure to have all the necessary tools and equipment at your disposal. This includes a tire iron, bead lubricant, a valve stem tool, and of course, a tire and rim.
Next, carefully line up the tire with the rim, ensuring that the valve stem is in the correct position. Apply a generous amount of bead lubricant to the edges of the tire and rim to help the tire slide into place. Now comes the tricky part – using the tire iron to pry the tire onto the rim.
This requires a bit of finesse, but with a little practice, you’ll get the hang of it. Finally, inflate the tire to the recommended pressure and give it a spin to make sure everything is lined up correctly. Congratulations, you’ve successfully put a tire on a rim! You are now officially a master of the mechanical arts.
Now go forth and conquer the open road with your newly mounted wheels.
FAQs
What tools do I need to put a tire on a rim?
You will need a tire iron, a rim clamp, and an air compressor.
Can I put a tire on a rim without a tire machine?
It’s possible, but it’s best to use a tire machine to ensure proper installation and avoid damaging the tire or rim.
How do I position the tire on the rim before putting it on?
Make sure the tire is properly aligned with the rim by matching the dot on the tire to the valve hole on the rim.
Do I need to lubricate the bead before mounting the tire on the rim?
Yes, it’s recommended to apply a bead lubricant to help the tire slide onto the rim and prevent damage.
How much air pressure should I put in the tire after installing it on the rim?
Check the owner’s manual or the tire manufacturer’s recommendations for the correct air pressure, which can vary depending on the vehicle and tire type.
What should I do if the tire won’t seat properly on the rim?
Try adding more air pressure to the tire, lubricating the bead, or using a rubber mallet to help seat the tire.
How often should I replace my tires and rims?
It depends on factors such as the vehicle, driving habits, and road conditions, but generally every 3-5 years or after 30,000-50,000 miles.


