Mounting a tire on a rim can be an intimidating task, especially if you’re not experienced in automotive work. However, learning how to put a tire on a rim is a vital skill that can save you time and money in the long run. Do you want to be able to fix a flat tire yourself? Or do you want to change your own tires instead of taking them to a mechanic? Either way, this guide will teach you everything you need to know about how to put a tire on a rim.
From the tools you’ll need to step-by-step instructions, we’ve got you covered. So let’s dive in and get started!
Table of Contents
Gather Materials and Tools
When it comes to putting a new tire on a rim, the first step is to gather all of the necessary materials and tools. This may include the new tire, the rim, tire irons, a valve stem, a tire pressure gauge, lubricant, and a jack and lug wrench if you need to remove the old tire from the rim. Make sure you have everything you need before getting started so you don’t have to take multiple trips or delay the job.
Once you have all of your materials, find a flat surface to work on and make sure your vehicle is safely secured. Putting a tire on a rim can be tricky, but with the right tools and some practice, it’s definitely doable. So, let’s get started and learn how to put a tire on a rim like a pro!
Tire and Rim
Before you start changing your tire and rim, you need to gather all the required materials and tools. Firstly, make sure you have a spare tire that is in good condition, with a similar size and tread to your existing tires. Also, have a jack and lug wrench in your trunk, which facilitates removing the flat tire and installing the new one smoothly.
Other helpful items include a tire pressure gauge, gloves, and a flashlight. It is essential to review your vehicle’s user manual to figure out the correct jack placement as it differs depending on the make and model of the vehicle. Moreover, it is crucial to check your tire pressure before and after the replacement process to avoid any future hazards.
By organizing your materials and tools, you can perform the tire change quickly and efficiently, ensuring your safety and smooth driving.

Tire Irons
Gathering the right materials and tools is essential when working with tire irons. You will need a good quality tire iron, which can come in different sizes and lengths depending on your needs. A lug wrench will also be necessary, as it will help you loosen and tighten lug nuts.
Other essential tools include a jack stand to lift the car, a torque wrench to help you tighten the lug nuts to the correct level, and a wheel chock to prevent the vehicle from rolling. You may also need a pry bar to help remove the tire from the rim and a tire pressure gauge to check the pressure levels. Don’t forget to wear safety gear like gloves and goggles to protect yourself.
By having all the necessary materials and tools at hand, you can ensure a smoother and safer tire ironing experience.
Lubricant
Lubricant Before you start lubricating any machine or equipment, make sure you have all the necessary materials and tools at hand. The first thing you need is the appropriate lubricant for the job. The type of lubricant you use will depend on the machine or equipment you’re lubricating.
There are different types of lubricants available such as grease, oil, and dry film lubricant, so be sure to choose the right one. You should also consider the viscosity grade of the lubricant. Viscosity refers to the thickness of the lubricant, and it’s usually indicated by a number.
The higher the number, the thicker the lubricant. You will also need a clean cloth or rag to wipe away any excess lubricant. If you’re lubricating hard-to-reach areas, you may need a grease gun or an oiler to apply the lubricant.
Don’t forget to wear gloves to protect your hands and safety glasses to protect your eyes. By gathering all the necessary materials and tools beforehand, you’ll be well-prepared to lubricate your machine or equipment properly.
Prepare the Tire and Rim
Putting a tire on a rim requires some preparation beforehand. First, you need to make sure your tire and rim match in size and style. Then, inspect the rim for any damage and clean any dirt or rust off the surface.
Next, apply a lubricant to the rim to help the tire slide on more easily. You can use soap and water or a specialized tire lubricant for this step. Once the rim is prepped, you can begin to mount the tire onto the rim.
Place the tire onto the rim and align the valve stem with the hole in the rim. Push the tire edges over the rim evenly, working your way around in small sections. Once the tire is on, inflate it to the proper pressure and double-check that it’s seated correctly on the rim.
With these steps, you can put a tire on a rim with ease and confidence.
Remove Old Tire
When it comes to changing a tire, the first step is to remove the old one from the rim. Before you can do that, however, you need to prepare the tire and rim for the process. Firstly, make sure the tire is fully deflated.
This will make it easier to work with and give you more room to maneuver. Then, loosen the lug nuts on the rim. You don’t need to remove them completely just yet, but loosening them will allow you to remove the tire more easily.
One important thing to keep in mind is safety – be sure to use a jack to lift the car and use jack stands to prevent it from falling. Once you have the car safely lifted, remove the lug nuts and take the tire off the car. Be careful when handling the tire, as it can be heavy and awkward.
With the old tire now removed, you can move on to installing the new one. By following these steps, you’ll be able to change your tire quickly and efficiently, getting back on the road in no time.
Clean Rim
If you want to achieve a clean rim, you must first prepare the tire and rim properly. Start by removing the hubcap or wheel cover and loosening the lug nuts. Once the lug nuts are loose, jack up the car and remove the wheel and tire assembly.
With the wheel and tire assembly removed, you can now focus on cleaning the rim. Begin by spraying the rim with a high-pressure washer to remove any dirt or debris. For tough stains or grime, use a wheel-cleaning solution and a soft-bristled brush to scrub the rim.
Be sure to avoid using a harsh formula or metal brush that can scratch the rim’s surface. Once you have thoroughly cleaned the rim, rinse it with clean water, and dry it with a microfiber towel. By preparing the tire and rim correctly, you can ensure that your clean rim will last longer and look great.
So, are you ready to get started and give your wheels the shine they deserve?
Install the New Tire
Putting a tire on a rim is an important skill every car owner should have. First, make sure you have the correct size tire that fits your vehicle’s rim. Next, line up the holes in the rim with the holes in the tire and insert the valve stem into its hole.
Apply some lubricant on the bead of the tire to make it easier to slide onto the rim. Start at the valve stem and work your way around the rim, pushing the tire’s bead over the rim’s edge bit by bit. Use tire levers to help guide the tire over the rim, being careful not to scratch the rim or damage the tire.
Once the tire is fully on the rim, adjust the valve stem, inflate the tire to the recommended pressure level, and ensure that the tire is properly seated on the rim by checking it in several spots. With a little practice, putting a tire on a rim can be accomplished without fuss or trouble.
Place Tire on Rim
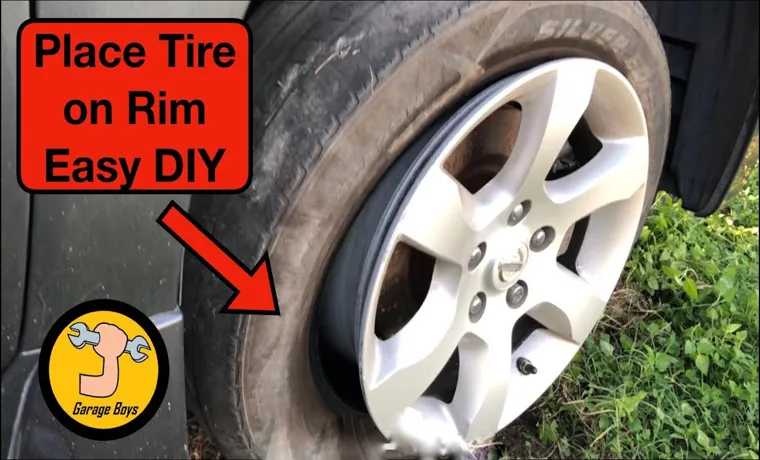
Installing a new tire can be a daunting task, but with the right tools and a little bit of patience, it’s definitely doable. One of the first steps in installing a new tire is placing it on the rim. This can be somewhat difficult due to the tight fit, but it’s important to make sure the tire is seated properly before moving on to the next step.
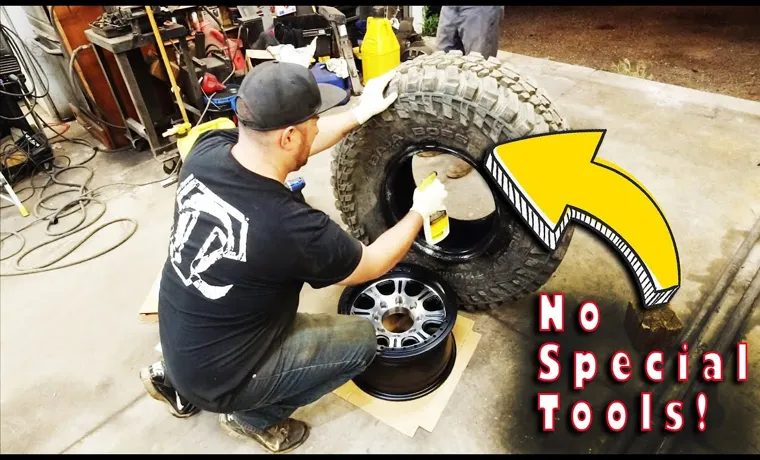
To do this, start by lubricating the bead of the tire and the rim with a tire mounting lubricant. Then, hold the tire at a 45-degree angle and place it over the rim, starting at the valve stem. Using your hands, work the tire onto the rim, being careful not to pinch the tube or damage the tire.
Once the tire is on, use a tire lever to help get the final portion of the tire onto the rim. It’s important to take your time during this step to avoid any damage to the tire or rim, which can cause issues later on down the road.
Use Tire Irons to Secure
When it comes to installing a new tire, there are several important steps to follow carefully. One crucial step is using tire irons to secure the tire in place. It’s important to note that tire irons should only be used by experienced individuals, as they can be dangerous if not used correctly.
To begin, remove the old tire and place the new tire onto the rim, making sure it sits evenly. Then, use the tire irons to pry the tire onto the rim, working in a circular motion and ensuring that the tire is properly seated. It’s important to not use too much force, as this can damage the tire or rim.
Once the tire is fully seated, use the tire irons to secure the tire by placing them between the rim and tire and pulling them over the rim. This step may take some practice, but with patience and attention to detail, it can be done successfully. Overall, using tire irons to secure a new tire is an important step in the installation process that should be done carefully and safely.
Inflate the Tire
After successfully removing the old tire, it’s now time to install the new one. To begin, start by inflating the tire to the manufacturer’s recommended pressure. Refer to the owner’s manual if you’re unsure about the recommended amount.
Before installing the tire, inspect the rim to ensure it’s free from any sharp objects or damage. Next, place the tire onto the rim, making sure to correctly align the valve stem with the hole in the rim. Using a tire iron or a lug wrench, tighten the lug nuts in a star pattern to ensure even pressure.
Avoid over-tightening, as this can cause the wheel to warp. Finally, use a torque wrench to tighten the lug nuts to the manufacturer’s recommended torque specification. With the new tire installed and properly secured, you’re ready to hit the road with confidence.
Remember to check your tire pressure regularly to ensure optimal performance and safety.
Check for Proper Installation
If you’re wondering how to put a tire on a rim, the first step is to make sure that the tire is properly installed. The tire should be flush against the rim all the way around with no bulges or areas where it’s not seated correctly. To check for proper installation, try running your hand along the tire to feel for any irregularities or bumps.
If you find any, use a tire iron or pry bar to gently push the tire into place until it sits evenly on the rim. It’s also important to ensure that the tire is facing the correct way, with the tread pointing in the right direction. Check the sidewalls of the tire for markings that indicate the correct orientation.
By taking these steps and carefully inspecting your tire before use, you can ensure a smooth and safe driving experience.
Inspect the Tire
When it comes to inspecting your tires, it’s important that you check for proper installation. This means making sure that the tire is mounted correctly onto the rim and that the rim is properly aligned with the wheel hub. One way to check if the tire has been installed properly is to look for any visible signs of damage or wear on the tire itself.
If you notice any bulges, cracks or cuts, it’s likely that the tire has been installed incorrectly or has been damaged in some way. Another telltale sign of improper installation is if the tire is vibrating or shaking at high speeds. This could indicate that the tire is unevenly mounted, causing it to wobble as the vehicle moves.
By checking for proper installation, you can ensure that your tires are functioning as they should, helping you stay safe on the road.
Retighten Lug Nuts
After having your car’s tire changed or rotated, it’s important to ensure that the lug nuts holding the wheel in place are properly tightened. Over time, lug nuts can loosen due to vibration, which can lead to more significant issues if left unchecked. To prevent this from happening, double check that the tire technician has properly torqued the lug nuts to the manufacturer’s specifications before you leave the shop.
It’s also a good idea to re-tighten the lug nuts yourself after driving a short distance, as this can help ensure they are snug and secure. Proactively checking your lug nuts is an important part of regular vehicle maintenance that can help keep you safe on the road.
Test Drive the Vehicle
When test driving a vehicle, one of the most important things to check for is proper installation. This means taking a close look at the vehicle to make sure that all parts are securely and correctly fastened. Check the brake lines to make sure they are tight and not leaking any brake fluid, and make sure all bolts and screws are tightened to the proper torque specifications.
Also, check the tires to make sure that they are properly inflated and that their tread depth is sufficient for safe driving. Driving a vehicle that has not been installed correctly can be very dangerous, so it is essential to take the time to check everything over before getting behind the wheel. By doing so, you can ensure your safety and the safety of those around you on the road.
Conclusion
So, with these simple steps, you now know how to put a tire on a rim like a pro. With a little bit of elbow grease and some cautious attention to detail, you can swap out your old, worn tires for fresh new ones in no time! And remember, whether you’re changing a tire on the side of the road or just improving your automotive skills, the key is always to stay safe, take your time, and don’t be afraid to ask for help if you need it. Happy tire-swapping!”
FAQs
What tools do I need to put a tire on a rim?
You will need a tire iron, wheel weight hammer, valve stem tool, and lubrication.
How do I prepare the rim before putting the tire on?
Clean the rim thoroughly with soap and water, check for any damage, and apply lubrication to the rim.
What is the best way to position the tire on the rim?
Start with one side of the tire and work your way around using tire irons to gradually pop the tire bead over the rim.
How do I know if the tire is properly seated on the rim?
Check for even spacing between the tire and the rim on both sides and listen for a popping sound as the tire seats.
What should I do if I can’t get the tire on the rim?
Try using more lubrication, a larger tire iron, or seek assistance from a professional.
Can I reuse the valve stem when putting a new tire on the rim?
It is best to replace the valve stem when putting a new tire on the rim to ensure proper function and prevent leaks.
How do I know if the tire and rim are properly balanced?
A properly balanced tire and rim will result in even wear and prevent vibration while driving. Have a professional balance the tire and rim if unsure.


