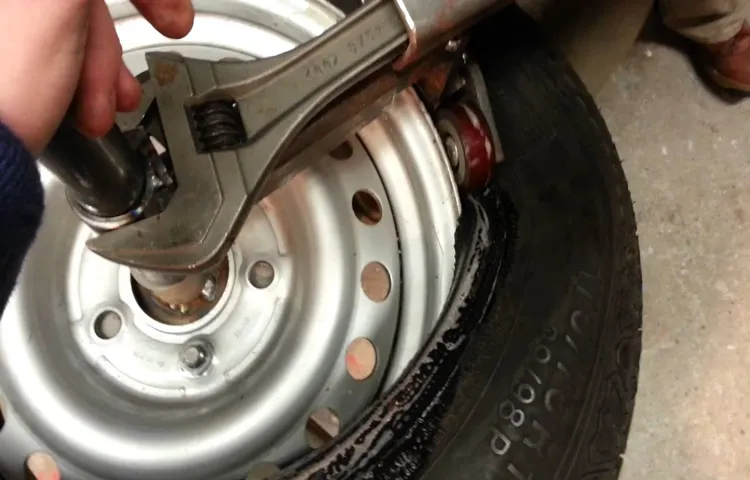
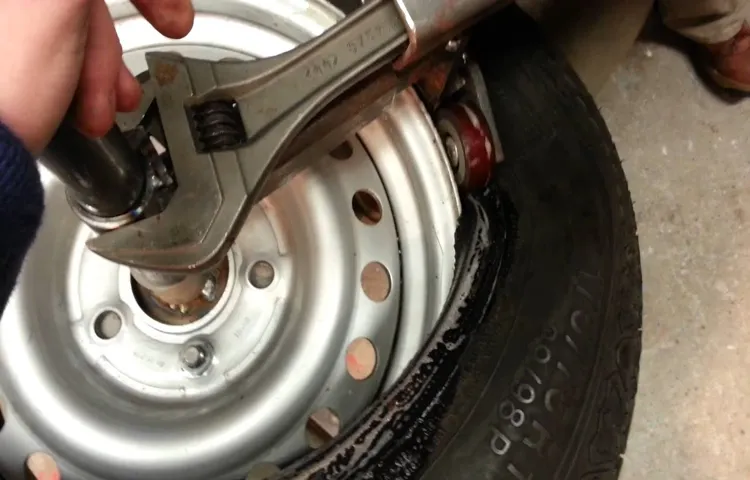
Putting a tire on a rim can seem like a daunting task, but with the right tools and technique, it can be a breeze. Whether you are changing a flat tire or upgrading to new tires, the process is relatively simple and can be done at home with just a few steps. In this step-by-step guide, we will walk you through the process and highlight the important aspects to keep in mind.
So, let’s dive in and learn how to put a tire on a rim like a pro!
Table of Contents
Prepare Your Tools
When it comes to putting a tire on the rim, you want to make sure you have all the necessary tools on hand to get the job done right. You’ll need a tire iron to remove the old tire, a lubricant to help slide the new tire onto the rim, and a tire pressure gauge to ensure the tire is inflated to the correct pressure. It’s also a good idea to have some gloves on hand to protect your hands while you work.
Before you start, make sure you have a clean and safe working area, and that you’re using the right type of tire for your vehicle. With all of your tools in place, you’ll be ready to tackle the process of putting a tire on the rim with confidence and ease. Remember, taking the time to prepare your tools in advance will help ensure a successful and efficient tire change every time.
Gather a bead breaker, lubricant, valve stem tool, rim protector, tire lever, and an air compressor
When it comes to changing your motorcycle tire, having the right tools on hand is crucial. You don’t want to be caught in the middle of the process without the necessary supplies. That’s why it’s important to gather all the items you need beforehand.
Here are some tools you’ll want to have on hand: a reliable bead breaker to help you get the tire off the rim, a lubricant to make the job easier, a valve stem tool to remove the valve stem, a rim protector to protect the rim from any damage, tire levers to help you take off the tire and put the new one on, and an air compressor to inflate your new tire to the proper pressure. You might also want to have a wrench handy, in case the rim nuts and bolts need loosening. Remember, preparation is key, so make sure you have all your tools ready before you begin your tire change.

Remove the Tire from the Rim
When it comes to putting a tire on a rim, the first step is to remove the old tire from the rim. This can be done by using a tire changer machine or by manually breaking the bead of the tire. If you’re doing it by hand, you’ll need to use a tire iron to pry the tire away from the rim.
Be sure to start at the valve stem and work around the tire in both directions to evenly break the bead. Once the bead is broken, you can use your hands to pull the tire away from the rim. If the tire is difficult to remove, you can use tire lubricant or even dish soap to make it easier.
Removing the tire from the rim may seem like a daunting task, but with a little patience and some elbow grease, it can be done in no time. Remember, safety always comes first, so make sure to wear protective gloves and eye gear.
Use the bead breaker to loosen the tire, then gently pry it off the rim with the tire lever
Removing a tire from the rim may sound like a daunting task, but with the right tools, it’s easier than you might think. Start by loosening the tire with a bead breaker, which will help to separate the tire from the rim. Once it’s loosened, use a tire lever to gently pry the tire off the rim.
Be careful not to damage the rim or the tire itself in the process. It may take a bit of effort, but with a little patience, you’ll be able to remove the tire without too much trouble. Don’t be afraid to ask for help or look up helpful tutorials if you’re unsure about any steps in the process.
By taking your time and being gentle, you’ll be able to remove the tire easily and efficiently. So, if you’re ready to tackle this task, grab your tools and get to work!
Clean the Rim and Tire
When it comes to putting a tire on the rim, it’s essential to start by cleaning the rim and tire first. With some soap and water, you can effectively remove any dirt, grime, or debris on the surface of both the rim and tire. Cleaning it thoroughly ensures that the tire will fit correctly onto the rim.
Additionally, inspect the tire and the rim for any damage or defects before proceeding. Any deformities or irregularities might cause the tire not to mount securely, risking accidents and further damages. Remember, a simple step like cleaning the tire and rim can significantly improve the safety of yourself and others on the road.
So, take the time to make sure the tire and rim are spotless before moving on to the next step.
Remove any debris and inspect for damage before applying lubricant
Before applying any lubricant to your bicycle, it is essential to clean the rim and tire thoroughly. Start by removing any debris or dirt that may be stuck on the rims using a soft cloth or a brush. Check for any signs of damage, such as cracks or dents, and make sure to address any issues before proceeding.
Give the rims a quick wipe down with a damp cloth and dry them off with a towel, ensuring the surface is clean and dry before proceeding. Once the rim is clean, check the tire for any punctures, tears, or other damage. If the tire is damaged, replace it before applying any lubricant.
By cleaning and inspecting both the rim and tire before lubricating your bicycle, you’ll ensure maximum performance and safety, making your ride smoother and more enjoyable.
Attach the Tire to the Rim
Putting a tire on a rim might seem daunting at first, but with the right tools and techniques, it can be done easily. The first step is to make sure the tire is properly aligned with the rim. Start by laying the rim flat on the ground and pushing the tire onto the rim with your hands.
Make sure that the tire is evenly spaced around the rim before using a tire lever or a bead jack tool to carefully work the tire onto the rim. Use a lubricant like soapy water to make this process smoother. Once the tire is on the rim, ensure that the tire bead is seated properly all the way around the rim.
Pushing and squeezing the tire around the rim can help with this. Finally, fill the tire according to the manufacturer’s recommended pressure and inspect for any leaks or irregularities before installation. Now that you put your tire on the rim, you are one step closer to getting back on the road with a safe and secure ride!
Place the tire onto the rim, inserting the valve stem first and using the tire lever to work the tire over the rim
Attaching a tire to a rim can be a tricky task, but with a few easy steps, you can do it like a pro. First, make sure you have all the necessary tools – a tire lever and a new tire with a valve stem. Start by placing the tire onto the rim, making sure to align the valve stem with the hole in the rim.
Use the tire lever to work the tire over the rim, starting from one side and working your way around. This may take a bit of effort, but be sure to take your time and avoid using excessive force as it may damage the tire. Once the tire is fully on the rim, inflate it slightly to ensure it’s seated properly.
Finally, tighten the valve stem nut and adjust the tire pressure to the recommended level. Following these simple steps will ensure your tire is securely attached to the rim and ready for use.
Inflate the Tire
After the tire is securely on the rim, the next step is to inflate it to the recommended pressure level. This step is crucial to ensure that your vehicle drives smoothly and safely. You can use an air compressor or a manual pump to inflate your tire.
If using a manual pump, attach the pump nozzle to the valve stem of the tire and begin pumping. Keep an eye on the pressure gauge and stop pumping when you reach the recommended pressure level for your tire, which can typically be found in your car’s manual or on a sticker located on the inside of the driver’s side door. Overinflating the tire can cause it to burst, while underinflating can lead to poor handling, reduced fuel efficiency, and wear and tear on the tire.
With the tire now inflated to the proper pressure, you can now take it for a spin and enjoy a smooth ride.
Use an air compressor to inflate the tire to the recommended PSI, checking for leaks or bulges
When it comes to inflating tires, using an air compressor is the way to go. It not only saves time but it ensures that the tire is inflated to the recommended PSI. Make sure to check your owner’s manual or the tire sidewall for the correct PSI as overinflation can lead to a bumpy ride and underinflation can cause poor gas mileage and increased tire wear.
Before inflating the tire, check for any leaks or bulges by using a tire pressure gauge. If you notice any signs of damages, it’s best to get your tire checked or replaced by a professional. Once you get the green light, attach the air compressor nozzle to the tire valve stem and press the lever to start the flow of air.
Keep an eye on the pressure gauge and stop inflating once you reach the desired PSI. Remember, checking your tire pressure regularly can improve safety and save you money in the long run by extending the life of your tires.
Reinstall the Tire on the Vehicle
Putting a tire on a rim can be a challenging task, especially if you don’t have the right tools. Once you have ensured that the tire is properly aligned with the rim, and the bead is seated correctly, you can reinstall the tire on the vehicle. Begin by lining up the holes on the rim with the holes on the hub, and place the lug nuts on hand-tight.
It’s important to tighten the lug nuts in a star pattern, so the tire is evenly and securely fastened to the hub. Use a torque wrench and tighten each lug nut to the manufacturer’s specifications. Once complete, inspect the tire for any signs of damage or uneven wear and make sure it’s properly inflated before hitting the road.
Remember, always take your time and be careful when putting a tire on a rim to ensure your safety and the safety of others on the road.
Align the tire, tighten the lug nuts, and test drive the vehicle to ensure proper installation
Once you’ve repaired or replaced a tire, it’s time to put it back on your vehicle. It’s important to align the tire properly and tighten the lug nuts to ensure a safe and smooth ride. First, line up the holes on the rim with the studs on the wheel hub and lower the tire onto the studs.
Then, tighten the lug nuts as evenly as possible, alternating between opposite nuts until they’re all snug. Use a torque wrench to ensure you’ve tightened them to the manufacturer’s specifications. Once the tire is secure, take a test drive to ensure it’s functioning properly.
Keep an eye out for any vibrations, wobbling, or noises that could indicate an issue with the installation. With a little care and attention, you can reinstall your tire with confidence and get back on the road in no time.
Conclusion
Putting a tire on a rim may seem like a daunting task, but with a little patience and practice, you’ll be a tire-changing pro in no time. Remember to stay safe by using proper equipment and techniques, and always double-check your work before hitting the road. So next time you find yourself with a flat tire, just remember: you got this!”
FAQs
What tools do I need to put a tire on the rim?
You will need a tire iron, a valve stem tool, and a rubber mallet.
How do I prepare the rim before putting on a new tire?
You should inspect the rim for any damage or debris, clean it thoroughly, and ensure it is completely dry.
What is the proper way to position the tire on the rim?
You should align the tire’s bead with the rim’s bead seat and then work the tire over the rim using a tire iron.
How tight should I make the bolts that hold the rim and tire together?
Torque the bolts to the manufacturer’s specifications, which can usually be found in the owner’s manual.
What is the proper inflation pressure for my tire?
Check the owner’s manual or the tire sidewall for the recommended inflation pressure, and use a tire gauge to ensure accuracy.
Can I install a tire on a rim without a machine?
It is possible to install a tire on a rim without a machine, but it can be difficult and time-consuming.
How often should I replace my tires?
Tires should be replaced when the tread depth falls below 2/32 of an inch, or if there is any visible damage or cracking.


