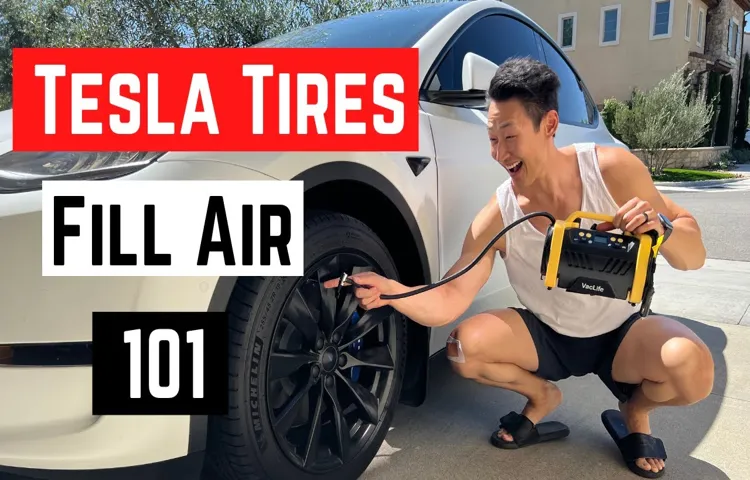
If you’re a new Tesla owner, one of the basic maintenance tasks you’ll need to learn is how to put air in your tires. Proper tire pressure is crucial for both your safety on the road and the overall maintenance of your vehicle. And while the process may seem daunting at first, it’s actually quite simple once you know what you’re doing.
So, how do you put air in your Tesla tires? In this blog post, we’ll go over the steps you need to take to ensure your tires are properly inflated and ready to hit the road. From checking the recommended tire pressure to using an air compressor, we’ve got you covered. So, whether you’re a seasoned driver or a newbie on the road, let’s dive in and learn how to keep your Tesla tires in top condition.
Table of Contents
Step-by-Step Guide
If you’re a Tesla owner, you may be wondering how to put air in your tires. The process is actually pretty straightforward and requires just a few simple steps. First, you’ll need to locate the tire pressure recommendations, which can be found in your owner’s manual or on a sticker located on the inside of the driver’s side door.
Next, you’ll need a tire pressure gauge and an air compressor. You can usually find an air compressor at your local gas station or at your dealership. Once you have everything you need, simply unscrew the valve cap on each tire and use the tire pressure gauge to check the pressure.
If the pressure is too low, use the air compressor to add air until you reach the recommended pressure levels. It’s important to check your tire pressure regularly and maintain the recommended levels for optimum safety and performance. Overall, putting air in your Tesla’s tires is a simple process that can be done easily and quickly with the right tools and knowledge.
Check the Recommended Tire Pressure
When it comes to maintaining your vehicle, one of the most important things to keep in mind is the recommended tire pressure. This may seem like a small detail, but it can have a significant impact on your safety and the overall performance of your car. To check your tire pressure, you’ll need a tire pressure gauge, which can be found at any auto parts store.
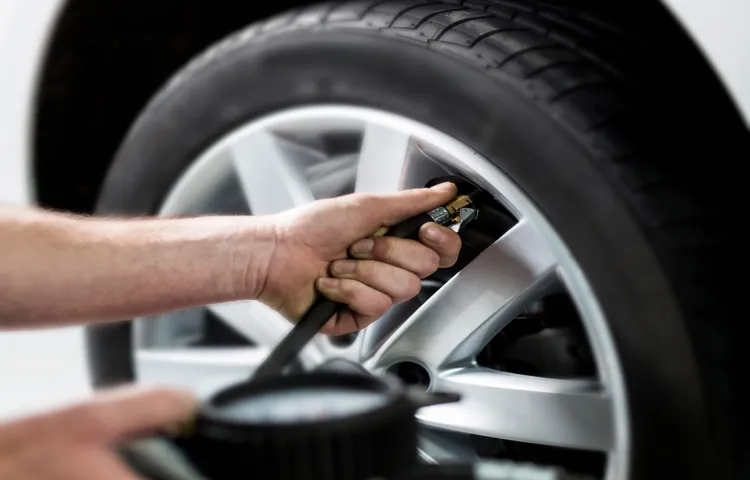
Begin by removing the valve cap from the tire and then place the gauge onto the valve stem, making sure it’s firmly in place. The gauge will give you a reading that you can compare to the recommended pressure listed in your owner’s manual or on a sticker located on the driver’s side doorjamb. If the pressure is too low or high, use an air compressor to adjust it accordingly.
Always be sure to check your tire pressure regularly, especially before long trips or in extreme weather conditions. Not only will this help keep you safe on the road, but it will also improve your fuel efficiency and reduce the wear and tear on your tires. So, take a few minutes to check your tire pressure today and enjoy a smoother, safer ride! Keyword: recommended tire pressure.

Park the Car on a Flat Surface
When you’re looking to park your car, it’s crucial to find a flat surface to avoid any accidents or damage. Parking on uneven ground can cause parts of the car to be under stress, leading to increased wear and tear over time. No one wants to return to their car to find out that the doors won’t open or the suspension has been damaged.
To avoid these potential issues, always try to park your car on level ground. Look for even surfaces that have minimal incline or decline, such as parking lots or driveways that are specifically designed for vehicles. If you don’t have access to a flat surface, try to park on the flattest surface you can find.
Remember, the safety and longevity of your car depend on where you park it. Avoid any unnecessary expenses by practicing this simple but crucial step and park on a flat surface!
Locate the Tire’s Air Valve
To properly inflate your tire, the first step is to locate the tire’s air valve. If you’re unfamiliar with the location, don’t worry, it’s easy to find. Typically, the air valve is on the side of your tire facing outwards.
It resembles a small metal or plastic cap that you can unscrew with your fingers. Once the cap is removed, you will see the valve stem, which is where you will attach the air hose. If you’re having difficulty locating the valve stem, try looking for the tire’s brand logo or the words “tire pressure” on the sidewall- these markings usually point to where the valve stem is located.
Remember, proper inflation is crucial to your tire’s overall performance and safety on the road, so don’t overlook the importance of regularly checking and maintaining your tire’s air pressure.
Remove the Valve Cap
When it comes to changing a tire, one of the first steps you should take is removing the valve cap. This small cap is located on top of the valve stem and is responsible for keeping dirt and debris out of the valve. To remove it, simply unscrew it counterclockwise.
If the cap is too tight, you can use a valve cap remover or even a pair of pliers to loosen it. It’s important to remove the valve cap before proceeding with the tire change, as leaving it on can cause your tire pressure to read incorrectly and further damage the valve stem. Remember to always put the valve cap back on once the tire has been changed to ensure the valve stays clean and protected.
By following these simple steps, you can ensure a successful tire change every time.
Attach the Air Hose to the Valve
Once you have determined that the valve is securely in place, it’s time to attach the air hose to it. This step is crucial because if the hose isn’t attached correctly, air can escape and the valve won’t work properly. To begin, make sure that the air hose is clean and free from any debris or dirt that could interfere with the seal.
It’s also essential to ensure that the hose and valve fittings match properly to guarantee an airtight seal. Once you have confirmed that everything is clean and matching, insert the hose into the valve and tighten the fitting. Be careful not to over-tighten, as this can cause damage or leaks to occur.
Finally, give the hose a gentle tug to make sure it’s securely attached. And just like that, you’ve successfully attached the air hose to the valve, ensuring that your pneumatic system is set up for optimal performance.
Add Air to the Tire
Adding air to your tires may seem like a daunting task, but it’s actually quite simple if you follow a few easy steps. The first thing you’ll need to do is locate a tire gauge and an air pump. Many gas stations have air pumps that are free to use, and you can purchase a tire gauge at an auto parts store or online.
Once you have everything you need, remove the valve cap from the tire stem and press the gauge onto the stem to determine how much air you need to add. The recommended pressure can usually be found in the owner’s manual or on a sticker on the inside of the driver’s side door. After determining the appropriate pressure, attach the air pump to the valve stem and begin adding air.
Check the pressure again with the gauge periodically to ensure you’ve reached the correct pressure. Once you’ve added the necessary amount of air, remove the pump and replace the valve cap. Your tires are now properly inflated, which will help improve fuel efficiency, handling, and overall safety.
Don’t forget to check your tire pressure regularly to ensure optimal performance and longevity.
Check the Tire Pressure Again
Checking the tire pressure may seem like a simple task, but it’s essential to ensure the safety and longevity of your car. In this step-by-step guide, we’re going to walk you through how to check tire pressure. The first step is to find a tire pressure gauge.
You can find one at any auto parts store or online retailer. Once you have the gauge, remove the valve cap on the tire and firmly place the gauge onto the valve stem. Press down firmly and wait for the gauge to give you a reading.
If the reading is lower than the recommended pressure for your car, go ahead and add more air into the tire until you reach the correct pressure level. However, if the reading is higher, release some air until the pressure reaches the correct level. Once you’ve completed this, make sure to check the tire pressure on all four tires and tighten the valve caps back on.
It’s recommended to check your tire pressure at least once a month to ensure optimal performance and safety on the road. So, make sure to check your tire pressure again, and if you notice any significant changes, don’t hesitate to take it to a professional for further inspection.
Tips and Precautions
Putting air in your Tesla tire may seem like a simple task, but there are some precautions and tips to keep in mind. First and foremost, before adding air to your tire, make sure to check the recommended tire pressure in your Tesla owner’s manual or on the inside of your car door. It’s essential to use a tire pressure gauge to ensure that you do not overinflate or underinflate your tire, as this can lead to a decrease in gas mileage, uneven tire wear, and even the risk of a blowout.
When using the air compressor at a gas station, make sure to secure the air valve firmly onto the tire valve stem and double-check that the air hose does not rub against the tire sidewall, which could cause damage. Finally, remember to check the tire pressure again after adding air to make sure you have reached the correct level. By following these simple tips and precautions, you can be sure to keep your Tesla tires in optimal condition.
Do Not Overinflate Tires
Overinflating tires can cause serious problems for your vehicle and your safety on the road. While it may seem like a good idea to put extra air in your tires to improve fuel efficiency and handling, doing so can actually lead to a blowout. When tires are overinflated, they become more rigid and less flexible, which can cause them to wear unevenly and reduce their lifespan.
The added pressure can also cause the tire to burst unexpectedly, resulting in a dangerous situation for both the driver and their passengers. To avoid these issues, it’s important to always check your tire pressure regularly and inflate them to the recommended level listed in the owner’s manual. Taking this simple step can help keep you and your vehicle safe on the road and prevent costly tire replacements in the future.
So, the next time you fill up at the gas station, don’t be tempted to overinflate your tires – your safety is worth the extra time it takes to check them properly.
Regularly Check Tire Pressure
Regularly checking the tire pressure is an essential aspect of maintaining your vehicle. It is crucial to ensuring your car is safe, efficient, and performs optimally on the road. One of the first tips to keep in mind when checking tire pressure is to stick to the manufacturer’s recommendations.
You can find the correct inflation pressure in the owner’s manual or on the doorjamb of your car. It is essential to check tire pressure frequently, at least once a month, and before heading out on long trips. Temperature changes can cause tire pressure to fluctuate, so be sure to check your tires when they are cold.
Also, make sure to adjust the pressure according to the number of passengers and the cargo you plan to carry. Overinflated or underinflated tires are dangerous, as they can impact your car’s handling, fuel consumption, and even cause a blowout. In conclusion, regularly checking tire pressure is an important aspect of maintaining your vehicle.
Taking precautions by adhering to manufacturer’s recommendations, monitoring tire pressure frequently, and making necessary adjustments can help keep you safe on the road.
Conclusion
In conclusion, putting air in your Tesla’s tires is easy and straightforward. Just locate the air valve, remove the cap, attach the air hose, and fill to the recommended PSI. And just like that, your Tesla will be riding on a cushion of air, ready to zoom down the road in style.
It’s like giving your car a breath of fresh air, and who doesn’t want that? So go forth and pump up those tires, because when it comes to keeping your Tesla running smoothly, every little bit counts.”
FAQs
Why is it important to properly inflate tires in a Tesla?
Properly inflated tires help improve vehicle handling and performance, as well as increase fuel efficiency. In addition, it can help prevent tire damage and extend the life of the tires.
What is the recommended tire pressure for a Tesla?
The recommended tire pressure for a Tesla varies depending on the model and tire size. This information can be found in the owner’s manual or on the tire information placard located on the driver’s side door jamb.
How often should I check and adjust the tire pressure in my Tesla?
It is recommended to check and adjust tire pressure at least once a month, or before any long trips. Changes in temperature can also affect tire pressure, so checking before the start of each season is also recommended.
Can I use a regular tire inflator to put air in my Tesla tire?
Yes, any standard tire inflator can be used to add air to your Tesla tire. Be sure to check the pressure with a tire pressure gauge and adjust as necessary.
What should I do if my Tesla tire is overinflated?
If your Tesla tire is overinflated, release some air until it reaches the recommended pressure. Overinflated tires can cause uneven wear and affect handling and performance.
What should I do if my Tesla tire is underinflated?
If your Tesla tire is underinflated, add air until it reaches the recommended pressure. Underinflated tires can cause increased fuel consumption and tire wear, as well as potentially affect handling and performance.
Can I rely on the tire pressure monitoring system in my Tesla to know when to add air?
While the tire pressure monitoring system can alert you to a significant drop in tire pressure, it is still recommended to check tire pressure regularly with a tire pressure gauge to ensure proper inflation.


