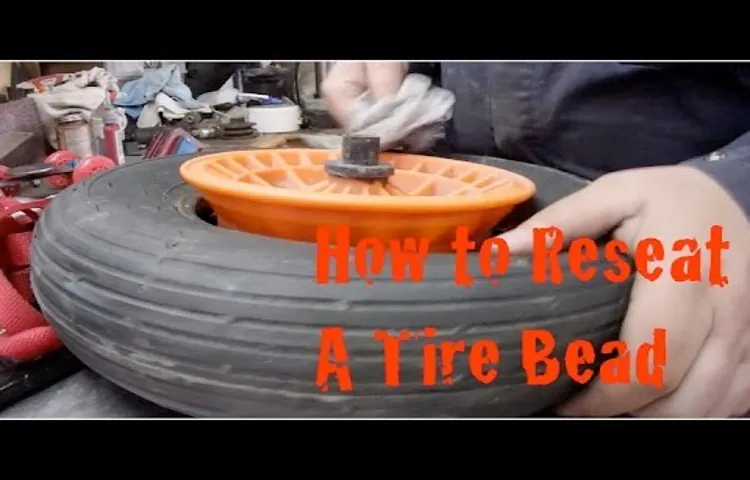
Have you ever found yourself with a flat tire on the side of the road? It can be a frustrating and stressful experience, especially if you’re not sure how to fix it. One of the most common issues when dealing with a flat tire is a bead that has come loose. This can make it difficult or even impossible to inflate your tire back to its proper pressure.
But don’t worry, reseating a tire bead is something you can easily do yourself with a few simple tools and techniques. In this blog post, we’ll walk you through the steps of reseating a tire bead, so you can get back on the road safely and with confidence!
Table of Contents
What is a Tire Bead?
If you’ve ever struggled with a flat or popped tire, you may have heard the phrase “tire bead” thrown around. But what exactly is a tire bead? Simply put, it’s the part of the tire that grips onto the rim. It’s made up of steel wires that are coated in rubber and stretched around the edges of the tire, creating a seal with the rim.
When a tire bead becomes separated from the rim, it causes air to leak out and the tire to go flat. This is where knowing how to re-seat a tire bead can come in handy. By correctly re-seating the tire bead, you can fix a flat tire and get back on the road without having to replace the tire or the rim.
So next time you find yourself dealing with a flat tire, remember to check the tire bead and try re-seating it before jumping to any drastic solutions.
Description of Tire Bead
Tire beads are often overlooked components of tires but they play a crucial role in ensuring the tire’s stability on the rim. The tire bead is the rubber-coated metal wire that is located at the inner edge of the tire’s sidewall. It is responsible for maintaining a secure fit between the tire and the rim.
The bead is reinforced with steel cords or cables, providing strength and rigidity to the tire. It creates an airtight seal between the tire and rim, allowing the tire to hold air pressure and preventing it from slipping off the rim during use. Without a properly functioning bead, the tire could easily lose air and fail while driving, putting the driver and passengers at risk.
The tires used on various vehicles such as cars, trucks, and bicycles all have different types of tire beads to ensure a perfect fit. Therefore, it is essential to choose the right tire bead that matches the rim size and type to guarantee your safety and vehicle’s optimal performance.

Signs That Your Tire Bead Needs Reseating
If you’re experiencing a bumpy ride or your tire is wobbling, it could be a sign that your tire bead needs reseating. The tire bead is the part of the tire that seats onto the wheel rim, providing a seal to keep air inside the tire. Over time, the tire bead can loosen or become misaligned, causing the tire to lose air or even come off the rim.
To reseat a tire bead, you’ll need to remove the tire from the rim and clean both the tire bead and the rim to ensure a good seal. Then, you’ll need to carefully guide the tire bead back onto the rim, taking care to avoid damaging the bead or the rim. Once the tire is back on the rim, inflate it slowly and check for any leaks or wobbling.
By taking the time to reseat your tire bead, you’ll prevent potential safety hazards on the road.
Examples of Tire Bead Problems
As a car owner, it’s important to be aware of the signs that your tire bead needs reseating. One common indicator is vibration while driving, as the bead is what secures the tire to the rim and any looseness can cause wobbling. Another sign is a loss of tire pressure, which can indicate that the bead is not creating a tight seal with the rim.
You may also notice visible damage to the bead, such as cuts or cracks, which can compromise its integrity. If you’re experiencing any of these issues, it’s important to have your tire inspected and potentially reseated by a professional to ensure your safety on the road. Don’t delay in addressing tire bead problems, as they can ultimately lead to more serious issues and even accidents.
Tools Needed to Reseat a Tire Bead
Re-seating a tire bead is an essential skill that every driver should learn. Whether you’re on the side of the road or at home in your garage, being able to re-seat a tire bead can save you time and money. However, before you can begin, there are a few tools that you’ll need.
Firstly, you’ll need a tire pressure gauge to ensure that the tire is properly inflated before attempting to re-seat the bead. Secondly, you’ll need a tire spoon or a bead breaker to loosen the tire from the rim. A rubber mallet can also be useful to gently tap the tire back into place once it’s loosened.
Additionally, a can of compressed air or an air compressor can make the process go smoother. With these tools on-hand, you’ll be able to confidently re-seat a tire bead whenever you need to.
List of Necessary Tools
When it comes to reseating a tire bead, having the right tools is essential. The necessary tools for this task include a jack and jack stands, tire irons, lubricant, and an air compressor. A jack and jack stands are required to lift the vehicle safely off the ground, while tire irons are used to pry the tire away from the wheel.
Lubricant is applied to help the tire slide over the wheel easier, and an air compressor is used to pump air into the tire to create the seal. It’s also a good idea to have a tire pressure gauge on hand to check the tire’s pressure once the bead is reseated. With these tools, you’ll be able to reseat a tire bead safely and effectively.
Remember to always take necessary safety precautions and to seek professional help if you’re unsure about any aspect of the process.
Steps for Reseating a Tire Bead
If you’re struggling with a tire bead that just won’t seat properly, don’t worry, it’s a common problem. And the good news is that it’s not very difficult to fix. The first step in re-seating a tire bead is to remove the wheel from the vehicle.
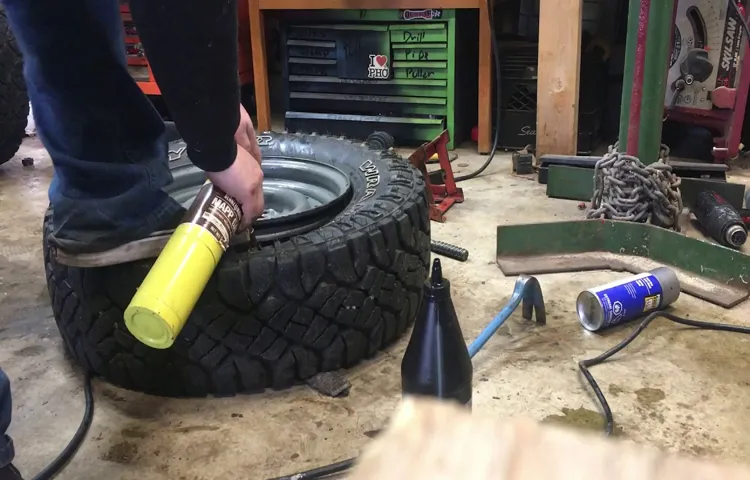
Then, carefully inspect the tire and rim to make sure there are no visible defects or damage that might be causing the problem. Next, deflate the tire completely and remove the valve core. Use a small amount of lubricant on the bead seat and rim flange to make the process easier.
Grab the tire by the sidewall and press down firmly on the side opposite the valve stem. You want to force the tire bead back onto the rim as you pump air into the tire. With some elbow grease, the tire should seat itself back onto the rim with an audible “pop.
” Be sure to reinflate the tire to the recommended pressure and reinstall it on your vehicle. Remember, if you’re not comfortable doing this yourself, seek help from a professional before attempting to re-seat a tire bead.
Step 1: Inspect the Tire Bead
When dealing with a tire bead that needs to be reseated, there are several important steps to follow. The first step is to inspect the tire bead. The bead is the part of the tire that rests against the wheel, and it is essential that it is properly seated in order to ensure a safe and secure fit.
Start by examining the bead for any damage or deformities. Look for any signs of cracking, excessive wear, or corrosion. If any issues are found, it may be best to replace the tire entirely.
Next, check the bead for any foreign objects or debris that may prevent it from seating properly. This can include dirt, rocks, or other small objects that may have become lodged in the tire. Removing any such debris will make it easier to reseat the bead.
Finally, ensure that the bead is properly seated by checking for evenness and smoothness around the entire circumference of the tire. Following these steps will help ensure that the tire is safe and secure for driving.
Step 2: Clean and Lubricate the Bead
When it comes to reseating a tire bead, one of the most important steps is cleaning and lubricating the bead. Dirt, rust, and debris can build up on both the tire and rim, which can prevent the bead from properly sealing. Therefore, it’s crucial to thoroughly clean both surfaces and apply a lubricant to ensure a smooth seal.
You can use a wire brush or rag to clean the bead, and then apply a bead lubricant. This will not only help reseat the tire, but it will also protect the rubber from wear and tear. It’s important to note that using an incorrect lubricant can damage the tire, so make sure to use a specialized lubricant for tires.
Properly cleaning and lubricating the bead can save time and prevent future issues.
Step 3: Use the Bead Seating Tool
If you’re having trouble with a tire that won’t seat properly on the rim, a bead seating tool may be the solution you need. This tool works by using a high-pressure burst of air to help force the tire bead down onto the rim. First, attach the nozzle of the bead seating tool to the valve stem of the tire.
Make sure the tool is properly seated and secure before turning on the air. Keep an eye on the gauge to monitor the pressure and adjust as needed. When the tire bead is properly seated, you’ll hear a satisfying pop as it snaps into place on the rim.
Remember to always use caution when using air pressure tools, and follow all manufacturer instructions for proper use. With a bead seating tool, you can quickly and easily resolve any issues with tire seating and get back on the road with confidence.
Step 4: Inflate the Tire
To reseat a tire bead, the final step is to inflate the tire to the appropriate pressure. Before inflating, make sure the tire is properly mounted on the wheel and that the valve stem is securely screwed in. You also want to make sure the tire is seated evenly around the wheel rim.
Once you are sure everything is in place, you can begin inflating the tire. A handheld air pump or a compressor is useful for this task. It’s important to inflate the tire gradually, checking the bead as you go to make sure it stays seated.
Once the tire has been inflated to the correct pressure, use a tire gauge to check that it matches the manufacturer’s recommendations. If the tire has been reseated correctly, it shouldn’t lose any air when you remove the pump. If it does, the bead may not be properly seated, and you will need to repeat the process.
In conclusion, reseating a tire bead can be a frustrating experience, but with patience and attention to detail, it can be done quickly and effectively. Remember to take your time, check your work, and inflate the tire gradually to ensure a safe and successful outcome.
When to Seek Professional Help
If you are experiencing any difficulty when trying to re-seat a tire bead, it’s important to know when to seek professional help. While it is possible to re-seat a tire bead yourself, it can be a tricky process that requires a certain level of expertise. If you’ve already tried the standard tricks, such as using a tire iron or lubricating the tire, and the bead still won’t seal properly, it’s time to call in a professional mechanic.
A professional will have the necessary equipment and experience to quickly diagnose and fix the problem, ensuring your safety on the road. Don’t hesitate to seek help if you’re struggling with this task; it’s better to be safe than sorry.
Warning Signs to Look Out for
When it comes to mental health, it’s important to recognize warning signs and know when it’s time to seek professional help. Sometimes, it may be difficult to identify these signs, but it’s crucial to pay attention to any changes in behavior or emotions. If you’re feeling overwhelmed or constantly stressed, experiencing difficulty concentrating, or losing interest in activities you once enjoyed, it may be time to seek support.
Other warning signs may include changes in sleeping patterns, appetite, or mood swings. If you’re noticing any of these signs, it’s important to talk to a healthcare professional who can help guide you towards the right resources. Seeking help is not a sign of weakness, but a courageous step towards improving your well-being.
Conclusion and Tips
In conclusion, re-seating a tire bead can seem like a daunting task, but with a little bit of elbow grease and know-how, it can be easily accomplished. Remember to use caution when dealing with high-pressure air and keep in mind the importance of safety while working on your tires. And just like that, you’ll have your tires back on the road and ready to roll.
So go ahead and pat yourself on the back, you tire-reseating master, you!”
Importance of Proper Tire Maintenance
Proper tire maintenance is essential for both your safety on the road and the longevity of your vehicle. Regular checks and tire maintenance should not be overlooked, and knowing when to seek professional help is crucial. One of the primary indicators that your tire needs professional attention is uneven wear.
This could be due to a number of factors, including incorrect tire pressure, poor alignment or poor construction. Alternatively, if you experience a sudden loss of pressure, it is essential to get your car checked out immediately. Continuing to drive with a flat tire can put you and your passengers at serious risk.
Additionally, if you notice any cuts, bulges or cracks in the tire sidewall, it may be time to replace the tire. When it comes to professional help, finding a trusted and certified tire professional in your area is of utmost importance. They will be able to diagnose and rectify any issues with your tires, ensuring that you and your family stay safe on the road.
Remember, regular tire maintenance is an investment that will save you both time and money in the long run.
FAQs
What is a tire bead and why might it need to be re-seated?
A tire bead is the part of the tire that seals it against the rim. It may need to be re-seated if there is damage to the bead or if it has become unseated due to low tire pressure or other factors.
How do I know if my tire bead needs to be re-seated?
Signs that your tire bead may need to be re-seated include visible damage to the bead, uneven tire wear, and a noticeable wobble or vibration while driving.
What tools do I need to re-seat a tire bead?
You will need a tire iron, a bead breaker, a lubricant such as soapy water, and a tire inflator.
Can I re-seat a tire bead without a bead breaker?
It is possible to re-seat a tire bead without a bead breaker, but it will be more difficult. It is recommended to use a bead breaker if possible.
How do I re-seat a tire bead?
First, remove the tire from the wheel. Then, lubricate the bead and rim with soapy water. Use a bead breaker to loosen the bead from the rim, then use a tire iron to pry the bead back onto the rim. Inflate the tire to the proper pressure and check for leaks.
Can I re-seat a tire bead myself or should I take it to a professional?
Re-seating a tire bead can be a difficult and potentially dangerous task, particularly if you do not have experience working with tires. It is recommended to take your tire to a professional if you are unsure of how to re-seat the bead yourself.
What should I do if I am unable to re-seat my tire bead?
If you are unable to re-seat your tire bead, it may be necessary to replace the tire. Consult with a professional to determine the best course of action.


