Have you ever noticed your car’s tires looking a little deflated or feeling a bit flat? It can be frustrating, especially if you’re in a hurry to get somewhere. No need to panic, though! Removing air from a tire is a simple task that almost anyone can do with ease. In this blog post, we’ll explore various methods for how to remove air from a tire, whether you have access to an air compressor or not.
Knowing how to do this can save you time and money, as well as keep you safe while on the road. So, let’s dive in and start learning!
Table of Contents
Check Your Tire Pressure
If you’re wondering how to remove air from a tire, the first thing you need to do is invest in a tire pressure gauge. Checking your tire pressure regularly is important for several reasons, including maintaining proper fuel efficiency and extending the lifespan of your tires. But, if you do find yourself with overinflated tires, the process of letting air out is relatively simple.
First, locate the valve stem on the tire and remove the cap. Then, firmly press the tire pressure gauge onto the valve stem and take note of the reading. Finally, using a tire pressure release tool or a small screwdriver, push down on the center pin inside the valve stem to release air until you reach the desired pressure level.
Be sure to check the pressure again after releasing air to ensure you’ve reached the correct level. With a little practice, removing air from your tires will become an easy part of your regular vehicle maintenance routine.
1. Use a tire pressure gauge to check the current pressure of the tire on a cold surface
It’s important to check your tire pressure regularly to ensure optimum performance and safety on the road. The first step in this process is to use a tire pressure gauge to check the current pressure of the tire on a cold surface. This ensures that the reading is accurate and not affected by any external factors.
Once you have the reading, you can compare it to the recommended pressure listed in your vehicle’s manual or on the tire itself. It’s important to note that underinflated tires can cause decreased fuel efficiency, a shorter lifespan for your tires, and even blowouts while overinflated tires can cause uneven wear and poor handling. By checking your tire pressure regularly, you can avoid these potential issues and maintain your vehicle’s safety and performance.
So don’t forget to take a few minutes to check your tire pressure before hitting the road!

2. Determine the recommended pressure for the tire either in the owner’s manual or the tire placard located on the driver’s side door jamb
Checking your tire pressure regularly is critical for your safety on the road. It’s easy to forget, but low tire pressure can lead to poor gas mileage, uneven wear on your tires, and even serious accidents. So, how do you know what your tire pressure should be? You can find the recommended pressure for your tires in two places – your owner’s manual or the tire placard located on the driver’s side door jamb.
This information is crucial because the recommended pressure can vary depending on the vehicle make and model. The tire placard provides precise details, including tire size and load rating, and it’s specifically designed for your vehicle. Checking your tire pressure before hitting the road can save you money, prevent accidents and ensure that your vehicle is running at peak efficiency.
So, make it a habit to check your tire pressure regularly and keep your safety at the forefront of your mind. Remember, a few minutes of checking your tires can save you a lot of headaches down the road.
Remove the Valve Cap from the Tire Valve Stem
Removing air from a tire might seem like a daunting task, but it’s actually pretty easy once you know how. The first step is to remove the valve cap from the tire valve stem. This small cap covers the valve, which allows air to be put in and taken out of the tire.
It’s important to remove the cap gently, without damaging the valve stem. You can use your fingers or a small tool like pliers to do this. Once the cap is off, you’re ready to start removing air from the tire.
It’s essential to ensure that you don’t remove too much air, as this can damage the tire or cause a blowout. Using a pressure gauge can help you determine how much air you have in your tire and how much you need to remove to achieve the desired pressure. Remember, removing air from your tire is an important part of vehicle maintenance and can help you avoid costly repairs down the road.
So, take the time to do it right, and your tires will thank you for it!
1. Remove the valve cap from the tire valve stem
When it comes to checking your tire pressure, the first step is to remove the valve cap from the tire valve stem. This small cap protects the valve from dirt and debris, but also prevents air from escaping the tire. To remove it, simply unscrew it counterclockwise by hand.
If the cap is stuck, try using a pair of pliers to grip it and turn it, or a valve cap removal tool, which is designed specifically for this task. Just be careful not to damage the valve stem in the process. Once the cap is off, you’ll have access to the valve for checking the pressure and inflating or deflating the tire as needed.
Remember to always replace the valve cap after completing this task to protect the valve from damage and keep it clean for the next time you need to check your tire pressure.
Depress the Valve Core
If you need to remove air from a tire, one of the most important steps is to depress the valve core. This small part inside the valve stem is responsible for regulating the flow of air in and out of the tire. By pressing it down with a valve core tool, you can release the air inside the tire quickly and easily.
It’s important to note that not all valve cores are the same, so you should choose the right tool for your tire. Once you’ve removed the air, be sure to check the tire pressure and add air as needed to ensure it’s at the right level for safe driving. Remember, regular maintenance of your tires is key to a smooth and safe ride on the road.
1. Use a valve core tool to remove the valve core from the valve stem
If you’re looking to change a tire on your vehicle or perform any maintenance on your tires, you’ll need to remove the valve core from the valve stem. To do this, you’ll need a valve core tool, which will help you depress the valve core and allow it to be removed easily. The valve core is the small component of the valve stem that allows air to flow in and out of the tire when the valve stem is open.
It can become damaged or clogged with debris, which is why it’s important to remove it and replace it if necessary. Using a valve core tool, you can easily depress the valve core and remove it, allowing you to perform any necessary maintenance on your tires. So, if you’re looking to keep your tires in good working order, it’s essential to know how to use a valve core tool to remove the valve core from the valve stem.
2. Press the valve core with the tool until all the air has been exhausted
Depress the valve core using a valve core tool to release all the air from your tire. This step must be performed carefully to avoid any potential safety hazards. The valve core is the central component of a tire’s valve system that controls air flow in and out of the tire.
It’s essential to release all the air from the tire before any maintenance work can be carried out, including fixing a puncture or replacing a tire. Using a valve core tool makes it easy to depress the valve core and release all the air from the tire. Make sure to press down on the valve core tool firmly while holding it in place with your fingers to prevent the tool from slipping.
Release the air slowly and steadily to ensure that you have control over the process. Removing all the air from the tire can help make it easier to inspect any damage more accurately. By depressurizing the tire, you make it easier to avoid future issues that can lead to safety concerns while driving.
Remember to always keep a valve core tool handy in your tire repair kit, so you are always prepared for any unexpected events on the road.
3. If a valve core tool is not available, press the pin on the valve stem with a fingernail or a tool until air stops coming out
Depressing the valve core on a tire valve stem is a necessary step when inflating or deflating tires. If you don’t have access to a valve core tool, fear not, you can still get the job done with a fingernail or a small tool. This step is crucial in order to stop air flow and maintain steady air pressure.
Simply press down on the pin located on the valve stem until the air ceases. It’s easy to overlook this step, but it’s an essential part of maintaining tire health and extending the life of your tires. Don’t let a lack of a valve core tool deter you from properly maintaining your tires.
Take the extra minute to depress the valve core with a fingernail or tool, and your tires will thank you for it in the long run.
Replace the Valve Core and Add Air
If you’re wondering how to remove air from a tire, the process is simple: replace the valve core and add air. The valve core is the small metal piece located in the center of the valve stem. To remove it, you’ll need a valve core remover tool, which looks like a small screwdriver with a forked end.
Insert the tool into the valve stem and turn counterclockwise until the valve core pops out. Once you remove the core, attach an air pump to the valve stem and add air to the tire. Make sure to check the recommended PSI for your specific tire, as overinflating can be just as dangerous as underinflating.
Once the tire is at the proper PSI, simply replace the valve core by screwing it back into the valve stem clockwise. It’s important to make sure the core is tightened securely to prevent any air leaks. And there you have it – a quick and easy way to remove air from your tire and get back on the road in no time!
1. Use the valve core tool to replace the valve core in the valve stem
If your car’s tire is running low on air, you’ll need to replace the valve core and add more air. This is something that can be done easily with a valve core tool. First, locate the valve stem on the tire and remove the valve cap.
Then, use the valve core tool to remove the valve core from the stem. Take care not to lose the core, as it is small and may fall out. Once the old core is removed, use the same tool to insert a new core into the stem.
Tighten it in place and put the valve cap back on. Now, add air to the tire using an air pump. Be sure to check the manufacturer’s recommended PSI for your tire, which can be found on the tire itself or in the owner’s manual.
Inflate the tire to the recommended pressure and you’re good to go! Remember to check your tire pressure regularly to ensure safe and efficient driving.
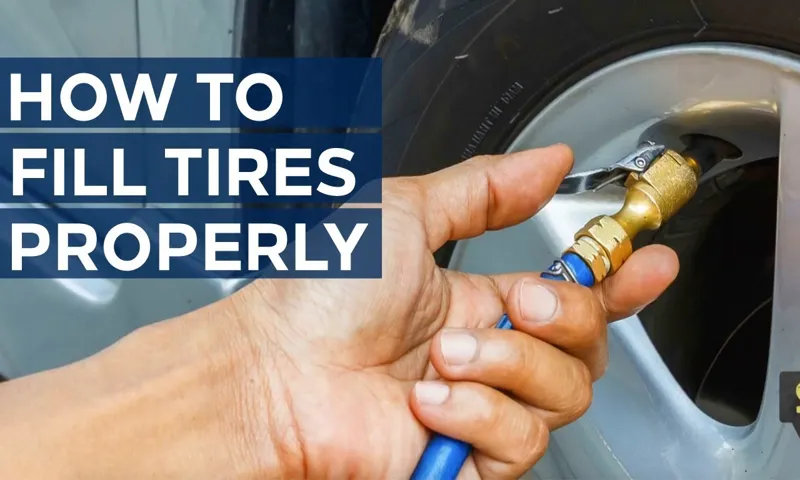
2. Use a tire inflator to add air to the tire until it reaches the recommended pressure
When it comes to replacing the valve core and adding air to your tire, there are a few things you need to keep in mind. First, it’s important to have a tire inflator on hand, as this tool will make the process much easier. Once you have the inflator, you’ll want to start by removing the old valve core using a valve core tool.
This may take a bit of effort, so make sure you have a good grip on the tool and use enough force to twist the core out of the valve stem. Once the old core is removed, it’s time to insert the new one. Make sure it’s threaded securely into place before moving on to adding air.
Using your inflator, add air to the tire until it reaches the recommended pressure. Remember, it’s important to check your tire pressure regularly and maintain it within the recommended range to ensure optimal performance and safety. By following these basic steps, you’ll be able to replace your valve core and add air to your tire like a pro in no time.
3. Replace the valve cap to the valve stem
When it comes to maintaining your vehicle’s tire pressure, replacing the valve core and adding air is key. The valve core is the small component inside the valve stem that allows air to flow in and out of the tire. Over time, this component can become worn or damaged, causing a leak.
To replace it, you’ll need a valve core tool, which can be purchased at any auto parts store. Once you’ve removed the old valve core, use a tire pressure gauge to check the pressure in your tire and add air if necessary. Be sure to check the recommended pressure for your vehicle, which can usually be found in the owner’s manual or on a sticker inside the driver’s side door.
Finally, don’t forget to replace the valve cap to the valve stem to protect it from dirt and debris. By maintaining proper tire pressure, you’ll not only improve your vehicle’s fuel efficiency but also extend the life of your tires.
Conclusion
Removing air from a tire may seem like a daunting task, but fear not! With just a few easy steps, you can release that excess air and get back on the road in no time. Just remember to be gentle with your tire, use the right tools, and stay calm under pressure (or lack thereof). And while it may be tempting to get a little too pumped up about the process, remember that sometimes less is more – especially when it comes to tire pressure!”
FAQs
Why is it important to remove air from a tire?
It is important to remove air from a tire to ensure safety while driving, and to prevent tire damage or blowouts due to overinflation.
What tools are needed to remove air from a tire?
To remove air from a tire, you will need a tire pressure gauge, an air compressor or tire inflator, and a tire valve stem tool.
How often should you check and adjust the air pressure in your tires?
It is recommended to check and adjust the air pressure in your tires at least once a month or before long trips, as tire pressure can fluctuate due to temperature changes and natural air loss.
Can overinflated or underinflated tires affect the lifespan of a tire?
Yes, overinflated or underinflated tires can cause uneven tire wear and reduce the lifespan of a tire.
What are some signs that your tire pressure may be low?
Some signs that your tire pressure may be low include decreased fuel efficiency, tire pressure warning light on the dashboard, and a feeling of the car pulling to one side while driving.
Can you remove excess air from a tire without an air compressor?
Yes, you can remove excess air from a tire using a tire pressure gauge and valve stem tool.
How do you know when you have removed enough air from a tire?
You can check the recommended PSI (pounds per square inch) for your tire on the sidewall or vehicle manual, and use a tire pressure gauge to measure the current air pressure in the tire. Remove air until the tire pressure matches the recommended PSI.


