Have you ever been in a situation where you need to add air to your tires, but you can’t seem to get those stubborn metal valve caps off? It can be a frustrating experience for even the most seasoned drivers. Removing metal tire valve caps may seem like a simple task, but it can be surprisingly difficult if you don’t know the proper techniques. Not to worry though, as we are here to help you with the tips and tricks you need to easily remove metal valve caps on your tires.
Whether you’re a beginner or an experienced driver, this guide will give you the confidence you need to take on this common car-care task with ease. So, let’s dive in and explore the ins and outs of valve cap removal!
Tools needed:
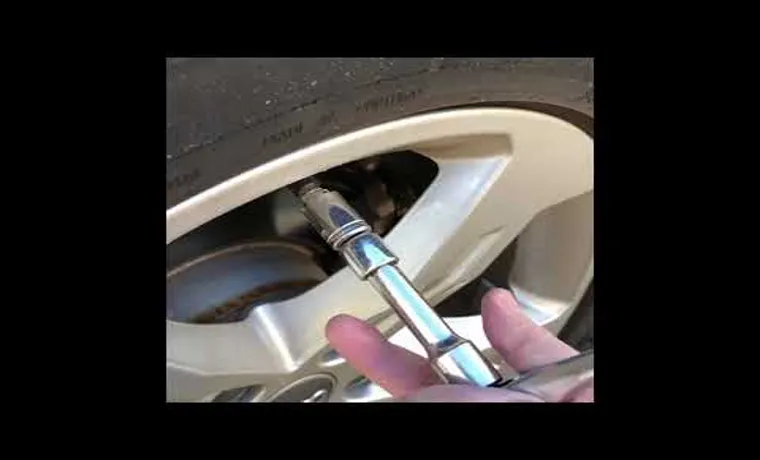
Removing metal tire valve caps can be a tricky task if you don’t have the right tools. It’s important to note that metal valve caps are typically corrosion-resistant and much tougher than their plastic counterparts, so it’s essential to use the right approach to remove them without damaging the valves. To remove metal tire valve caps, you’ll need a valve cap removal tool or pliers.
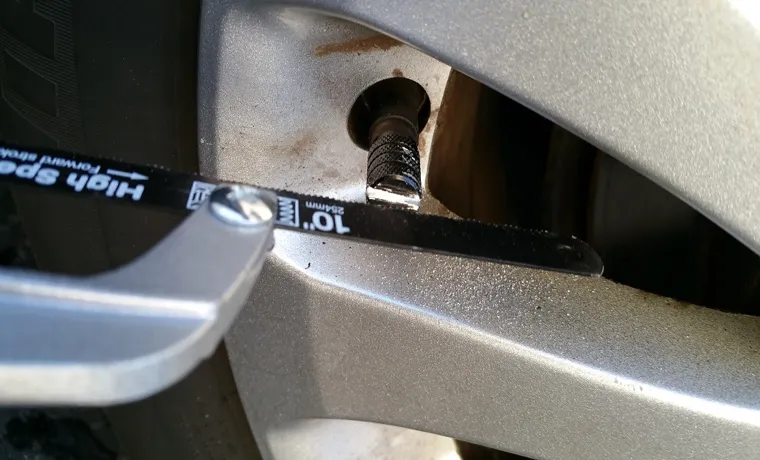
A valve cap removal tool is a specialized tool designed to unscrew the valve cap without damaging the valve or the cap. Pliers are also a useful tool for removing valve caps, but you need to use them carefully, ensuring that you don’t apply too much pressure to the metal cap. Once you have the tool, insert it into the valve cap and turn it counterclockwise.
You may need to apply some force to loosen the valve cap, but don’t force it too hard, or you risk damaging the valve. Once the cap is loosened enough, unscrew it completely, and you’re ready to replace it with a new one.
Pliers or Wrench
When it comes to working on DIY projects or fixing issues around the house, having the right tools is crucial. One of the most common debates among homeowners and DIY enthusiasts is whether to use pliers or a wrench. Both tools have their uses and strengths, but the best tool depends on the specific task at hand.
Pliers are a versatile tool that can be used for gripping, cutting, and bending. They come in many different shapes and sizes, making them useful for a wide range of tasks. One of the main advantages of pliers is that they can be used in tight spaces that a wrench may not be able to reach.
However, when it comes to tasks that require a lot of force, pliers may not be the best choice. Wrenches, on the other hand, are designed for applying torque and turning bolts or nuts. They come in many different sizes and shapes, but the most common type is an adjustable wrench that can fit a range of bolt sizes.
When it comes to tasks that require a lot of force, a wrench is the go-to tool. However, they may not be as versatile as pliers and may not be able to reach certain tight spaces. Ultimately, the best tool for the job depends on the specific task at hand.
If you need to bend or cut something, pliers may be the better choice. If you need to apply a lot of force to turn a bolt or nut, a wrench is the better option. By having both tools in your toolbox, you will be equipped to handle a wide range of tasks around the house.

Step-by-Step Guide
If you’re looking for a way to remove metal tire valve caps, you’ve come to the right place. These caps can be a hassle to deal with, especially if they’re stuck or corroded onto the valve stem. The first step is to locate the valve stem and remove any dust or debris around the area using a dry cloth or a toothbrush.
Then, using a pair of pliers or a valve cap removal tool, grip the cap firmly and twist it counter-clockwise until it is loose enough to be removed by hand. Be careful not to damage the valve stem as you remove the cap, and if the cap is still stubborn, use a penetrating oil to loosen it up. Finally, clean the valve stem with a cloth and check for any damage or corrosion before replacing the cap with a new one.
With these simple steps, you can remove metal tire valve caps easily and safely.
Step 1: Remove the plastic cap
If you’re looking for a simple way to improve your hair care routine, look no further than removing the plastic cap from your favorite hair care products! This small step can make a big difference in the effectiveness of your hair products. When you remove the plastic cap, you allow air to flow into the bottle, which helps the product to flow out more smoothly. It also makes it easier to measure the correct amount of product, as you can see exactly how much you’re dispensing.
So, the next time you reach for your trusty bottle of hair serum or leave-in conditioner, take a few extra seconds to remove the plastic cap and see the difference it can make. Your hair will thank you for it!
Step 2: Use pliers or wrench to remove valve cap
To remove the valve cap, you need to have a pair of pliers or a wrench. This is an important step in maintaining the proper functionality of your valve. Firstly, ensure that you have a secure grip on the valve cap with your pliers or wrench.
This will help to prevent it from breaking or stripping. Once you have the right grip, apply a bit of pressure to loosen the cap. Give it a few twists until it starts to turn easily.
With a bit of force, the cap should come loose. It’s important to remember to not use too much pressure, as this could damage the valve. If you encounter any resistance, you may need to apply a bit more lubrication or use a different tool to remove the valve cap.
Remember, when you’re finished, make sure to re-tighten the valve cap securely to avoid any leaks. By following these steps, you’ll be well on your way to ensuring the proper care of your valve.
Step 3: Turn counter-clockwise to loosen valve cap
So, you’ve identified that your valve cap is stuck and needs to be loosened. No worries, as it’s a common problem that many people face. In this third step, you’ll need to turn the valve cap in a counter-clockwise direction to loosen it.
Remember not to tighten it, as that can lead to further complications. This is where a little elbow grease comes in handy. However, be gentle as well, as using too much force may cause damage to the valve stem or cap.
Doing things too quickly when you’re in a rush can be tempting, but it’s always best to take it slow and be careful to avoid any undesired consequences. Take your time, apply moderate pressure, and be patient. With a bit of persistence, you’ll soon find that it’ll start to turn.
Once you’ve loosened it, you’re ready to move on to the next step and completely remove the valve cap. Remember to always take your time and work methodically to avoid causing any unwanted damage. You’ve got this!
Step 4: Remove valve cap completely
In this step-by-step guide on removing a valve cap, we arrive at the fourth and final step: remove the valve cap completely. This might seem like a straightforward task, but it’s essential to do it correctly. A loose or improperly secured valve cap can lead to air leaks or even a flat tire.
To remove the valve cap, make sure you have a firm grasp on it and twist it counterclockwise until it comes off. Some valve caps might be difficult to remove due to corrosion or wear and tear. If this is the case, use pliers or a wrench to loosen it, making sure not to damage the valve stem.
Remember to keep the cap in a safe place until you’re ready to replace it, ensuring that it doesn’t roll away or get lost. And that’s it! By following this simple guide, you can remove your valve cap without any issues and keep your tires in tip-top shape.
Tips to keep in mind
Removing metal tire valve caps can sometimes be a tricky and daunting task. But don’t worry, a few simple tips can make this process smooth and effortless. First and foremost, it is crucial to make sure that you have the right tools for the job.
You will need a valve cap remover tool that is designed to fit onto the valve cap and turn it in a counterclockwise direction. It is important to note that forcing the valve cap off with pliers or other tools can lead to damage or breakage of the valve stem. Secondly, it is recommended to clean the area around the valve cap before attempting to remove it.
Dirt buildup can make it difficult to remove the valve cap, and cleaning it off can make the process much easier. Lastly, it is always a good idea to use a bit of penetrating oil or lubricant to loosen the valve cap and make it easier to remove. With these tips, getting those stubborn metal tire valve caps off will be a breeze, and you’ll be back on the road in no time!
Tip 1: Apply a lubricant if the valve cap is too tight
Valve cap If you’re dealing with a super tight valve cap, don’t worry – it’s a common problem. The good news is that there’s a simple solution: lubrication. Applying a lubricant, such as WD-40 or silicone spray, can make all the difference.
Start by cleaning the cap and valve stem with a dry cloth. Then, spray a small amount of lubricant onto the threads of the valve stem and the inside of the cap. Carefully screw the cap back on and test it out.
You’ll find that the cap should now go on and come off with ease. This easy tip will save you time and frustration in the future when it comes to keeping your valves in good condition.
Tip 2: Use a rag or glove to protect your hands from getting hurt
When it comes to DIY projects or any task that requires the use of tools, safety should always be a top priority. One simple tip to keep in mind is to use a rag or glove to protect your hands from getting hurt. It may seem like an obvious precaution, but it’s amazing how many people skip this step and end up with painful injuries as a result.
Even simple tasks such as tightening a screw or hammering a nail can pose a risk to your hands and fingers. Wrapping a rag around your fingers or wearing a protective glove can make all the difference in preventing cuts, bruises, or even fractures. Remember, taking a few extra seconds to protect yourself is always worth it in the end.
So, the next time you reach for a tool, don’t forget to grab a rag or a pair of gloves to keep your hands safe.
Conclusion
In conclusion, removing metal tire valve caps may seem like a daunting task, but with the right tools and technique, it can be as easy as pie. Just remember to screw on the cap tightly, avoid using pliers or metal objects that can scratch the surface, and twist counterclockwise to unlock. And if all else fails, don’t be afraid to ask for a helping hand from a fellow car enthusiast or a trusty mechanic.
After all, life is too short to be stuck with a stubborn valve cap. Happy driving!”
FAQs
What is the purpose of metal tire valve caps?
Metal tire valve caps protect tire valves from dirt, dust, and other debris, preventing air leaks and maintaining tire pressure.
Can metal tire valve caps get stuck on the valve stem?
Yes, metal tire valve caps can get stuck due to corrosion or overtightening. Use a penetrating oil or pliers to remove a stuck metal valve cap.
How often should metal tire valve caps be replaced?
Metal tire valve caps can last for years if properly maintained, but it is recommended to replace them every time you replace your tires or every 2-3 years.
What are the benefits of using metal tire valve caps?
Metal tire valve caps are more durable and long-lasting compared to plastic caps, provide a better seal, and add a sleek appearance to your wheels.
Can metal tire valve caps affect tire pressure monitoring systems (TPMS)?
No, metal tire valve caps do not affect TPMS as long as they do not interfere with the valve stem’s proper functioning.
How do I prevent theft of my metal tire valve caps?
You can use anti-theft metal tire valve caps, which require a special key to remove them, or park your car in a secure location.
Can metal tire valve caps cause damage to the valve stem if overtightened?
Yes, overtightening metal tire valve caps can damage the valve stem threads and lead to air leaks. Tighten them only reasonably using your fingers or lightly with pliers.


