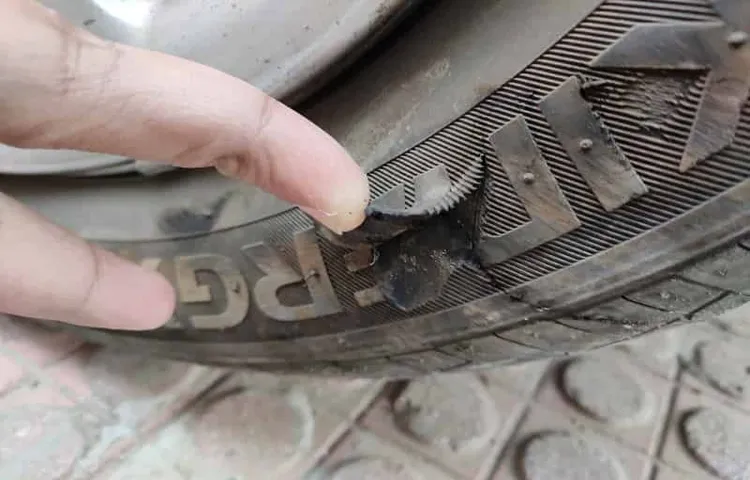
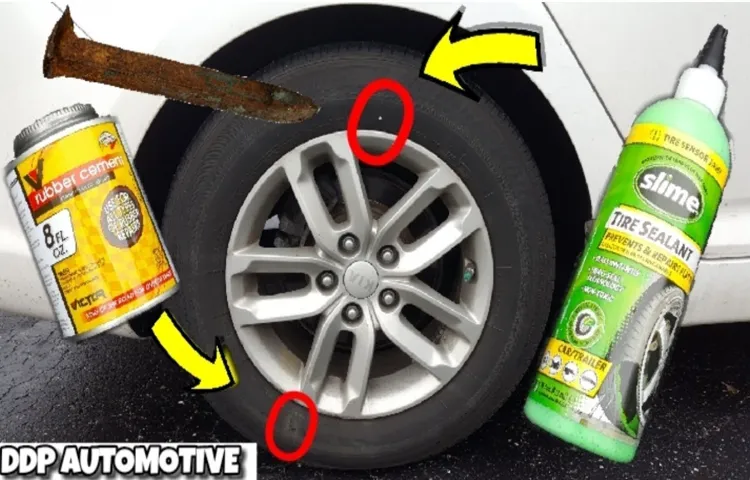
Have you ever had the unfortunate experience of driving over a sharp object and puncturing your tire sidewall? It can be frustrating and dangerous, but repairing tire sidewall damage is possible. Ignoring the damage can lead to costly consequences like tire blowouts, loss of control on the road, and even accidents. However, there are steps you can take to fix the damage and prevent further issues.
Think of your tire sidewall as the protective armor that keeps your tire from losing its shape and offers support. It also helps to preserve the structural integrity of the tire so that it can perform well on the road. When your tire’s sidewall gets compromised, your vehicle’s safety gets compromised too.
Though it’s tempting to try and fix it yourself, repairing tire sidewall damage is best entrusted to a professional. A tire technician can assess the extent of the damage and determine if the tire can be repaired, or if it needs to be replaced. In some cases, a patch or sealant can be used to cover small punctures or slices.
However, if the damage is too severe or in a critical area of the tire, it’s safer to replace it entirely. Keep in mind that prevention is key to avoiding tire sidewall damage. Be mindful of road hazards like potholes, road debris, and construction zones.
It’s best to avoid running over sharp objects if you can, or at least try to steer your vehicle away from them. In conclusion, if you experience tire sidewall damage, don’t ignore it. Take action to have it repaired or replaced as soon as possible, to help keep you, your passengers, and other drivers safe on the road.
Assess the Damage
If you notice sidewall damage on your tires, it’s important to assess the extent of the damage before determining if it is repairable or if it requires a replacement tire. Start by checking for any bulges or bumps on the sidewall that could indicate internal damage. If you see any visible cuts, punctures, or cracks, it’s likely that the damage has penetrated the rubber surface and cannot be fixed with a simple repair.
In this case, the tire will need to be replaced. However, if the damage is minor and doesn’t penetrate the tire’s surface, it may be repairable. Make sure to take your tire to a certified mechanic for a proper inspection and repair to ensure your safety on the road.
Remember, proper maintenance and inspection of your tires can save you from potential accidents and costly repairs in the long run.
Inspect the Damage
When dealing with a damaged property, the first thing you should do is inspect the damage. This step is crucial in assessing the extent of the damage done and determining the necessary repairs. It is recommended to take photos and video recordings of the damage for documentation purposes.
Take a detailed look at the affected areas, including any structural damage, water damage, or possible mold growth. Check for any potential safety risks, such as loose electrical wires or gas leaks, and evacuate the premises immediately if necessary. Once a thorough inspection is done, you can then begin planning the next steps towards restoring your property to its former state.
Remember to always prioritize safety first before addressing any other concerns.

Determine the Extent of the Damage
Before taking any corrective action, it’s essential to assess the damage done to know the severity of the situation. Depending on the extent of the damage, you can determine whether to repair or replace the affected area. Look for any signs of visible damage, such as cracks or holes.
Determine the location and reach of the damage, whether it was localized to one spot or has affected a significant portion of the structure. Understanding the nature of the damage can help you predict any future problems and prepare accordingly. Additionally, assessing the damage can give you a rough estimate of the costs involved in repairing or replacing the affected area.
It’s crucial to document all the observations during the assessment phase for future reference. Once you have assessed the damage and documented it, you can move forward with repairing or replacing the affected area accordingly.
Repair the Damage
If you’ve noticed some sidewall damage on your tire, it’s important to address the issue right away to prevent further problems down the road. The first step in repairing tire sidewall damage is to assess the severity of the damage. If the damage is minor, you may be able to patch the tire with a plug or patch kit.
However, if the damage is more severe, it may be necessary to replace the entire tire. Before making any repairs, it’s important to ensure that the tire is completely deflated and removed from the wheel. Once the tire is removed, you can carefully inspect the sidewall for any signs of damage.
If you determine that a patch or plug is the best option, you’ll need to follow a few simple steps to complete the repair. Make sure to clean the area around the damaged section, apply a bonding agent, and then insert the plug or patch. With proper care and maintenance, your tire should be able to handle thousands of miles of driving after a sidewall repair.
Choose a Repair Kit
When faced with damage to your belongings, choosing the right repair kit can make all the difference. Whether it’s a tear in your favorite shirt or a broken piece of furniture, having the necessary tools and materials on hand can save you time and money in the long run. Consider the type of damage you’re facing and look for kits that cater specifically to that issue.
For example, if you need to patch a hole in your drywall, look for a kit with spackling paste and a putty knife. If you need to repair a leaky faucet, look for a kit with replacement washers and O-rings. With so many options on the market, it’s important to do your research to find the right kit for the job.
Don’t forget to follow any included instructions carefully to ensure the best results. By selecting the right repair kit, you can make sure your belongings stay in top condition for years to come.
Clean and Dry the Damaged Area
When dealing with damage to an area, the first step in the repair process is to clean and dry the affected area. This is crucial for ensuring that any further damage is prevented and that any repair work can be done effectively. To begin, remove any debris or foreign objects from the area and wipe down any surfaces with a clean cloth.
It’s important to make sure that the area is completely dry before any repairs are made. This can be done by using a fan or dehumidifier to remove moisture from the air and ensure that the area is dry. Once the area is clean and dry, it’s ready to be repaired.
It’s important to remember that proper preparation and cleaning of the area is essential for a successful repair job. By taking the time to clean and dry the area, you can ensure that any repairs made will be long-lasting and effective.
Insert the Repair Plug
To repair a damaged tire, you must insert a repair plug. This process is relatively simple but requires some skill and precision. Start by locating the puncture hole in the tire and cleaning the area thoroughly.
Once clean, insert the rubber repair plug into the hole using a specialized tool. Make sure to push the plug all the way in and leave a few inches hanging out. Trim any excess plug material with a razor blade and inflate the tire to the recommended PSI.
This will allow the plug to expand and create a solid seal. Finally, inspect the tire for any additional damage or leaks. If all is well, you’re good to go.
The process shouldn’t take more than 15-20 minutes, saving you time and money in the long run. Remember, safety always comes first, so if you’re not comfortable repairing a tire on your own, seek professional assistance.
Trim the Excess Plug and Reinforce the Patch
Once you’ve applied the patch to your damaged drywall, it’s time to trim the excess plug and reinforce the patch. This step will ensure that your patch is fully flush with the surrounding wall and won’t crack or peel over time. Using a utility knife or a drywall saw, carefully trim away any excess patch material until it’s level with the wall.
Then, apply another layer of joint compound over the patch and extend it out several inches beyond the edges. Use a drywall knife to spread the compound evenly and smoothly. Once the compound is dry, lightly sand it and apply a final coat of compound if needed.
This will give your patched area a smooth finish that blends in seamlessly with the rest of your wall. Remember to give the compound ample time to dry between coats. With a little patience and attention to detail, you’ll have a repaired drywall that looks like new again!
Preventing Future Damage
If you find yourself dealing with a damaged tire sidewall, it’s important to know how to repair it properly to prevent future damage. The first step is to assess the damage and determine if it is safe to drive on. If the damage is severe or the tire is old and worn, it may be best to replace the tire completely.
If it is safe to repair, the damaged area can be filled with a rubberized sealant and then covered with a patch. It’s important to remember that while this may offer a temporary fix, it is not a permanent solution and should be replaced as soon as possible. To prevent future damage, avoid driving too close to curbs or obstacles and be mindful of rough roads.
Regularly checking your tire pressure and rotating your tires can also help prevent damage to the sidewall. By taking these precautions and properly repairing any damage, you can keep your tires in good condition and prevent any unwanted accidents on the road.
Avoid Obstacles on the Road
When driving, it’s essential to keep an eye out for obstacles on the road. These obstacles can range from potholes and debris to animals or even other vehicles. However, avoiding them isn’t just about immediate safety; it’s also about preventing future damage to your vehicle.
Hitting a pothole or piece of debris can cause your car to become misaligned, leading to issues with the suspension and steering over time. Similarly, colliding with an animal or another car can cause significant damage to your vehicle that may require costly repairs or even replacement. By driving defensively and staying aware of your surroundings, you can take steps to prevent these obstacles and keep your car in tip-top shape.
Remember, staying safe on the road means anticipating the unexpected and taking proactive measures to avoid potential hazards.
Maintain Proper Tire Pressure and Alignment
Maintaining proper tire pressure and alignment is essential in preventing future damage to your vehicle. Not only does it improve fuel efficiency and increase the lifespan of your tires, but it can also prevent accidents from occurring. Driving on under-inflated tires puts more stress on the rubber, causing them to wear irregularly and potentially leading to a blowout.
Similarly, misaligned wheels can cause uneven tire wear and affect the handling of your vehicle, making it more difficult to control on the road. By regularly checking your tire pressure and alignment, you can ensure that your vehicle is operating at its optimal level, reducing the risk of costly repairs and accidents. Don’t make the mistake of neglecting your tires – taking a few minutes to perform these simple maintenance tasks can save you money and keep you safe on the road.
Conclusion
So there you have it – the complete guide on how to repair tire sidewall damage. Remember – prevention is always better than cure, so drive carefully and avoid hitting potholes or other objects on the road. But if damage does occur, don’t panic – with a little bit of DIY know-how and the right tools, you can patch up your sidewall and get back on the road in no time.
Just make sure to follow all safety precautions and if in doubt, seek professional help. After all, when it comes to your tires, safety always comes first. Happy driving!”
FAQs
What causes tire sidewall damage?
Tire sidewall damage can be caused by impact with curbs, potholes, or other road hazards. Improper inflation, overloading the vehicle, and carrying heavy cargo can also contribute to sidewall damage.
Can a tire with sidewall damage be repaired?
Generally, no. Sidewall damage compromises the structural integrity of the tire, making it unsafe to repair. It’s recommended to replace the tire instead.
What are the signs that a tire has sidewall damage?
The most apparent sign of sidewall damage is a visible bulge or bubble on the tire’s sidewall. Other signs may include vibrations, steering wheel vibration, or noise while driving.
How can I prevent sidewall damage to my tires?
You can prevent sidewall damage by properly maintaining your tires, including regularly checking tire pressure and ensuring that your vehicle is not overloaded. Avoid hitting curbs or other road hazards and consider driving slower on poorly maintained roads.
How long does it take to replace a tire with sidewall damage?
The time it takes to replace a tire will depend on several factors, including the availability of the tire, the service center’s workload, and the scheduling of the appointment. Generally, it can take anywhere from a few hours to a day to replace a tire.
Can I drive on a tire with sidewall damage?
It’s not recommended to drive on a tire with sidewall damage as it can be dangerous. The damaged tire can result in sudden loss of air pressure, making it difficult to control the vehicle or resulting in a blowout.
How much does it cost to replace a tire with sidewall damage?
The cost depends on the type and size of the tire and your geographic location. Generally, a new tire can cost between $100 to $300. Additionally, there may be additional fees for installation, balancing, and disposal of the old tire.


