
Has your tires been acting up lately? Noticed a slight, but annoying leak on your tire’s bead? Not to worry, as you can quickly seal a tire bead leak by following a simple step-by-step guide. A tire bead leak can cause significant air deflation leading to flat tires, which can be dangerous when driving on the road. It is essential to address this issue immediately to avoid further damages.
In this article, we’ll guide you through the process of sealing a tire bead leak, so you don’t have to spend countless hours and money at the auto shop. Whether you’re a beginner or experienced, these tips will have you well-equipped to tackle any tire bead leak in no time. So sit back, relax, and let’s get started!
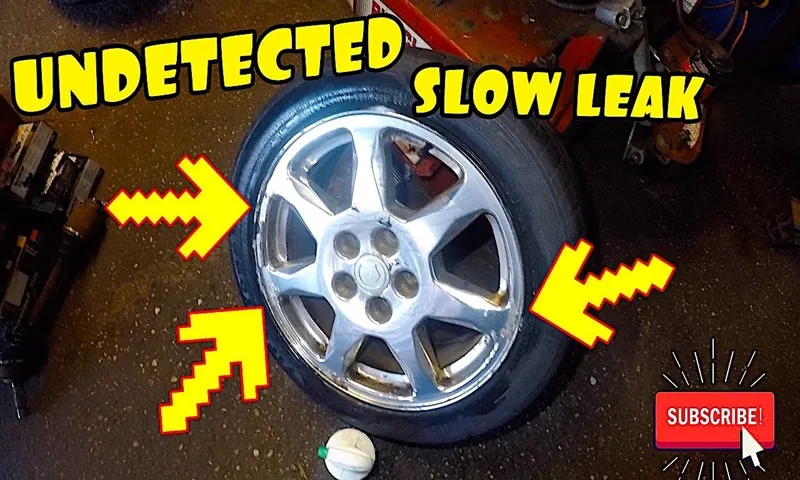
What is a Tire Bead Leak?
If you’re experiencing a tire bead leak, it means that there’s air escaping from the seal between the tire and the wheel rim. There are a few reasons this can happen, including a damaged or worn tire bead, corrosion on the rim, or debris stuck in the seal. To fix this issue, you’ll need to seal the leak using a tire sealant.
Start by removing any debris from the seal, then apply the sealant around the entire area. Be sure to follow the instructions on the sealant carefully to ensure proper application. Once the sealant has dried, inflate the tire to the recommended pressure and check for any further leaks.
If the sealant doesn’t work, it may be necessary to replace the tire or have the rim repaired. It’s important to address a tire bead leak as soon as possible, as driving on a flat or low-pressure tire can cause damage to the tire and/or the wheel, and is also a safety hazard.
Explaining the Issue
A tire bead leak refers to an air leak from either side of the tire bead – the part that connects the tire to the wheel rim. This can happen due to a few reasons such as a damaged valve stem, corrosion on the rim or bead, or even a poorly installed tire. A tire bead leak can be difficult to diagnose, but signs usually include a loss of air pressure, irregular tire wear, or visible damage to the bead area.
If left unaddressed, a tire bead leak can lead to a flat tire or even worse, a blowout while driving, which can be extremely dangerous. It’s important to have a professional inspect your tires if you suspect a bead leak or any other air leaks.

Causes of a Tire Bead Leak
A tire bead leak is a common issue experienced by drivers, which occurs when air is lost from the tire due to a compromised seal between the tire and wheel. Several factors can contribute to a tire bead leak, such as corrosion or damage to the wheel rim or valve stem, improper installation of the tire, and foreign objects lodged between the tire and the wheel. A worn out or damaged tire bead can also lead to a bead leak, causing air to escape from the tire and resulting in a flat tire.
Proper tire maintenance, such as regular wheel and tire checks and replacements, can help prevent tire bead leaks and ensure optimal performance and safety on the road. If you notice any signs of a tire bead leak, such as a flat tire, hissing noises, or vibrations, it’s important to address the issue promptly to avoid further damage or accidents.
Tools and Materials Needed
If you’re dealing with a tire bead leak, you’ll need to gather a few tools and materials to fix the issue. First and foremost, you’ll need to locate the source of the leak which can be done by submerging the tire under water and identifying the area where bubbles emerge. Once you’ve found the leak, you’ll need to clean the affected area around the bead of the tire using a wire brush and a cleaner such as acetone or rubbing alcohol.
Next, you’ll want to apply a sealant to the cleaned area to prevent air from escaping. One recommended option is a tire bead sealer which can be easily found at most auto shops. You’ll also want to ensure that you have a tire patch kit on hand in case the sealant is not enough to fix the leak.
Overall, with the right tools and materials, you’ll be able to seal your tire bead leak and get back on the road in no time.
What You’ll Need
When embarking on a new project, such as making a piece of furniture or even just completing a DIY repair, having the right tools and materials is essential. Depending on the project you have in mind, there may be a variety of tools needed, but some basics include a hammer, screwdrivers, pliers, wrenches, a saw, and a drill. It’s also important to have the right materials, such as screws, nails, sandpaper, paint, and wood.
To avoid frustration and delays, take the time to gather everything you need before getting started. This will not only make the project run smoother, but it can also prevent potentially dangerous situations from occurring due to using the wrong tools or materials. By having the right tools and materials at your disposal, you’ll be well on your way to completing your project successfully.
Safety Precautions
When it comes to any kind of DIY project, safety should always be the number one priority. To ensure that your woodworking experience is both fun and safe, you’ll need to gather a few tools and materials. First and foremost, invest in a good pair of safety goggles to protect your eyes from flying wood chips.
You’ll also want to grab some earplugs to protect your hearing from loud power tools. A dust mask is essential for protecting your lungs from sawdust and other airborne particles. Depending on the type of project you’re working on, you may need a variety of saws, including a jigsaw, a circular saw, and a miter saw.
Finally, make sure you have a sturdy workbench or table to use as a workspace. When you have all the tools and materials you need, take the time to set them up safely. Keep your workspace clean and organized, and always make sure that power tools are unplugged when you’re not using them.
By following these safety precautions, you’ll be able to enjoy your woodworking hobby without any unnecessary risk.
Step-by-Step Guide to Seal a Tire Bead Leak
If you’re dealing with a tire bead leak, don’t panic! Fixing it is actually a lot easier than you might think. The first step is to find the source of the leak. Usually, this will be around the edge of the tire where it meets the rim.
Once you’ve located the leak, you’ll need to clean the area thoroughly with soap and water. Next, apply a bead sealer to the area. This will help to fill in any gaps and create a strong, airtight seal.
Be sure to follow the manufacturer’s instructions carefully, as different products may have different application methods. After you’ve applied the sealer, wait for it to dry completely before inflating the tire. Check to make sure the leak has been fixed, and you’re good to go! Remember, a tire bead leak should never be ignored as it can lead to dangerous driving conditions, so take care of it as soon as possible.
Step 1: Locate the Leak
If you find yourself with a tire that just won’t hold its pressure, it may be time to seal a tire bead leak. The first step is to locate the exact spot where the leak is coming from. It could be a small puncture or crack in the rubber, or it could be a problem with the valve stem or rim.
The easiest way to find the leak is to use a spray bottle filled with soapy water and spray it onto the tire. Watch carefully for any bubbles forming – this is a sign of a leak. Once you’ve located the leak, you can move on to the next step to seal it up and get your tire back to its full strength.
Remember, taking the time to carefully inspect your tire can save you time and money in the long run. So, make sure you do a thorough job before moving on to any repairs.
Step 2: Remove the Wheel from the Vehicle
To seal a tire bead leak, the second step is to remove the wheel from the vehicle. This is a crucial step in the process, as it gives you better access to the tire bead and allows you to work more comfortably. To do this, first ensure that the vehicle is parked on a level surface with the parking brake engaged.
Then, use a lug wrench to loosen the lug nuts on the wheel you need to remove. Be sure to loosen them in a star pattern to avoid warping the wheel. Once they are loose, use a car jack to lift the vehicle off the ground and finish removing the lug nuts.
Carefully remove the wheel from the vehicle and place it on a suitable work surface. It is essential to take extra care when removing the wheel nuts to avoid injuring yourself or damaging the vehicle. Remember, safety always comes first when working with tires and wheels.
Step 3: Clean the Bead Area
When dealing with a tire bead leak, it’s crucial to ensure the bead area of the tire is clean and free of any debris or particles. This step is essential to provide a smooth surface for the sealant to adhere to, and it also helps to prevent any contamination that may affect the seal’s effectiveness. Start by removing the tire from the rim and inspecting the area around the bead.
You may need to use a wire brush or an abrasive pad to remove any built-up dirt, rust, or old sealant from the area. Wiping the area down with a cloth dampened in an alcohol-based cleaner is also essential to ensure there’s no trace of oil or grease. It’s vital to keep the bead area completely free from contaminants to ensure your sealant can do its job correctly.
Once the area is clean and dry, you’re ready to apply the bead sealant. Applying it evenly and smoothly is essential to ensure a secure and effective seal. Remember to work carefully and methodically, taking your time to ensure a job well done.
Step 4: Apply Sealant
Seal a Tire Bead LeakOnce you’ve found the tire bead leak, it’s time to seal it up to prevent any more air from escaping. The best way to do this is by applying a sealant. Start by cleaning the rim and tire bead thoroughly to ensure that there’s no dust or debris that could interfere with the sealant’s effectiveness.
Then, apply the sealant around the bead area, making sure to cover the entire circumference. Allow the sealant to dry completely before re-inflating the tire and checking for any leaks. Sealants can come in various forms, including liquids, sprays, and foams.
Choose the one that best fits your needs and follow the manufacturer’s instructions for application. Some sealants may require a second application or may need to be reapplied after a certain amount of time or mileage. By sealing a tire bead leak, you can extend the life of your tire and ensure your safety while on the road.
Step 5 (optional): Use a Tire Bead Sealer
If you’ve been dealing with a tire bead leak, don’t worry, you’re not alone. This is a common issue that many drivers face at some point. Fortunately, there’s an easy fix – a tire bead sealer.
While this step is optional, it can be a lifesaver if your leak is stubborn. To use a tire bead sealer, first, make sure the tire is clean and dry. Next, apply the sealer to the bead of the tire, making sure to cover the entire area.
The sealer will form a protective layer that prevents air from escaping. You can find a tire bead sealer at most auto parts stores, and it’s an inexpensive solution to a frustrating problem. Remember, if the leak is caused by a puncture or other damage to the tire, a sealant won’t fix the issue.
Be sure to inspect your tire thoroughly and replace it if necessary.
Step 6: Reinstall the Wheel
Once you’ve successfully sealed your tire bead leak, it’s time to reinstall the wheel. This is the final step in the process of fixing a flat tire, and it’s important that you do it correctly to avoid any accidents or mishaps. Start by lining up the holes in the wheel with the bolts on the hub and gently tighten them in a star pattern.
This will ensure that the wheel is installed evenly and securely. Once all the bolts are in place, use a torque wrench to tighten them to the manufacturer’s recommended specifications. This will prevent over-tightening or under-tightening, both of which can be dangerous.
Finally, check the tire pressure and make sure it matches the recommended psi for your vehicle. With these steps complete, you’re ready to hit the road again with confidence, knowing that your tire is securely in place and ready for whatever comes your way.
Preventative Measures
If you’re wondering how to seal a tire bead leak, there are several preventative measures you can take to avoid encountering this issue in the first place. One of the most important things you can do is to regularly check your tire pressure. Maintaining the correct air pressure in your tires will help prevent leaks from occurring.
Additionally, it’s a good idea to replace your tire valves and valve stems every time you replace your tires. This will help ensure that your tires remain sealed properly and prevent leaks from developing. Finally, be sure to avoid overloading your vehicle or driving over rough terrain that could damage your tires.
By taking these simple steps, you can help prevent tire bead leaks and ensure that your vehicle remains safe and reliable on the road.
Regular Tire Maintenance Routines
Regular tire maintenance is essential to ensure optimal vehicle performance, safety, and longevity of your tires. Implementing preventative measures can go a long way to minimizing the risk of tire-related problems, such as flat tires, blowouts, and uneven tread wear. As part of your maintenance routine, you should regularly inspect your tires for signs of damage, such as cuts, bulges, and punctures, and address any issues promptly.
Additionally, regularly checking the tire pressure and keeping it at the recommended level can extend the life of your tires and improve fuel efficiency. Rotating your tires every six months or so can also help to promote even tread wear and extend the life of your tires. By consistently showing your tires the TLC they need, you can enjoy a safer, smoother, and more cost-effective driving experience, and avoid costly tire repairs or replacements down the road.
Common Mistakes to Avoid
When it comes to common mistakes to avoid, it’s important to take preventative measures to ensure a smooth and successful outcome. One of the best ways to do this is by thoroughly planning ahead and anticipating any potential obstacles. This may involve conducting extensive research, setting realistic goals, and having a backup plan in case something goes wrong.
Another key preventative measure is to stay organized and keep track of all important deadlines and milestones. This can be done by using tools such as calendars, to-do lists, and project management software. By being proactive and taking these preventative measures, you’ll be better equipped to avoid common mistakes and achieve your desired outcomes.
Conclusion
Sealing a tire bead leak might seem like a daunting task, but with a little determination and some elbow grease, it’s as easy as giving a flat tire the cold shoulder. Don’t let a leaky tire get the better of you – grab some sealant, a tire iron, and get ready to make that bead tight enough to make even the most gossipy tires jealous. Remember, a properly sealed tire is like a good friendship – it holds up under pressure and keeps you moving forward.
So, tighten those beads and hit the road with confidence knowing that you’re ready to seal the deal with any leak that comes your way!”
FAQs
What is a tire bead leak and how does it occur?
A tire bead leak occurs when air escapes from the tire due to a gap between the tire bead and the wheel rim. This gap can form due to corrosion or damage to the rim, making it difficult for the tire to maintain pressure.
Can a tire bead leak be fixed without replacing the tire?
Yes, a tire bead leak can often be fixed without replacing the tire. Using a sealant such as Fix-a-Flat or bead sealer can help fill in gaps and create a tighter seal between the tire bead and the rim.
How do I use bead sealer to fix a tire bead leak?
To use bead sealer, first, deflate the affected tire and remove it from the rim. Clean the bead and rim area with a wire brush or sandpaper to remove any debris or rust. Apply a small amount of bead sealer around the rim and spread it evenly with a brush or your fingers before seating the tire back onto the rim. Inflate the tire to the recommended pressure.
Can bead sealer be used as a preventive measure for future tire bead leaks?
Yes, bead sealer can be used as a preventive measure for future tire bead leaks. Applying bead sealer to the rim before mounting the tire can help create a stronger seal and prevent air loss due to a tire bead leak.
How long does bead sealer take to cure?
Bead sealer typically takes about 24 hours to fully cure. It’s important to avoid driving the vehicle or exposing the tire to extreme temperatures or moisture during this time.
Can a professional mechanic help fix a tire bead leak?
Yes, a professional mechanic can help diagnose and fix a tire bead leak. They may recommend using bead sealer or replacing the rim or tire if necessary.
Are there any safety precautions I should take when fixing a tire bead leak?
Yes, some safety precautions to take when fixing a tire bead leak include wearing gloves and eye protection, avoiding smoking or open flames near the tire, and ensuring proper ventilation when working with bead sealer or other sealants.