Got a flat tire on your tubeless bike? It can be a real pain in the you-know-what. Not only do you have to stop your ride and fix it, but you also have to worry about making sure it doesn’t happen again. Luckily, there’s a solution to this problem: sealing your tubeless tire.
Sealing a tubeless tire might seem intimidating at first, but it’s actually a pretty easy process. It involves adding a sealant to your tire that will fill any small holes or punctures that could cause a flat. This can be extremely helpful if you’re someone who frequently rides on rocky or rough terrain, as it can prevent a lot of headaches down the line.
If you’re wondering how to seal a tubeless tire, don’t worry – we’ve got you covered. In this blog post, we’re going to go over everything you need to know about sealing your tubeless tire, from the tools you’ll need to the step-by-step process. So sit back, relax, and get ready to become a pro at sealing your tubeless tire.
What You’ll Need
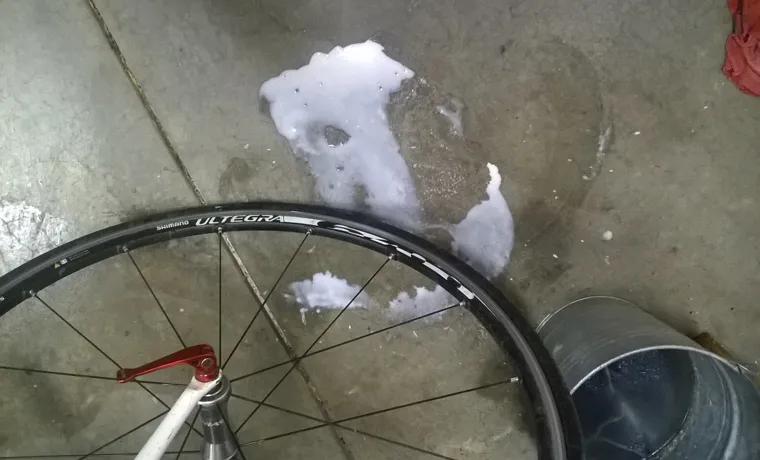
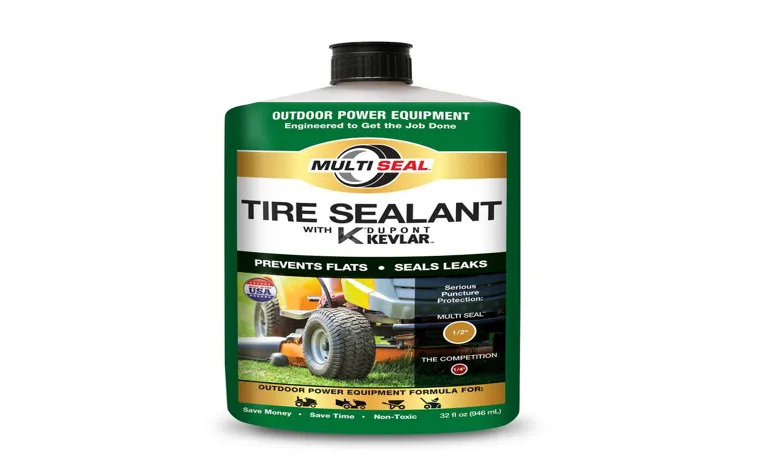
If you’re looking to learn how to seal a tubeless tire, there are a few things you’ll need before getting started. First and foremost, you’ll need a tubeless tire sealant. This will be the key ingredient in sealing up any punctures or leaks in your tire.
Next, you’ll need a valve core remover tool to remove the valve stem core so you can inject the sealant directly into your tire. Finally, you’ll need an air compressor or a high-volume hand pump to inflate your tire after adding the sealant. With these tools in hand, you’ll be ready to tackle any puncture or leak that comes your way and keep your tubeless tires rolling smoothly.
Remember, tubeless tire sealant should be added periodically to maintain optimal performance. So, don’t wait until it’s too late to seal up those pesky punctures.
Tubeless Tire Sealant
Tubeless tire sealant is an essential aspect of ensuring the longevity and performance of tubeless tires. The basic ingredients of a tubeless tire sealant include latex, ammonia, and crystals. To make the perfect sealant mixture, you’ll need the following essentials.
Firstly, you need a basic latex, which serves as the base for your sealant. Secondly, ammonia is required to increase the coagulation speed, allowing sealant to work well to seal the puncture. Thirdly, you need crystals such as glitter or microfibers, which provide the tire sealant with added filling power, making it more effective in sealing small punctures.
Lastly, you will need a container to mix the sealant adequately. One of the most essential parts of sealing your tubeless tire punctures is having all the right tools on hand. So, make sure you have these necessary ingredients before mixing up a batch of tubeless tire sealant.

Valve Core Remover Tool
If you’re a cyclist or bike mechanic, then you know how important it is to have the right tools for the job. One essential tool that you’ll need is a valve core remover. This tool will allow you to remove the valve core from your bike’s tire valve stem, which is necessary for repairing a flat tire or adding sealant to a tubeless tire.
To use the valve core remover, you’ll need to remove the valve cap from the tire valve stem and then insert the tool into the valve stem until it grips the valve core. You can then unscrew the valve core and remove it from the stem. It’s essential to have a valve core remover tool in your toolkit, as it makes tire repairs and maintenance much easier.
With the right tool, you can quickly and easily remove and replace valve cores, saving yourself time and frustration. So, if you’re serious about cycling or bike maintenance, then you’ll definitely want to invest in a high-quality valve core remover tool.
Air Compressor
When it comes to using an air compressor, there are a few things that you’ll need to get started. First and foremost, you’ll need the air compressor itself. There are several types and sizes of compressors available on the market, ranging from small portable units to large industrial models.
Depending on the task at hand, you’ll need to choose the right compressor that can handle the job efficiently. In addition to the compressor, you’ll need an air hose to connect to the compressor. The hose should be made of sturdy material that can withstand high pressure and be long enough to reach your work area.
A set of air tools are also necessary, such as an air gun for blowing debris, an impact wrench for loosening bolts and a spray gun for painting. Lastly, you’ll need to have a good understanding of the safety measures that need to be taken when operating an air compressor, including the use of protective gear such as goggles and ear protection. By having all of these items on hand and following the proper safety guidelines, you can effectively and safely use an air compressor for your projects.
Step-by-Step Guide
Tubeless tires are becoming more and more popular among cyclists, but sealing them can be a bit tricky. Don’t worry, though – with a bit of know-how and the right tools, you can seal a tubeless tire in no time! Here’s how to do it: first, remove the valve core from your tubeless tire. Then, shake your sealant bottle and pour it into the valve stem until the recommended amount has been added.
Once the sealant is in, replace the valve core and inflate your tire to the recommended pressure. Move the tire around to ensure the sealant spreads evenly inside. Finally, ride for a few minutes to let the sealant work and check the tire for any leaks.
Repeat the process if necessary. By following these steps, you’ll have a fully-sealed tubeless tire ready to tackle any terrain.
Remove the Valve Core
Removing the valve core from a bike tire can be a daunting task, but with a few simple steps, it can be done quickly and easily. First, you’ll need a valve core remover tool, which can be found at most bike shops or online retailers. Begin by unscrewing the valve cap and applying pressure to the valve to release any air remaining in the tire.
Once the tire is completely deflated, insert the valve core remover tool into the valve and twist counter-clockwise until the core is loosened. Be careful not to lose the core or any sealing rings. Once the core is removed, you can either replace it with a new one or clean and reinstall the old one.
With this simple process, you can remove a valve core from your bike tire and get back on the road in no time.
Pour Sealant into Tire
When it comes to fixing a punctured tire, pouring sealant into the tire is a quick and effective solution. But it’s essential to follow the right steps to ensure that the sealant works correctly and doesn’t do any damage to the tire or rim. First, start by locating the puncture and removing any debris that might be present in the tire.
Then, attach the nozzle of the sealant bottle to the valve stem and inject the sealant into the tire. Be sure to follow the recommended amount of sealant, and avoid overfilling the tire. Then, use your pump to inflate the tire to the correct pressure, and let the sealant do its job by distributing evenly throughout the tire.
Give it a test drive to ensure that the sealant has created a proper seal, and you’re good to go! Remember, using a sealant is not a permanent fix and is only meant to get you to a repair shop or a safe location. So, always inspect and repair the tire as soon as possible.
Reinstall Valve Core and Inflate Tire
Reinstall valve core and inflate tire After completing the necessary repairs or maintenance on your tire, it’s time to re-install the valve core and inflate it back to the recommended pressure. To begin, take the valve core and insert it back into the valve stem. Make sure it is threaded correctly, and use a valve core removal tool to tighten it into place.
Once you have done this, grab your tire inflator and attach it to the valve stem. Be sure to check the recommended tire pressure for your vehicle, which can be found in your owner’s manual or on the inside of the driver’s side door. Inflate the tire slowly, checking the pressure with a tire gauge periodically until it reaches the recommended psi.
If you accidentally overinflate the tire, you can use the gauge to release air until you reach the correct pressure. Once you have reached the recommended pressure, remove the inflator and replace the valve cap. Your tire is now ready to hit the road!
Rotate Tire to Distribute Sealant
When it comes to using sealant in your tires, one crucial step to ensure optimal distribution is rotating the tires. Here’s a step-by-step guide to help you distribute the sealant evenly across all your tires: First off, make sure your vehicle is parked on a flat surface and that all the tires are cold.
Remove the valve caps and use a tire pressure gauge to check the pressure of each tire. If any of the tires have low pressure, inflate them to the recommended pressure level.
Next, loosen all the lug nuts on each wheel but don’t remove them just yet.
Use a jack to lift the car and support it with jack stands. Make sure to place the stands on flat and stable ground.
Remove the lug nuts and take off the wheels. Make a note of the location of each tire as you will need to put them back in the same position.
Now that the wheels are off, use a tire rotation chart to determine the pattern in which you should rotate your tires. This will depend on factors such as whether your car is front-wheel drive, rear-wheel drive, or all-wheel drive.
Tips and Tricks
If you’re looking to seal a tubeless tire, the process isn’t always straightforward, but it can be done with a few simple steps. First, you’ll need to find the source of the leak by removing the tire from the rim and submerging it in water, then looking for bubbles. Once you’ve found the leak, you can plug it using a tire plug kit or seal it with a tire sealant.
If you choose the plug kit, you’ll need to insert the plug into the hole and use a pair of pliers to pull it tight. If you choose the sealant, you’ll need to pour it into the tire through the valve stem and then spin the tire to distribute the sealant evenly. After completing either of these steps, be sure to inflate the tire to the proper pressure and check for any leaks.
With a little bit of effort and patience, you can successfully seal a tubeless tire and get back on the road in no time.
Check Sealant Every Few Months
One of the essential tips and tricks to keep your home in great shape is to check the sealant every few months. The sealant is crucial for maintaining a waterproof barrier within your home, protecting it from any water damage. If left unchecked, the sealant can deteriorate, crack, or peel away, leading to water seeping in places it shouldn’t, resulting in expensive repairs.
A quick inspection of the sealant requires only a few minutes and can be done easily by homeowners themselves. Start by checking areas prone to moisture, such as around windows, doors, and bathtub caulking. If you notice any cracks or gaps, it’s time to reapply the sealant.
By doing this regularly, you can prolong the life of the sealant, and ultimately, your home. So why not take a few minutes every few months to check and save yourself from the hassle of costly repairs in the future?
Monitor Tire Pressure Regularly
One of the most important things that car owners often neglect is checking their tire pressure. Regularly monitoring tire pressure not only helps improve fuel efficiency, but it also ensures safety while driving. When tires are under-inflated, they can cause accidents, wear out quickly, and decrease the vehicle’s stability.
Over-inflated tires are also dangerous as they may burst and cause harm. Therefore, it’s crucial to maintain the recommended tire pressure. It is advised to check tire pressure monthly and before embarking on long drives.
Keeping a tire pressure gauge in the car is also essential. Doing so helps drivers quickly determine the tire pressure and adjust it when required. By keeping the correct tire pressure, car owners can reduce the substantial expenses of frequently changing their tires, save fuel by improving gas mileage, and most importantly, ensure their safety while driving.
Remember, safety should always come first!
Conclusion
And there you have it, folks! Sealing a tubeless tire is as easy as pie once you know the ropes. Just remember to prep your tire, insert the sealant, and give it a good spin. With a little patience, a steady hand, and a touch of know-how, you’ll be back on the road in no time.
So go ahead and seal the deal with your tubeless tire – it’s the smart choice for any savvy cyclist!”
FAQs
What are the benefits of using tubeless tires?
Tubeless tires provide better traction, increased fuel efficiency, and a reduced risk of blowouts due to punctures.
How can you tell if a tubeless tire is leaking air?
Check the tire pressure regularly and if it is lower than normal, use soapy water to check for bubbles at the site of the leak.
Can you repair a tubeless tire if it gets punctured?
Yes, you can repair a tubeless tire using a repair kit that includes a plug and adhesive. However, it is always recommended to replace the tire if the puncture is in the sidewall.
What is the process for sealing a tubeless tire?
First, locate the puncture and remove any debris. Then, use a plug and adhesive to seal the hole, and inflate the tire to its recommended pressure.
How often should you check the air pressure in a tubeless tire?
It is recommended to check the tire pressure every two weeks, or before any long drives, to ensure optimal performance and safety.
Can all cars use tubeless tires?
Yes, most modern cars are compatible with tubeless tires. However, it is always recommended to check the owner’s manual for compatibility.
How long do tubeless tires last?
The lifespan of a tubeless tire depends on various factors, such as the quality of the tire, driving conditions, and maintenance. On average, tubeless tires can last between 5-7 years.


