Have you ever experienced a flat tire while driving? It’s undoubtedly one of the most frustrating things that can happen to you on the road. While replacing the tire is the ideal solution in such a scenario, it may not always be feasible. But you don’t have to worry – sealing a tire is an option that can help you get back on the road in no time.
This comprehensive guide will walk you through the process of sealing a tire and provide you with valuable tips to ensure that you do it correctly. From identifying the source of the leak to selecting the right sealant and tools, we’ve got you covered. So, let’s dive in and learn how to seal a tire like a pro!
Table of Contents
What You Need
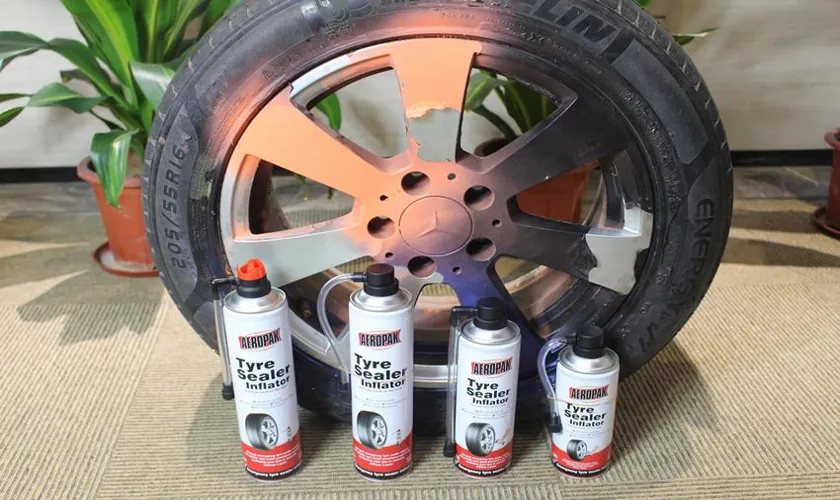
Sealing a tire can be a daunting task, but with the right tools and steps, you can do it easily. First and foremost, you will need a tire sealant, which can be easily purchased at any auto parts store. Some sealants come in aerosol cans, while others come in liquid form.
You will also need a tire pressure gauge to check the pressure of your tires before and after sealing. Before applying the sealant, you should also inspect your tire for any damage or punctures that may require professional attention. Once you have confirmed that your tire is in good condition, you can use the sealant as per the manufacturer’s instructions.
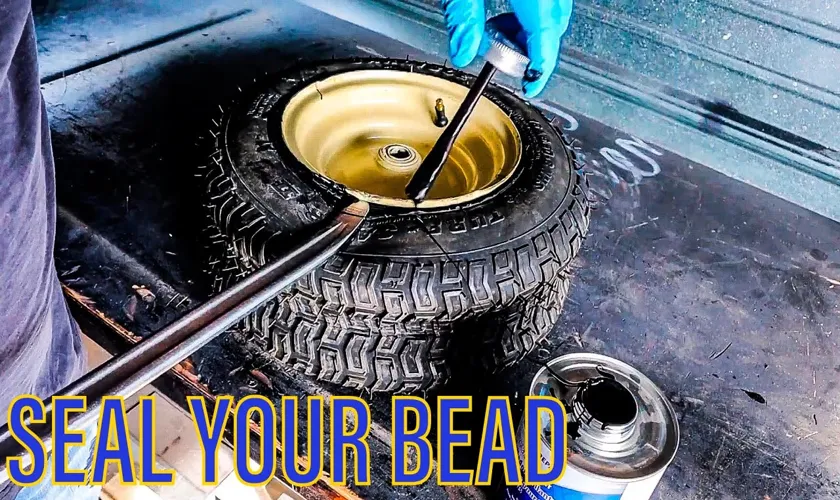
In general, you will need to remove the valve core from the tire and pour the sealant into the valve stem. After doing so, you can re-attach the valve core and re-inflate the tire to the recommended pressure. Once you have completed the sealant application, make sure to drive your vehicle for a few miles to distribute the sealant evenly.
Overall, sealing a tire is a simple process that can help you avoid a costly repair or replacement.
Tire Sealant
If you’re someone who wants to avoid a flat tire at all costs, then tire sealant may be the solution you’re looking for. This handy product can help plug up small punctures and leaks in your tire before they become a bigger issue. But what do you need to use tire sealant effectively? First, you need to make sure you have the right type of sealant for your tires.
There are different formulas for different types of tires, so read the label carefully before you make your purchase. Next, you’ll need to have an air compressor or other inflator on hand to refill your tire once the sealant has been added. You’ll also want to have a tire pressure gauge handy to ensure that your tire is inflated to the proper pressure.
Finally, make sure you’re wearing gloves and eye protection when using tire sealant, as some formulas can be messy and may contain chemicals that can irritate your skin or eyes. With these items on hand, you’ll be prepared to deal with any small tire issues that come your way.

Valve Core Remover
If you are a bike enthusiast, then you must have come across the valve core remover. This tiny tool can be a lifesaver when it comes to changing your bike’s tires. First and foremost, you will need a valve core remover if you want to add sealant to your tire.
The valve core is the part that allows air to flow in or out of your tire, and it can be removed by using a valve core remover. This tool is also necessary if you want to replace your valve stem with a longer or shorter one. Additionally, if you are using a tubeless tire, you will need a valve core remover to remove the valve core before you can inflate the tire.
Valve core removers come in different shapes and sizes to cater to different valve stem types. Some valve core removers are integrated into a multi-tool, while others are separate tools. Whatever type of valve core remover you choose, it’s an essential tool that can save you time and frustration in case of a tire emergency.
Make sure to add this tool to your biking kit!
Rags
When it comes to rags, it’s important to choose the right type of fabric for the task at hand. Depending on what you’re cleaning or wiping up, a more absorbent or durable material may be needed. Some common options include cotton rags, microfiber cloths, and terry cloths.
Cotton rags are great for general cleaning and wiping up spills, as they absorb moisture well and are easy to wash and reuse. Microfiber cloths are incredibly versatile and can be used for a variety of tasks, from dusting to cleaning glass surfaces. They are also great for trapping and holding onto dirt and dust particles.
Terry cloths, on the other hand, are thicker and more durable, making them ideal for tough cleaning jobs, such as scrubbing grime off of surfaces. No matter what type of rag you choose, it’s important to keep them clean and properly stored to prevent the spread of germs and bacteria. By having a variety of rags on hand and using them appropriately, you can keep your home or workspace clean and tidy with ease.
Air Compressor
If you’re in the market for an air compressor, there are a few things you’ll want to consider before making a purchase. Firstly, you’ll want to determine the power requirements you need. This will depend on the tools you plan on using with your compressor and the level of power they require to function.
Additionally, it is important to consider the size and weight of the compressor, especially if you plan on using it for DIY or around-the-house projects. Portability is also a key factor for those who move around frequently or desire the flexibility to take their compressor on the go. Lastly, don’t forget to consider the maintenance requirements and cost of the compressor you’re interested in.
Investing in a high-quality machine may save you money in the long run as it will require less repair or replacement costs. Remember to keep these key considerations in mind before making your purchase to ensure you choose the best air compressor for your needs!
Step-by-Step Instructions
If you’re a regular driver or ride a bicycle, you’ve probably had a flat tire at some point. It can be frustrating to deal with, especially when you’re in a hurry. One solution is to seal your tire.
This process is simple and can be done at home. First, remove any debris from the tire. Next, use an alcohol-based cleaner to clean the area where the sealant will be applied.
Then, shake the sealant bottle to mix the contents and attach the applicator to the tire’s valve stem. Squeeze the bottle to release the sealant into the tire. Finally, reinflate the tire to the proper pressure and spin it to distribute the sealant evenly.
The sealant will then patch any punctures or leaks in the tire as you ride, keeping you safely on the road. Remember to replace the tire as soon as possible after sealing, as sealant is not a permanent fix. Overall, sealing your tire is a practical and affordable solution that can save you time and hassle.
Step 1: Remove the Tire
Removing a tire can be a daunting task for a beginner, but with the right tools and a bit of patience, it can be accomplished with ease. Firstly, ensure that the car is parked on a level surface and the handbrake is engaged. Then, using a lug wrench, loosen the lug nuts on the tire being removed by turning them counterclockwise.
It’s important to do this before lifting the car off the ground, as the resistance offered by the ground will prevent the wheel from spinning. Once the lug nuts are loose, use a jack to lift the car off the ground, ensuring that the car is secure and the jack is placed in a suitable location. Finally, remove the lug nuts completely and carefully pull the tire off the car.
Always ensure that the tire is labeled and stored in a safe location. These simple steps can be followed to remove any tire, provided that all safety precautions and guidelines are followed.
Step 2: Locate the Leak
Locating leaks in your home may seem like a daunting task, but it’s a necessary one if you want to prevent further damage and avoid costly repairs. Step two involves locating the source of the leak, which can sometimes be tricky. Start by looking for visible signs of water damage, such as wet spots on the ceiling or walls.
If you’re unable to locate the source this way, consider using a moisture meter to help you pinpoint the exact location. It’s also possible that the leak could be coming from a different area than where the damage is visible. In this case, check the area above the damage for any other signs of water damage or follow pipes and other potential sources using a flashlight.
Remember to take your time and be thorough in your investigation. Once you’ve located the area of the leak, you can move on to the next step in the process.
Step 3: Prepare the Tire and Sealant
To prepare your tire and sealant, you’ll need to take some easy steps to ensure that the sealant is evenly distributed and that your tire is ready to be reinflated. First off, make sure to shake the sealant bottle thoroughly before using it. This will help mix any sediment that may have settled at the bottom.
Next, remove the valve core from the tire and pour the sealant into the tire. You can use a funnel to add the sealant to your tire, or if you have a container with a spout, that can work too. Once the sealant is added, rotate your tire back and forth, making sure that the sealant is evenly distributed.
Finally, reinstall the valve core and inflate your tire to the recommended PSI. And that’s it! You’re now ready to hit the road with a tire that’s prepared to handle any potential punctures that may come your way.
Step 4: Apply the Sealant
Now that you have cleaned your deck and let it dry, it’s time to apply the sealant. Choose a high-quality sealant that is specifically designed for decks. Start by pouring the sealant into a paint tray and using a paint roller to apply it evenly to the surface of the deck.
Be sure to follow the manufacturer’s instructions and work in small sections to avoid pooling or streaking. Use a paintbrush to reach areas that the roller can’t cover, such as the gaps between boards. If you have a larger deck, you may need to work in sections and let each section dry before moving on to the next.
After you have applied the first coat, let it dry completely before applying a second coat. This will help to ensure that your deck is completely protected from the elements. Remember to keep the deck dry for at least 24 hours after the final coat before using it again.
Your deck will now be ready for many years of enjoyment.
Step 5: Reinflate the Tire
After successfully plugging the punctured area in your tire, it’s time to reinflate it. Here’s a step-by-step guide on how to do it: Remove the valve cap and attach the air chuck to the valve stem.
Turn on the air compressor or inflate the tire manually using a tire pump. Start with a low-pressure setting to avoid overinflation, then check the tire’s pressure using a tire gauge.
If the pressure is too low, continue inflating until it reaches the recommended PSI (pounds per square inch), which can be found in your vehicle’s manual or on a sticker located on the driver’s side door frame.
Once the tire is properly inflated, turn off the air compressor or remove the tire pump. Finally, replace the valve cap and check the tire’s pressure again after a few hours or the next day to ensure it hasn’t lost any air.
Remember to always check your tire’s pressure regularly to maintain optimal performance and avoid potential hazards on the road. Inflating your tire properly after a repair is crucial for a safe and smooth ride.
When to Use Tire Sealant
If you’re dealing with a flat tire, a tire sealant can provide a quick fix to temporarily seal the puncture and allow you to get on the road again. However, it’s important to note that tire sealants are not a permanent solution and should only be used in certain situations. Tire sealants work best for small punctures, such as those caused by nails, screws, or small debris.
They may not be effective for larger punctures or sidewall damage. Additionally, tire sealants should only be used in tubeless tires. Using them in tires with tubes can cause the sealant to clump and clog the valve stem.
It’s also important to follow the manufacturer’s instructions closely when using tire sealant, as improper application can cause further damage to the tire. In short, while tire sealant can be a helpful tool in certain situations, it should not be seen as a full replacement for a professional tire repair or replacement.
Pros and Cons of Tire Sealant
Tire sealant is a quick and easy fix for small punctures in your tire, making it a convenient solution for those unexpected situations on the road. However, it also has some pros and cons you should consider before using it. One of the biggest advantages of using tire sealant is that it can save you time and money, especially if you don’t have a spare tire.
Plus, it’s simple to use and doesn’t require any professional help. On the downside, tire sealant may not work for larger punctures or cuts, and it can also damage your tire if it’s not used correctly. It’s essential to follow the instructions carefully to avoid any potential issues and replace your tire as soon as possible.
In summary, tire sealant can be a useful tool to get you out of a bind, but it’s important to know when and how to use it properly to avoid any further complications.
Emergency vs. Preventative Measures
Tire sealant is an excellent emergency measure to get you back on the road if you experience a flat tire. It can come in handy when you are not able to replace your tire immediately or when you want to avoid a dangerous situation or being stranded in the middle of nowhere. Tire sealant is a quick and easy fix that will temporarily seal a punctured tire, allowing you to drive safely to a nearby service station or garage.
However, it is important to note that this is only a temporary fix, and you should not rely on sealant as a long-term solution. Moreover, if you use tire sealant regularly to fix multiple punctures, it can affect the tire’s structural integrity and may cause serious problems down the line. Therefore, preventative measures are crucial to ensure your safety and avoid any unforeseen complications.
Consider maintaining the correct tire pressure, inspecting your tires regularly, and replacing any worn out or damaged tires. These measures can help you avoid punctures and reduce the risk of accidents, ultimately saving you money and ensuring your safety on the road.
Conclusion: Stay Safe on the Road
In conclusion, sealing a tire is like sealing a promise with a loved one. It requires commitment, attention to detail, and the right tools. Like a relationship, a tire can sometimes encounter bumps in the road, but with proper care and maintenance, it can continue to run smoothly.
So, the next time you need to seal a tire, remember to take your time, follow the steps carefully, and don’t forget to show it some love every once in a while. After all, a well-sealed tire is a happy tire, and a happy tire means a happy ride.”
FAQs
What is tire sealing?
Tire sealing is a process of repairing small punctures or leaks in a tire to prevent air loss.
How do I know if my tire needs to be sealed?
If you notice a gradual loss of air pressure in your tire, it may have a small puncture or leak that needs to be sealed.
Can I seal a tire myself?
Yes, you can seal a tire yourself using a tire sealant kit, but it’s recommended to have a professional technician do it for you.
How long does tire sealant last?
Tire sealant can last anywhere from a few months to a few years, depending on the type and quality of the sealant and the severity of the puncture.
Is tire sealing a permanent solution?
No, tire sealing is a temporary fix and should only be used for small punctures or leaks. It’s recommended to have the tire replaced or repaired by a professional for larger damages.
What type of tire sealant should I use?
It’s recommended to use a sealant that’s compatible with your tire type and rim material. Consult with a professional or refer to your tire manufacturer’s recommendations.
Can tire sealant cause damage to my tire?
Improper use of tire sealant or using a sealant that’s not compatible with your tire can cause damage to the tire or affect its performance. Always follow the manufacturer’s instructions and recommendations.


