Seating beads on a tire can be a daunting task, especially if you are new to the whole process. But fear not, as we are here to guide you through every step of the way. Whether you are a seasoned pro or just a curious beginner, our comprehensive guide will take you through the ins and outs of how to seat beads on a tire with ease.
Think of seating beads like fitting a puzzle piece: it requires patience, precision, and the right technique. From ensuring proper tire pressure to lubricating the bead, we will go over each step necessary for a successful seating process. No more struggling with getting the tire to fit onto the rim or fearing a blowout due to an improperly seated bead.
By the end of this guide, you will have the confidence and knowledge to tackle the task like a pro. So, buckle up and let’s get started on the journey to seating beads on a tire efficiently and effectively.
Table of Contents
Understanding Tire Beads
Seating a tire bead can be a tricky task, but understanding the makeup of tire beads will make it easier. Essentially, the tire bead is the rubberized banding that creates an air-tight seal between the tire and the wheel. These bands are typically made from wire or fiber cords, which can come in various sizes and shapes depending on the make and model of the tire.
When mounting a tire onto a wheel, proper seating of the bead is essential to ensure proper air pressure and prevent the tire from coming off while driving. To seat a tire bead, it’s important to ensure the bead is cleaned and lubricated before pushing it down onto the wheel. Once seated, moderate air pressure can be applied to fully seat the bead.
It’s important to note that patience and caution should be exercised when seating tire beads, as improper seating can lead to a blown tire while driving.
The Basics of Tire Beads
Tire beads are an essential component of any tire, yet many people don’t understand what they are or how they work. Essentially, tire beads are the part of the tire that anchors it to the rim of your vehicle. They consist of a steel cable coated in rubber and are located on the inner edges of the tire.
When the tire is mounted onto the rim, the beads sit snugly against the rim flanges, creating an airtight seal that allows the tire to hold air pressure. Without the beads, the tire would not be able to stay securely on the rim, and it would quickly lose air pressure. So next time you’re driving down the road, think about the important role that tire beads play in keeping your vehicle safely on the road!

Types of Tire Beads to Know
When it comes to tires, the bead is an important aspect that should not be overlooked. Beads are the part of the tire that sit on the wheel, and they hold the tire in place through inflation pressure. There are two main types of tire beads: wire beads and folding beads.
Wire beads are made from steel wire and are typically heavier and less flexible than folding beads. They are often found on cheaper tires and are more difficult to install. Folding beads, on the other hand, are made from Kevlar or other lightweight materials and are easier to install.
They also tend to be more expensive. Understanding the differences between these bead types can help you select the right tire for your specific needs. So, next time you go tire shopping, don’t forget to consider the bead type!
Preparing the Tire Beads
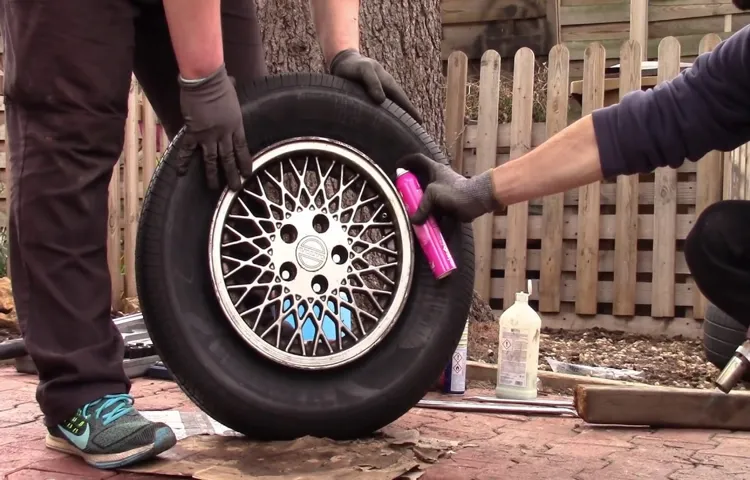
When it comes to seating the bead on a tire, preparation is key. First, make sure the rim is clean and free of any debris. Next, lubricate the bead with a tire mounting lubricant or soapy water to help it slide onto the rim easily.
It can be helpful to start by seating one side of the bead onto the rim before working on the other side. Use caution, as tires can be under high pressure and require proper inflation before seating the bead. One technique to consider is using a bead seat tool, which can help to evenly distribute pressure around the bead.
With a little patience and attention to detail, you can safely and successfully seat the bead on your tire.
Inspecting the Tire and Rim
When inspecting your tire and rim, it’s important to prepare the tire beads before mounting the new tire onto the rim. The tire beads are the rubber edges that are designed to grip the rim and keep the tire securely in place. To prepare the beads, first, clean any debris or dirt off of them.
Then, apply a tire lubricant to both of the beads to reduce the friction between the tire and rim during installation. This will make it easier to slide the tire onto the rim and reduce the risk of damaging the tire or rim. It’s also important to ensure that the beads are seated correctly on the rim, so that the tire is properly aligned.
A misaligned tire can cause uneven wear and decrease the lifespan of the tire. Taking these steps to prepare the tire beads will ensure a smoother installation process and longer-lasting tire performance.
Adding Lubricant to the Beads
To ensure a proper seal between the tire bead and the wheel rim, it’s essential to prepare the beads by adding lubricant. This step is crucial to make the mounting process easier and prevent damage to the tire. The lubricant used varies depending on the type of tire, but most often, soap and water or specialized bead lubricants are used.
Before applying the lubricant, it’s important to clean the bead area and remove any dirt, dust, or debris. Applying the lubricant can be done either by spraying or by brushing it onto the bead. Adding the lubricant to the beads makes them more flexible and easier to maneuver, which reduces the risk of bead damage during mounting.
Therefore, taking the time to prepare the beads beforehand can ultimately save time and money in preventing costly damages.
Mounting the Tire
If you’re wondering how to seat the bead on your tire, don’t worry – it’s easier than you might think! The bead is the part of the tire that fits onto the rim, and if it’s not seated properly, you won’t be able to inflate your tire or have a safe ride. To start, make sure the tire is properly mounted on the rim. Then, apply tire lubricant to the bead and rim area.
Using a tire lever or your hands, work the tire onto the rim. Once it’s mostly on, use a tire inflator with high pressure to seat the bead onto the rim. If it doesn’t inflate right away, try spraying the bead, rim, and valve stem with soapy water to create a better seal.
Be patient and persistent – it may take a few tries, but eventually, the tire will pop into place with a satisfying burst, letting you know it’s seated properly.
Placing the Tire on the Rim
Mounting a tire on a rim can be a daunting task, especially for those who haven’t done it before. However, with practice and patience, anyone can successfully mount a tire on a rim. Start by making sure the tire is clean and lubricated, and then place it onto the rim while making sure the valve stem is in the correct position.
Use a tire lever to push the tire’s sidewall over the rim flange, and then work your way around the tire gradually using the same technique until the entire tire is securely mounted on the rim. It’s important to be careful during this process so as not to damage the tire, rim, or valve stem. With practice and experience, mounting a tire on a rim will become second nature, and you’ll be able to do it quickly and efficiently.
Remember to always double-check your work and seek professional help if you’re unsure about any aspect of tire mounting.
Inflating the Tire
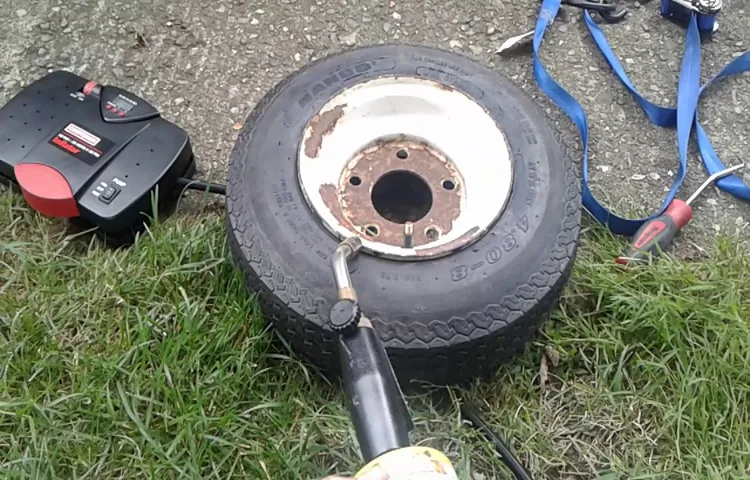
When it comes to mounting a tire, one of the crucial steps is inflating it properly. Not only does this ensure that the tire is safe and secure for driving, but it also helps to extend the life of the tire. To begin inflating the tire, start by using a tire pressure gauge to check the recommended PSI (pounds per square inch) for your specific tire model.
This information can typically be found in the owner’s manual or on a sticker inside the driver’s side door. Once you have the correct PSI, attach the air pump to the tire valve and begin adding air. It’s important to monitor the pressure as you go, adjusting the amount as needed and making sure not to over-inflate the tire.
Over-inflation can cause increased wear and tear on the tire and even lead to a blowout while driving. By taking the time to properly inflate your tire, you’ll not only ensure safe driving, but also a longer-lasting tire.
Ensuring a Proper Bead Seat
When it comes to mounting tires, one of the most important steps is ensuring a proper bead seat. This refers to the sealing of the tire’s inner and outer beads against the rim flange. Proper bead seating is crucial for maintaining tire pressure and preventing blowouts.
So, how can you make sure that the bead is seated correctly? Firstly, make sure that the rim and tire are compatible, and that the tire is the correct size for the rim. Then, lubricate the beads with soapy water or tire mounting solution. Use a tire mounting machine to press the beads into the rim flange evenly, and check that the bead is fully seated all the way around.
Finally, inflate the tire to the recommended pressure and check for any leaks. With these steps, you can ensure a proper bead seat and prevent any potential tire problems down the road.
Checking the Bead Seat with the Soap Solution
Checking the bead seat with the soap solution is an essential step in ensuring a proper fit for your tire. A proper bead seat is critical for tire safety and longevity, and the soap solution test is a simple and effective way to ensure it is achieved. The test involves applying a soap solution around the tire’s bead area and inflation valve, then inflating the tire to its recommended pressure.
If bubbles appear, it could indicate a defect in the tire bead or valve, and the tire should not be used. However, if no bubbles appear, it is a sign of a proper fit, and you can safely use your tire. Remember to test your bead seat periodically, especially after tire removal or replacement, to ensure your safety on the road.
Adjusting the Bead Seat if Necessary
Adjusting the Bead Seat if Necessary Ensuring a proper bead seat is crucial to avoiding damage to your tires and maintaining a smooth driving experience. If you notice any wobbling or shaking while driving, it may be necessary to adjust the bead seat. Start by checking the tire pressure and make sure it is at the manufacturer’s recommended level.
Then, remove any debris or rust build-up from the bead seat area using a wire brush or sandpaper. Once this is done, apply a bead lubricant or sealant to the wheel before reinstalling the tire. Be sure to tighten the lug nuts in a star pattern to ensure even pressure on the bead seat.
If these steps do not fix the issue, it may be necessary to take your vehicle to a professional to assess the situation further. By taking the time to ensure a proper bead seat, you can extend the life of your tires and ensure a safe and comfortable driving experience.
Conclusion
In conclusion, seating the bead on a tire is a bit like coaxing a cat out of a tree – you have to be patient, persistent, and know a few tricks. By using a good lubricant, inflating the tire with a powerful compressor, and pushing and pulling on the tire in strategic spots, you can get that stubborn bead to pop into place. Remember, just like with cats, sometimes the best thing to do is walk away and come back another time.
But with a little effort and some savvy techniques, you’ll be up and running (or rolling) in no time. May the bead be ever in your favor!”
FAQs
What tools are needed to seat a bead on a tire?
You will need a tire mounting machine, an air compressor, and a tire inflation tool.
How do you know when a tire bead is properly seated?
A tire bead is properly seated when it makes a “pop” sound and the tire is fully seated against the rim flange.
Can you seat a tire bead without a tire mounting machine?
It is not recommended to attempt to seat a tire bead without a tire mounting machine as it can be dangerous and damage the tire.
What is the importance of properly seating a tire bead?
Properly seating a tire bead ensures a secure connection between the tire and rim to prevent air leakage, tire damage, and potential accidents.
How much air pressure should be used to seat a tire bead?
The recommended air pressure to seat a tire bead is 40 to 45 PSI, but it may vary depending on the tire size and type.
What should you do if the tire bead won’t seat properly?
If the tire bead won’t seat properly, try using more air pressure, lubricating the tire bead and rim flange, or adjusting the tire positioning on the rim.
Can a poorly seated tire bead cause vibration while driving?
Yes, a poorly seated tire bead can cause vibration while driving as it creates an imbalance in the tire and wheel assembly.


