If you are a car enthusiast, at some point you may need to change or replace your car’s tires. One essential step in this process is to set the bead on the tire correctly. A correctly set bead ensures a secure fit between the tire and the rim, preventing air leaks and ensuring your vehicle’s safety.
However, setting the bead on a tire can be a daunting task for beginners, and it’s not uncommon to face problems even for experienced individuals. In this blog post, we’ll guide you through the process of setting a bead on a tire step-by-step, so you can get back on the road with confidence. By following these simple and effective methods, you’ll learn how to set a bead on a tire like a pro!
Table of Contents
Prepare the Tire and Wheel
Before attempting to set a bead on a tire, it is important to prepare the tire and wheel properly. Start by inspecting the tire for any damage or debris lodged in the tread. Next, clean the tire and wheel with a degreaser to remove any residual dirt or grease.
Then, lubricate the tire beads and rim flanges with a bead lubricant to ensure ease of installation and reduce the risk of damaging the tire during the mounting process. It is also recommended to inflate the tire to its maximum recommended pressure for a few minutes to allow the tire beads to settle into the rim flanges before deflating to the proper inflation level. Proper preparation of the tire and wheel can prevent bead seating issues and ensure a successful tire mounting process.
With everything prepared, it’s time to attempt setting the bead on the tire.
Remove any debris from the rim and tire
Before starting to change a tire, it is important to prepare the tire and wheel properly. Part of this process involves removing any debris from the rim and tire. Debris can include rocks, dirt, or even small pieces of metal.
If these particles are not removed, they can damage the tire’s tread or cause a puncture in the sidewall. To remove the debris, use a wire brush or a cloth to brush and wipe the rim and tire. You can also use compressed air to blow away any smaller particles that may be difficult to reach.
Taking the time to properly prepare the tire and wheel can prevent further damage and ensure a safer journey.

Clean the rim and tire to remove any dirt and grime
When it comes to preparing your tires and wheels, it’s important to start with a good cleaning. Begin by removing any visible debris or grime from the tire and rim with a soft-bristled brush. Once you’ve done that, it’s time to give them a thorough scrub.
Use a tire and wheel cleaner solution specifically designed for your vehicle to get the best results. Apply the solution liberally to the surface, and let it sit for a few minutes to break down stubborn dirt and grime. Use a clean and soft cloth to wipe away any dirt and cleaner residue.
Lastly, give the rim and tire a final rinse with clean water to remove any remaining debris. By following these steps, you’ll ensure that your tires and wheels are clean and ready to go for your next ride. Remember, a well-maintained tire and wheel not only looks good but also performs optimally, providing better handling, stability, and safety on the road.
So, keep your car’s tire and wheel in top shape, and enjoy a smooth and comfortable ride wherever you go.
Apply a bead lubricant to the tire bead and rim edge
When it comes to changing a tire, it’s important to properly prepare both the tire and wheel before installation. One important step in the process is applying a bead lubricant to the tire bead and rim edge. This lubricant helps ease the installation process by reducing friction and allowing the tire bead to slide easily onto the rim.
Without lubrication, the tire can be more difficult to install and may result in damage to the bead or the rim. It’s important to choose a high-quality lubricant that is specifically designed for tires and rims. Applying the lubricant is as simple as spreading a small amount onto the bead and rim with a brush or cloth.
Don’t forget this important step in tire changing to ensure a smooth and easy installation process.
Mount the Tire
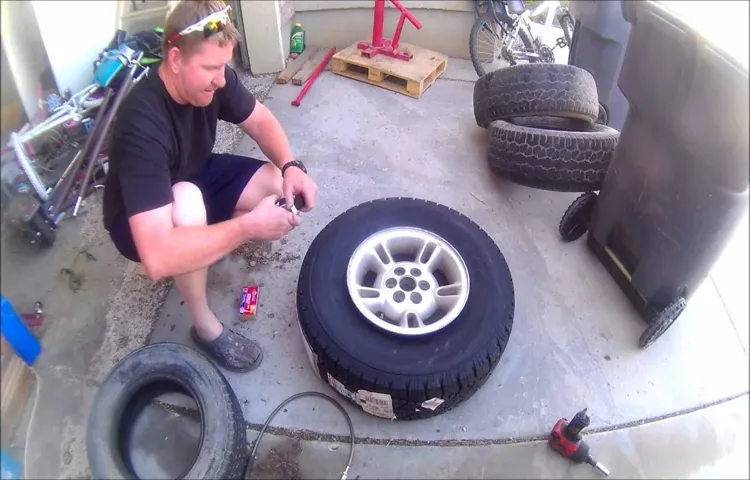
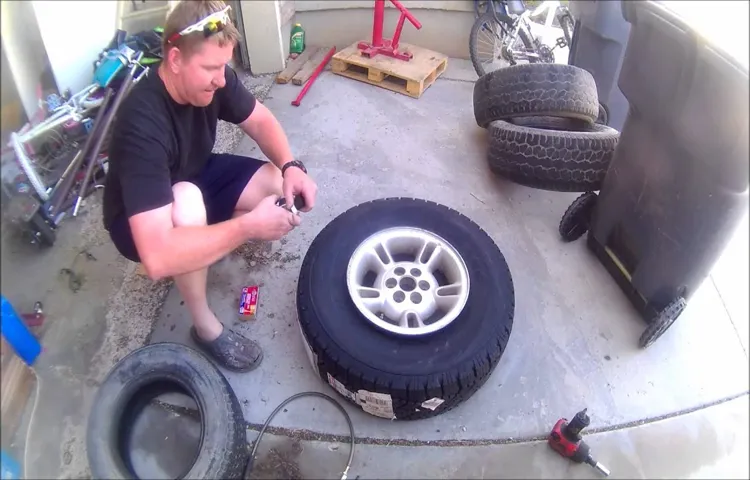
Setting a bead on a tire can be a little intimidating at first, but with the right tools and technique, it can be done easily. The first step is to position the tire so that the beads are centered on the rim. Next, lubricate the beads using a bead lube or soapy water.
This will make it easier to seat the tire. Then, place the tire on the rim and begin to inflate it. As you inflate, make sure to keep an eye on the beads to see if they are seating properly.
If they’re not, you may need to adjust the position of the tire or deflate and start over. Once both beads are set, continue inflating the tire to the recommended pressure. Check the bead again to make sure it’s fully seated.
If everything looks good, you’re all set to hit the road! Remember to always use caution and follow recommended safety procedures when working with tires.
Place the tire onto the wheel by aligning the valve stem with the valve hole
When it comes to mounting a tire on a wheel, it’s important to ensure proper alignment to avoid any damage or safety concerns. The first step is to place the tire onto the wheel by aligning the valve stem with the valve hole. This can involve some maneuvering and adjusting to get the valve stem in the correct position.
Once aligned, use a tire mounting machine and lubricant to help slide the tire onto the wheel. It’s important to ensure the tire bead is properly seated on the wheel, as any gaps or unevenness can cause the tire to fail. Checking for proper inflation and a secure fit is also crucial.
By taking the time to mount the tire correctly, you can ensure a smooth ride and increase the lifespan of both the tire and wheel.
Begin to inflate the tire, making sure the bead is sitting evenly on the rim
Mounting a tire can be a daunting task, but with the right tools and knowledge, it can be done without much difficulty. Firstly, ensure that the tire you are about to mount is the correct size for your rim. Next, lubricate the bead of the tire with some tire mounting lubricant, as this helps the tire slide onto the rim easily.
Then, align the tire onto the rim by placing the valve stem on the same side of the rim as the valve hole. Hold the tire in place and begin to inflate it, making sure the bead is sitting evenly on the rim. This can be done with a compressor or by using a hand-held pump.
As you inflate the tire, you may hear some popping sounds which are entirely normal as the tire bead snaps into place. Keep inflating the tire until the bead is fully seated, at which point you can adjust the air pressure to the recommended level. Voila! You have successfully mounted your tire.
Remember, practice makes perfect, and the more you do it, the easier it gets.
Continue inflating until the bead pops onto the rim edge
Mounting the tire can be a daunting task, especially if you’re not familiar with the process. The first thing you need to do is to line up the bead of the tire with the rim edge. Once they are in place, you can start inflating the tire.
As you inflate, you’ll hear the tire’s bead snap into position, signaling that it’s securely in place. It’s important to ensure that the tire is correctly mounted; otherwise, you could risk a blowout while driving. This process can be challenging for inexperienced individuals, but with a little patience and practice, it can be done quickly and effectively.
Remember always to keep safety in mind when mounting your tire and use caution when inflating, as over-inflated tires could lead to accidents. With these tips, you can mount your tire with ease the next time you need to replace it.
Check for Leaks and Adjust Pressure
When it comes to setting a bead on a tire, it’s important to make sure you’re not dealing with any leaks or punctures before moving forward. So, how do you check for leaks? You can start by inspecting the tire itself for any obvious damage. If there are no visible issues, you can try submerging the tire in water and looking for bubbles, which is a sign of air escaping.
Once you’ve confirmed that the tire is leak-free, it’s time to adjust the pressure. Use a tire pressure gauge to check the recommended pressure for your vehicle, then use an air compressor to adjust the pressure accordingly. It’s important to use the proper pressure, as both overinflating and underinflating can affect the performance and lifespan of your tires.
With the leaks fixed and the pressure adjusted, you’re now ready to set the bead and get back on the road with confidence!
Check for any leaks around the valve stem and bead area
When it comes to maintaining your vehicle’s tires, checking for leaks and adjusting the pressure regularly is crucial. One area you need to pay attention to is the valve stem and bead area. These two locations are prone to leaks, especially if the valve stem is damaged, worn out, or loose.
The valve stem is responsible for sealing the air in and is a small, thin rubber piece. Over time, it can become brittle and crack or even break off, causing the tire to lose air. Additionally, if the bead isn’t correctly seated against the rim, it can cause air to escape through the small gap.
Both of these issues can lead to underinflated tires, which not only decrease fuel economy but also compromise safety. To prevent this, have a tire pressure gauge on hand and always check your tire pressure every few weeks, especially before long trips. If you suspect a leak, inspect the valve stem and bead area visually for any wear, cracks, or damage.
If you find any, it’s best to replace the valve stem or have a professional fix it to ensure your tire stays inflated and safe to use. Remember, maintaining your tires also means maintaining your safety on the road.
Adjust the tire pressure to the recommended level
When it comes to keeping your tires in top condition, it’s important to regularly check for leaks and adjust the pressure to the recommended level. Not only will this help your tires last longer, but it will also ensure your vehicle performs at its best. To get started, use a tire pressure gauge to check the current pressure level of each tire, which can be found in your vehicle’s manual or on the tire itself.
If the pressure is too low or too high, adjust it accordingly, but be sure not to overinflate or underinflate the tire. In addition, check for any visible leaks or signs of damage such as cuts or punctures. If you do notice a leak or damage, it’s best to have the tire inspected by a professional to determine if it needs to be repaired or replaced.
By taking the time to regularly check your tire pressure and inspect for leaks, you’ll be able to enjoy a safer, smoother and more efficient ride.
Conclusion
In conclusion, setting a bead on a tire is a delicate art that requires patience, elbow grease, and a touch of finesse. You must coax the tire onto the rim with gentle persuasion, using air pressure as your ally. It’s a bit like trying to convince a stubborn mule to take a stroll with you – you have to be persistent and use a combination of force and persuasion.
But with practice and a little bit of luck, you’ll soon be setting beads like a pro and enjoying smooth rides on your freshly mounted tires. So take a deep breath, roll up your sleeves, and let’s get to work!”
FAQs
What is the purpose of setting a bead on a tire?
Setting a bead on a tire ensures that the tire is properly sealed onto the wheel rim, preventing air from escaping and ensuring proper tire performance.
What tools do I need to set a bead on a tire?
To set a bead on a tire, you will need a tire pressure gauge, tire iron or pry bar, and an air compressor.
How do I know if a tire bead is properly set?
You can ensure a tire bead is properly set by visually inspecting the tire for any gaps between the rim and tire bead, and by checking the tire pressure with a gauge.
What should I do if a tire bead won’t set?
If a tire bead won’t set, try applying a bead sealant or lubricant to the tire and rim before inflating the tire.
Can I set a bead on a tubeless tire with a manual pump?
It is possible to set a bead on a tubeless tire with a manual pump, but it may require additional effort and patience.
Should a tire bead be set before or after balancing the tire?
A tire bead should be set before balancing the tire to ensure an accurate balancing process.
What is the recommended tire pressure for setting beads?
The recommended tire pressure for setting beads varies by tire and rim size, so always consult your tire manufacturer’s guidelines before attempting to set a bead.


