Changing a tire isn’t exactly rocket science, but removing a tire from a rim without a machine can be a daunting task for someone who has never done it before. The process might seem complicated, but if you have the right tools, this DIY method can be done in a matter of minutes. Whether you’re on the side of the road with a flat tire or just trying to save some money, knowing how to remove a tire from a rim without a machine can come in handy.
In this blog, we’ll go through simple and easy-to-follow steps to help you get your tire off the rim. So buckle up and let’s get started!
Tools You’ll Need
If you’re looking to take a tire off a rim without the use of a machine, there are a few tools you’ll need to make the process easier. First and foremost, you’ll need a tire iron or pry bar to help you pry the tire off the rim. Additionally, a rubber mallet will come in handy for tapping the tire off the rim once it’s loosened.
If you plan on reusing the tire, it’s important to have some soapy water or a tire lubricant to make getting the tire off the rim easier. Having a valve stem tool will also be helpful for removing the valve stem and allowing air to escape from the tire. Finally, a pair of pliers or wire cutters may be necessary to remove any safety wires or other objects keeping the tire attached to the rim.
With these tools in hand, you’ll be well prepared to take your tire off the rim without the help of a machine.
Bead Breaking with a Hammer and Block
When it comes to bead breaking with a hammer and block, it’s important to have the right tools. First, you’ll need a hammer with a flat or rounded face. A ball peen hammer or a sledgehammer may be too aggressive and cause damage to the rim.
A rubber mallet is also a good option for more delicate rims. Next, you’ll need a sturdy block of wood or rubber to place behind the wheel. This will absorb the impact of the hammer and prevent the wheel from spinning.
A cinder block or metal surface should not be used as they can damage the rim or cause it to warp. Make sure the block is positioned securely in place before starting. With the right tools and technique, bead breaking can be done safely and efficiently.

Using Lubricant and a Tire Iron
When it comes to changing a tire, having the proper tools on hand is key. For using lubricant and a tire iron, you’ll need a few things. First, make sure you have a can of lubricant, such as WD-40, at your disposal.
This will help to loosen any rust or grime on the lug nuts, making them easier to remove. Additionally, you’ll need a tire iron or lug wrench to actually remove the lug nuts. Make sure you have the proper size for your vehicle’s lug nuts, as using the wrong size can cause damage.
If you don’t have a tire iron, you can often find one in your vehicle’s emergency kit or purchase one separately. Having these tools on hand can make changing a tire much easier and less frustrating. So, the next time you need to change a tire, make sure you have your lubricant and tire iron ready to go.
Step-by-Step Guide
If you’re looking to remove a tire from its rim without using a machine, it’s important to remember that it requires a bit of elbow grease, but it’s definitely doable. First, use a pry bar to loosen the valve core and release the air pressure in the tire. Once the air is out, place one side of the tire on the ground and step on it with both feet, pushing down hard to break the tire bead from the rim.
Next, turn the tire over and repeat the process on the other side. Once both beads are released, use a pair of tire spoons to pry the tire away from the rim. Work carefully and slowly, as you don’t want to damage either the tire or the rim in the process.
With a bit of practice and patience, you’ll soon be able to remove a tire from its rim without the aid of a machine.
Step 1 – Deflate the tire and remove the valve core
When it comes to fixing a flat tire, the first step is to deflate the tire and remove the valve core. This allows you to easily remove the tire from the rim and assess the damage. To do this, you’ll need a valve core removal tool, which is a small device that fits onto the valve stem and enables you to unscrew the valve core.
Once the core has been removed, you can use a tire pressure gauge to check the pressure in the tire and ensure it’s fully deflated. It’s important to remove the valve core carefully and keep it in a safe place, as it will need to be reinstalled once the tire has been repaired or replaced. By taking the time to properly deflate the tire and remove the valve core, you can ensure that your repair work goes smoothly and you can get back on the road with confidence.
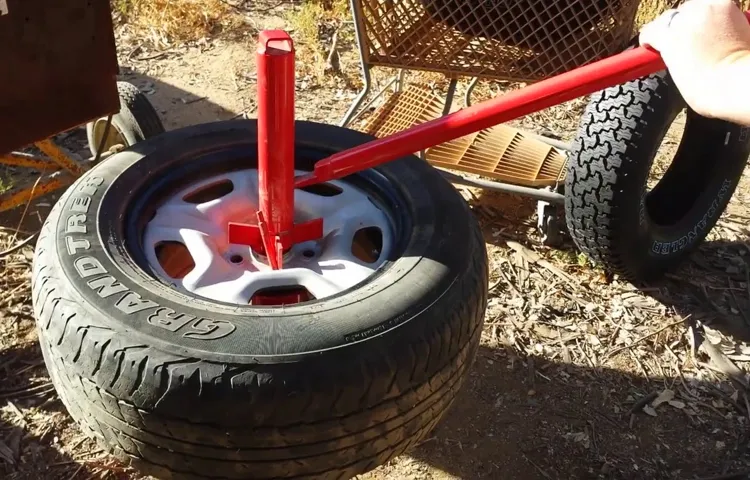
Step 2 – Break the bead with a hammer and block
When it comes to changing a tire, breaking the bead can be one of the most challenging steps. But with the right tools and technique, it can be a piece of cake. To start, you’ll need a hammer and a sturdy block.
Begin by placing the tire on its side and positioning the block near the edge of the rim. Next, hold the hammer at a 45-degree angle and strike the edge of the tire firmly but steadily. Be careful not to hit the rim, as this can cause damage.
Repeat this process around the entire circumference of the tire until the bead pops off the rim. Once the bead is broken, you can move on to removing the tire from the rim. Breaking the bead may seem intimidating, but with a little practice and patience, it can be done quickly and easily.
Remember, safety should always come first, so make sure to wear protective eyewear and gloves while performing this task. With this step out of the way, you’re one step closer to getting back on the road.
Step 3 – Remove one side of the tire bead with a tire iron
Removing one side of the tire bead with a tire iron is the third and crucial step of changing a tire. Begin by positioning the tire iron between the rim and the tire. Apply some force to the tire iron till it hooks into the bead’s edge, holding it up at an angle of 45 degrees.
Work your way around the tire, leveraging the tire iron to break the seal between the tire and the rim. The bead of the tire should now be removed entirely from the rim. At this point, you must remove the tire from the rim’s opposite side entirely.
Keep in mind that safety is crucial during the entire process, as potential accidents can occur if the tire iron isn’t properly used. By following these steps, you can safely remove the tire from the rim with ease.
Step 4 – Flip the tire over and repeat on the other side
After completing the first side of the tire flipping exercise, it’s time to repeat the process on the other side. Start by assessing your form and making any necessary adjustments. Then, grip the tire from the opposite side and use the same explosive power and hip drive to lift and flip it over.
Keep your core tight and your back straight as you lift to avoid injury. As you land, focus on absorbing the impact with your legs and lower back. Remember to take breaks as needed to prevent fatigue and keep your mind focused.
Flipping the tire over is an excellent full-body workout that builds muscular strength and endurance, so take your time and enjoy the process. By the end of your tire flipping session, you’ll feel a sense of accomplishment and be well on your way to achieving your fitness goals.
Tips and Precautions
Taking off a tire from a rim without the help of a machine may sound like a daunting task, but with the right tips and precautions, anyone can do it. The first step is to ensure that your safety is a top priority. Always work in a well-lit and clean area, wear gloves and safety glasses, and use a tire iron to avoid any potential injury.
Next, loosen and remove the lug nuts on the flat tire using a tire iron or wrench. Once all the lug nuts are off, position the tire on a rubber mat and use a tire iron to pry the tire off the rim by wedging it between the rubber and the rim. If the tire is stubborn, spray some penetrating oil around the edge of the rim to loosen it up.
Once the tire is off, replace it with a new one or have it repaired. Remember to tighten the lug nuts in a crisscross pattern to ensure even pressure and avoid any accidents on the road. Taking off a tire from a rim without the use of a machine may require some elbow grease, but it is doable with the right precautions and tools.
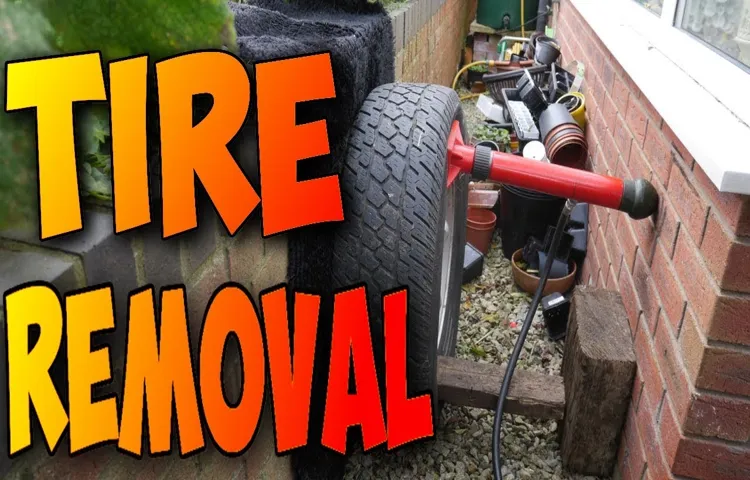
Tire Removal can be dangerous and challenging without machine
Tire removal can be a challenging and even dangerous task to carry out without the use of specialized machinery. However, there are a few tips and precautions you can take to ensure your safety and the efficiency of the process. Firstly, make sure to wear protective gear such as gloves, eye goggles, and heavy-duty sneakers to prevent any injuries that may arise from sharp metal edges or accidental contact with the tire.
Additionally, using a sturdy jack or jack stands can provide stability for the car, reducing the risk of it tipping over. It’s also essential to loosen the lug nuts before raising the vehicle to prevent the tire from spinning, which could damage the studs or cause injury. Finally, always work in a well-lit and open area, free from clutter and potential hazards such as low-hanging power lines or wet surfaces.
By following these precautions, you can safely remove tires without encountering any worry or accidents.
Always wear proper safety gear when working on tires
When working on tires, always wear proper safety gear to avoid accidents and injuries. This is especially important when dealing with heavy, sturdy tires that can cause serious harm if not handled properly. Some important safety gear to wear includes gloves, goggles, and steel-toed boots.
Gloves provide a better grip on the tire and protect your hands from harsh chemicals or sharp edges. Goggles prevent debris or dust from entering your eyes, which can cause irritation or even blindness. Steel-toed boots protect your feet from heavy objects that may fall on them.
Additionally, always ensure that the tire is properly inflated before working on it to avoid sudden deflation and injury. By taking these simple precautions, you can ensure your safety when working on tires and avoid unfortunate accidents or injuries.
Be careful to avoid damaging the rim or the tire
When handling rims and tires, it is crucial to be careful to avoid damaging them. One of the first tips to keep in mind when working on your rim or tire is to use the proper tools, including tire levers and rim protectors. If you’re using just any old tool, there’s a chance you could scratch or dent the rim, or even puncture the tire.
It’s also important to make sure the tire is fully deflated before removing it from the rim, as attempting to remove a partially inflated tire could lead to it bursting or causing damage to the rim. Another key precaution when handling your tires and rims is making sure to not overinflate the tire. This can cause the tire to burst or the rim to crack, which can lead to a dangerous situation when driving.
Lastly, make sure that you’re not clamping down on the rim too tightly when working on it, as this can cause deformation and other damage to the rim. By following these tips and taking precautions when handling your rims and tires, you’ll ensure that your vehicle will continue running smoothly and safely.
Conclusion
Congratulations, you’ve successfully removed your tire from the rim without the help of a fancy machine. You may be feeling quite triumphant at this point, and rightfully so. But let’s not forget that this process required some handy skills, some elbow grease, and maybe even a touch of good luck.
Taking a tire off a rim without a machine may not be the easiest task, but it’s definitely doable if you’re determined enough. Just remember to approach this process with caution and patience, and you’ll be on your way to a perfectly mounted (and machine-free) tire in no time.”
FAQs
What tools are needed to take a tire off a rim without a machine?
You will need a tire iron, a rubber mallet, and a lubricant such as soap and water.
Can I take a tire off a rim without a tire iron?
It is not recommended as a tire iron provides leverage and makes the process easier. However, you can try using pliers or a screwdriver in a pinch.
Is it possible to take a tire off a rim without damaging the tire?
Yes, it is possible with the right technique and tools. Avoid using excessive force and take care when prying the tire off the rim.
Can I take a tire off a rim without a second person?
It is possible, but having a second person to help hold the tire in place can make the process smoother and safer.
How long does it typically take to take a tire off a rim without a machine?
Depending on experience and the type of tire, it can take anywhere from 30 minutes to an hour or more.
Can I reuse the tire after taking it off the rim without a machine?
As long as the tire is still in good condition and has not sustained any damage during the removal process, it can be reused.
Should I seek professional help to take a tire off a rim without a machine?
If you are inexperienced or unsure about the process, it is recommended to seek the help of a professional to avoid damaging the tire or injuring yourself.


